Instructions
Dilute non-woven wallpaper adhesive according to the manufacturer's instructions on the packaging.
Start wallpapering from the corner of the room, drawing a vertical line on the wall using a level or plumb line to maintain an even joint in the future.
Cut the strips of wallpaper according to the height of the wall, leaving a small margin. If the structure of the wallpaper requires adherence to the pattern, do not neglect this - all discrepancies will be visible at the joints.
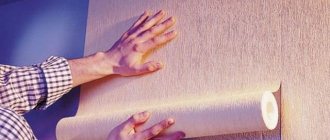
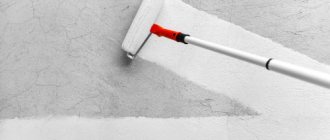
Using a roller, apply glue to the wall to cover several strips and begin gluing the first canvas, strictly adhering to the line you drew. The upper part of the canvas should have a slight overlap to the ceiling, which is then trimmed.
Using a wallpaper spatula, smooth the canvas, avoiding the formation of bulges. Proceeding in this way, glue the first canvas. Place a wide putty knife in the joint between the wall and ceiling and carefully cut off the excess wallpaper by running a sharp paint knife along the putty knife line.
Attach a second canvas, following the drawing if necessary.
Glue the second canvas, strictly following the joint - the wallpaper should overlap or form a joint. Press the joint with a joint roller and remove any exposed adhesive. Trim off excess canvas.
Using the same principle, cover the rest of the wall with wallpaper. Be careful when gluing the wallpaper in the corners - if “wrinkles” form, make neat cuts with a paint knife, and, releasing the air, carefully smooth the wallpaper.
In any room, gluing non-woven vinyl wallpaper is much easier than using regular paper wallpaper. In addition, if you buy high-quality glue in the store that is specifically designed for this type of wallpaper, then there will be no problems at all with gluing them to the walls of the kitchen or bedroom.
You will need
- - glue; - rubber spatula; - rubber roller.
Instructions
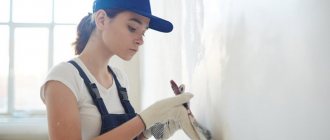
First you need to prepare the surface by removing old wallpaper, tiles, dust and other defects. The walls must be puttied, sanded and primed. After the primer has dried, you can start gluing the wallpaper. When gluing vinyl wallpaper on a non-woven base, they do not need to be coated with glue at all. For this type of wallpaper, you just need to coat the walls with high-quality glue and lightly brush the wallpaper around the edges. But when coating walls, it’s not worth saving glue at all. It should be applied quite thickly, covering every centimeter of your wall when applying. For more convenient application of the glue, it is best to use a special model of wallpaper roller. You may also need a brush to apply high-quality glue to the most difficult places for rollers to reach on the surface of the walls and in their corners. After you have coated the edges of the wallpaper sheet and all the walls, you can start gluing. To conveniently smooth vinyl wallpaper, it is best to use a modern rubber roller or special rubber spatulas and brushes. When gluing non-woven wallpaper, all the glue is applied not to the wallpaper, but to the wall, which is why the wallpaper sheet itself will always remain dry. Consequently, it will never get wet and will not tear while gluing it to the wall. Another advantage of this method of gluing vinyl wallpaper is that if the sheet does not fit properly on the wall, it can be immediately carefully removed and re-glued without damaging the structure of the sheet.
Video on the topic
note
They are strong and durable, but gluing vinyl wallpaper (like any other heavy wallpaper) has its own nuances.
The Land of Soviets will tell you how to glue vinyl wallpaper. It depends on the base: you need to apply glue to wallpaper with a paper base, but not to wallpaper with a non-woven base. If you apply glue to paper-based vinyl wallpaper, make sure that the edges are not dry.
Helpful advice
Tips for sticking different types of wallpaper: vinyl, non-woven, paper-based wallpaper.
How to glue vinyl wallpaper. For gluing, use the type of adhesive that is recommended by the manufacturer of this type of wallpaper; for example, for vinyl wallpaper, it is recommended to use adhesives containing a fungicide. In general, the type of glue depends, first of all, on the weight and density of the wallpaper.
Sources:
- gluing non-woven wallpaper
Stores sell hundreds of types of beautiful wallpaper. Non-paper options, which are difficult to use, are very popular.
Buyers prefer a relief pattern with a dense base. At the same time, when acquiring such a texture, you need to know how to glue vinyl wallpaper on a non-woven backing. There are several tricks that help you change the design of a room easily and quickly; it is important to follow a few rules, and then everything will work out, even for beginners.
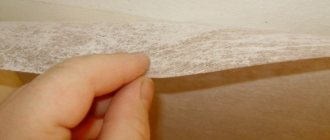
What is the peculiarity of modern wallpaper, how long does it take vinyl wallpaper on non-woven backing to dry? They differ in their density, they are created from several layers, visually they seem thicker than paper ones. This characteristic allows the fabric not to stretch even after glue gets on the surface.
Once applied to the wall, they do not shrink and the pattern is not deformed. Some wallpapers can be washed; their coating is not afraid of moisture. The weight of each roll is light, and they stick more firmly to the walls.
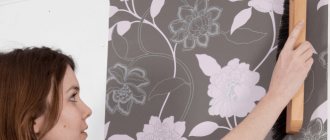
When choosing wallpaper in a catalog or in a store, you need to understand that hot-stamped vinyl on a non-woven backing often requires adjustment. For example, photo wallpaper requires precise joining in order for the design to be harmonious.
Wallpaper with embossing is purchased with a margin of 10-15%, because trimmings remain when creating a single ornament. When purchasing, it is recommended to make sure that all rolls have the same pattern and there is no difference in color. It is better to choose wallpaper from one batch.
Is it possible to paint vinyl wallpaper on non-woven backing? Some types of these coatings are specially created for painting.
They are dense, not afraid of water and are not deformed by paint. Paint can be applied up to 6 times, but they show through a little, the bottom layer should not be darker when painting to get the desired result. Only coatings for interior work are allowed to be used to change color, so as not to cause harm to those living in the room.
How to properly glue vinyl wallpaper? The process begins by preparing the walls.
It is important to remove the previous coating and level the surface. The larger the pattern, the better they will hide the unevenness of the walls, so it is not necessary to make the corners perfect. If you are planning a monochromatic coating or a small pattern, you should pay more attention to the condition of the walls.
How to glue vinyl wallpaper on a non-woven backing so that everything turns out perfect? It must be remembered that wallpaper is translucent. Below them you will see the drawings that are on the surface to be pasted.
If the walls are of different colors, apply a thin layer of plaster. If the walls are dark, it is also recommended to apply an additional lightening layer. This kind of preparation will help you avoid surprises.
Step-by-step technique for doing the job
Wallpaper plan:
Initially, the height of the wall is measured. Strips are cut with an allowance of 5-7 cm.
The strips should fit perfectly together, so it’s easier to cut them from 2 different rolls one by one. It is necessary to prepare at least 4 vertical stripes before gluing. Sometimes it is appropriate to cut off all the necessary strips at once. How to properly glue vinyl wallpaper on a non-woven backing?
It is important to start from the window. The first strip is glued exactly vertically; if there is even a slight displacement, its angle will increase in the future, so this should be avoided. To make it perfect, draw a vertical line to help align the starting strip.
The glue is applied to the wall surface in an even layer.
Every centimeter is coated, the area being slightly larger than the size of the strip. It is recommended to apply the glue with a roller or brush in a thin layer. Additionally, glue is placed on the edges of the wallpaper to make the joints more even.
There is no need to add a fixing compound to the entire canvas. After this, the first strip is applied to the wall, the reference point is the vertical line drawn earlier. When the wallpaper is on the wall, you need to smooth the surface with a roller or soft rag. There should be no bubbles, compactions or unevenness.
In this case, it is possible to easily adjust the design so that it looks perfect. Sometimes glue appears at the joints; it is removed with a damp sponge. It is prohibited to smear it on the surface of the wallpaper.
The canvases are glued end-to-end without overlap. Excess parts formed at the bottom or top are cut off. If there are sockets on the wall, it is recommended to remove them, turn off the electricity, stick the cloth, and then carefully cut a hole for the wires and return the structure to its place.
All manipulations must be done carefully. And lastly, seal the space near the window. Above and below the window opening, small pieces of wallpaper are fixed, which are cut out from the remains.
Preparing the glue mixture
For non-woven wallpaper, preference is given to universal or special products for this type of material. Before the purchase itself, as well as mixing the glue, you need to carefully look at its compatibility with this wallpaper. This is an important point, since different types of adhesive mixtures are offered for different sizes of material.
How to mix the adhesive composition:
- Pour water at room temperature into a bucket in the proportions that you read in the instructions.
- Stir the water to form a funnel in the middle.
- Slowly add glue into the funnel, without ceasing to stir .
- Mix the mixture and leave for half an hour.
- After 30 minutes, mix the glue thoroughly again.
Prices for various types of glue for paper wallpaper
Adhesive for paper wallpaper
The mixed glue should sit for half an hour
The composition is not applied to the product - they only need to treat the top layer of the walls. However, to be more confident, you can apply the compound to the material. You need to work in a concentrated manner, especially in the summer, since the adhesive mixture quickly hardens on the surface.
Important point! Follow the instructions each time when mixing the glue. Incorrect proportions may result in a different consistency. As a result, the properties will be lost and you will not be able to work with this composition. It is also recommended to use freshly prepared composition each time.
The most convenient way to apply glue to the wall is with a lint-free roller
Video tutorials on gluing vinyl wallpaper on non-woven backing
There are many nuances in wallpapering.
For example, what glue should I use to glue non-woven vinyl wallpaper, how to dilute it and for how long to use it? Questions also arise about decorating difficult areas: corners, the space behind the radiator, above windows or doors. These features can be easily understood with the help of a video that shows in detail how such problems are solved.
How to measure the height of the wall, foam the glue, quickly cut the canvases and place them on the wall? This video will tell you about little tricks that will reduce the time it takes to create a new interior and allow you to do renovations in a matter of hours, even alone. Working with non-woven wallpaper is shown in as much detail as possible, and reviews of this lesson say that it has helped dozens of people cope with repairs without outside help.
Useful tips
- Before purchasing meter-long non-woven wallpaper, you need to calculate how many rolls you need to buy. To do this, calculate the height and width of the walls of the room. For example, if the height of the wall is 2.8 meters, then one roll of wide canvases will be enough for 3 meters of wall width, given that one roll contains 10 meters of material.
- When working, you should not skimp on the adhesive composition. If the strip is glued unevenly, then thanks to the abundant layer of glue, the canvas will slide well, which will help align it, instead of peeling off and redoing the work again.
- To prevent wrinkles from appearing after gluing, it is necessary to smooth the canvas with a soft cloth or roller immediately when it is transferred to the wall.
How to properly cover walls
The walls in houses and apartments differ in materials, evenness and color.
But the principle of wallpapering is the same for everyone. A detailed tutorial on decorating a room with modern wallpaper shows how to transform the walls of a room in a short time. Using the example of two masters, it is clear not only how to choose wallpaper and place the first strip, but also how to make perfect joints, carefully fit sockets and adjust the design.
Additional tools
As already noted, the main advantage of non-woven wallpaper is that it is not necessary to apply glue to it. This means that the process does not require a large room to place long strips of material on the floor to process them.
In order to wallpaper a room, you need to immediately find all the tools necessary for this, so as not to look for them later. You may need the following items:
- the canvas itself and the glue that suits it;
- building level;
- two small containers, in one of which you will knead the adhesive composition, and in the other you will hold water;
- metal spatula and roller;
- a plastic spatula and a brush with which you will apply the adhesive;
- tape measure, pencil, stationery knife;
- foam sponge, sandpaper;
- starting and finishing putty, sickle mesh, primer;
- paint (if you will be covering the canvas on top).
Listed above are not only tools for gluing wallpaper, but also materials for preparing walls for decoration. You will also need plinths or plaster corners, polyurethane foam, and polystyrene foam for the final processing of the walls. This will make the renovation complete and aesthetically pleasing.
Set of accessories for working with wallpaper
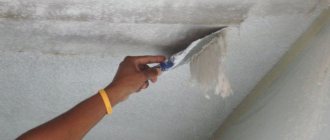
How to glue wallpaper to the ceiling
Pasting the ceiling requires special skill. The markings are not done like on the walls, and it is more difficult to align the pattern.
The intricacies of this process are easy to master and are covered in detail in the video. Using these tips, you will be able to create a flat surface even above your head. You just need to follow simple rules, do everything step by step and take your time.
Corners in a room are the most difficult area to glue.
Walls are rarely strictly perpendicular, so in this area you have to adjust the design, coming up with many tricks. An overlap is allowed for alignment, but to do it perfectly, watch the video for detailed instructions. A step-by-step demonstration will help you avoid mistakes.
Currently, almost all wallpaper is made from vinyl. This synthetic material has proven itself to be excellent: it is durable, resistant to damage, non-hygroscopic, and easy to clean. Vinyl coverings can be used for more than ten years without losing their excellent appearance and aesthetics.
Types of wallpaper with vinyl coating
To properly glue wallpaper, you need to know everything about it. Vinyl coverings can be of two types:
- on a paper backing; on a non-woven base.
The first option is more affordable; the paper base has no other advantages. Non-woven backing has several characteristics:
- transparency; elasticity; tensile strength; good adhesion to many wall materials.
Vinyl wallpaper on a non-woven base consists of three layers: vinyl, opaque dense synthetic material, non-woven material. This makes them thick and dense, the structure allows you to mask small cracks and uneven walls. The coating on a non-woven backing will not tear so quickly in the corners due to cracks, because the fabric is elastic and can stretch.
Taking into account the characteristics of the material, it is necessary to decide how to glue vinyl wallpaper on a non-woven backing. This can be done in several ways.
Glue preparation
The durability and quality of wall decoration with non-woven wallpaper directly depends on the type of adhesive chosen. He must:
- have good adhesion to trellises;
- diluted to a thick consistency, which allows it to be applied in a thin layer without smudges;
- do not leave marks when drying - do not turn yellow.
Only specialized glue satisfies such requirements - universal glue does not hold even light non-woven trellises well. Let us note here that there are two types of special glue: for light and heavy wallpaper.
Attention: heavy trellises are made of vinyl with a non-woven backing (vinyl trellises). Therefore, here we are talking only about glue for light (pure non-woven) types of wallpaper.
Which glue to choose
On the shelves of construction stores you can see a huge variety of brands of wallpaper glue for non-woven fabrics. But, due to the lack of reliable information about the quality characteristics of unfamiliar brands, it is better to buy popular brands.
"The Interlining Moment." The cheapest glue from recognizable brands, which is due to its Russian origin (pack of 250 g from 200 rubles, 500 g from 399 rubles). Suitable for all types of non-woven wallpaper, including heavy vinyl wallpaper.
Provides good sliding of the wallpaper sheet along the wall during joining. Contains additives against mold and mildew. Can be stored diluted for up to a week. At the same time, it also has disadvantages:
- Dilutes poorly - it is difficult to obtain a homogeneous mass;
- not suitable for trellises with a three-dimensional pattern - it requires dense rolling, which cannot be done with a rubber roller on embossed wallpaper (a wallpaper spatula cannot provide such force).
"Methylane Interlining ultra premium." Product of the famous German company Henkel. It is made from methylcellulose and natural resins, which provide reliable adhesion of all types of non-woven wallpaper to various types of walls (plasterboard, concrete, cork, brick, etc.). Easy to divorce.
Does not leave stains when applied to the front side. It has an important feature: it must be diluted to a thinner consistency than indicated on the package, as it dries quickly. It is in the middle price category - a pack of 250 g from 290 rubles. up to 350 rub., packaging weighing 500 g from 535 rub.
"Quelyd Special non-woven fabric". Produced in France. It has the highest price among all brands of glue for non-woven wallpaper (a 450 g package costs from 360 rubles). However, the price fully corresponds to the quality - professional finishers consider it an ideal means for gluing trellises:
- perfectly holds light and heavy wallpaper, with a smooth and voluminous pattern;
- easy to divorce;
- does not smell;
- does not flow down the wall during spreading;
- does not leave marks when it gets on the front side, etc.
The “PUFAS” line of adhesives for wallpaper with a non-woven base (5 types on sale) provides better adhesion between the trellises and the wall surface. It has a color indication, which helps with spreading - no omissions are allowed. When purchasing glue from this brand, you can choose a product for a specific wallpaper: smooth, corrugated, light, heavy.
In addition, we can recommend: “FliziLex”, “Exclusive Non-Woven”, “Kleo Non-Woven”.
How to calculate the number of glue packs
An important feature of glue for non-woven trellises is that the packaging indicates its consumption not per number of rolls of wallpaper, but per wall area in m2. Therefore, the calculation is done a little differently.
First, the area of the walls to be covered is determined. Then the result obtained is divided by the consumption in m2 indicated on the packaging. The result is rounded up.
How to divorce
To dilute the glue you will need:
- 10-12 liter capacity (plastic bucket, basin or bowl);
- warm (40-45°C) water (it will not dissolve in cold water; in hot water it will coagulate into insoluble lumps);
- an object that can be used to stir the glue (stick, whisk, mixer, electric drill, etc.);
- a tablespoon or measuring cup (an error of just 50 g of the powdery mass leads to complete rejection - the mixture is poured into the toilet).
The instructions are simple:
- warm water is poured into the basin (bucket) in the volume specified in the instructions - no more, no less;
- the required amount of powder mixture is measured;
- the water is stirred until a funnel forms with a stick or hand (power tools cannot form a funnel);
- the glue is slowly poured into the center of the swirling water;
- in this way the glue is stirred for another minute after all the dry mixture is in the water;
- It is advisable to carry out further stirring with a mixer or a drill with an attachment - they will break up all the small lumps, which is difficult to do by hand;
- After stirring is completed, the glue is allowed to brew and swell (14-16 minutes is enough), during which time it will take on a working consistency - it will look like jelly or thick sour cream.
Professional finishers recommend adding another 200 ml of water and mixing thoroughly (thick glue dries quickly). You need to add water within half an hour after starting stirring. If you violate this requirement, you will end up with water with floating jelly-like clots. That's it, the resulting glue is ready for use.
Preparatory work
An important factor during installation is the correct adhesive. The composition is selected according to the type of wallpaper.
Non-woven fabrics are heavy, so the glue for them should be thicker. Pour the dry mixture into a container of water, stirring constantly. After five minutes the composition is ready for use.
Equally important is the condition of the surface of the walls and ceiling. At the preparation stage, it is necessary to remove the old coating; it is moistened with water or a weak glue solution. Remove swollen wallpaper with a metal spatula.
The walls and ceiling are inspected for cracks and irregularities.
All defects are repaired with starting putty. After drying, it is sanded with sandpaper. It is better to treat all walls with a thin layer of finishing putty - the smoother the surface to be pasted, the neater the new coating will look.
Any moisture-intensive wall material (concrete, plaster, drywall) must be coated with a primer.
Tip! You can use the same glue that will be used to stick the wallpaper as a primer.
It is dissolved according to the instructions and applied to the walls with a fur roller. The surface must dry thoroughly before subsequent gluing.
If light-colored wallpaper is chosen for finishing, it is better to paint the primer with a color of the corresponding color. Vinyl coverings on a non-woven base are transparent. Unlike paper ones, stains may appear on them.
The prepared room is left until the soil dries completely.
Product Features
Before choosing, you must take into account a number of features that will allow you to understand how high-quality the composition you are using:
- when stirring the glue there should be no clots or lumps;
- storage in packaging can reach a very long time;
- high-quality products protect against the formation of fungus and mold;
- it must be safe for health;
- The preparation process is indicated on the package and even a beginner can perform it.
If the glue has all these characteristics, then most likely you are buying a quality product. Preparation of the solution takes no more than 10 minutes.
Installation of non-woven wallpaper
The standard procedure for gluing surfaces with vinyl wallpaper involves the arrangement of strips without overlapping - it is correct to glue such sheets end-to-end. This is done because the material is thick, the overlaps will be too noticeable. Thanks to this feature, you can start work from anywhere in the room.
This will avoid possible unevenness and joints of the canvas in a visible place.
At the zero point it is necessary to draw a vertical line along which the first strip will be aligned.
This can be done using a plumb line or a building level. The width of the outlined strip should be 1.5-2 cm less than the width of the roll. This edge must be turned at an angle.
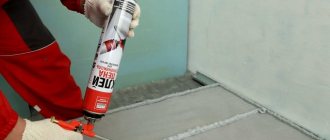
The wall is carefully coated with glue. Another feature of the non-woven backing is that it does not need to be treated with glue - just apply it to the wall. It is important to avoid gaps; apply a thick layer of glue in the corners and under the ceiling with a small brush.
Important! When the repair time was during the summer heat, it is better to treat not only the wall, but also the wallpaper with glue.
While the strip is being measured and cut, the wall may dry out due to the high temperature.
A piece of the required length is cut from the roll (2-5 cm is added to the height of the walls). The upper edge of the canvas is aligned with the line under the ceiling and aligned relative to the vertical line. Using a rubber spatula or wallpaper roller, press the strip in the center, moving from top to bottom.
Now you need to expel excess glue and air. To do this, move the spatula from the center to the edges. Remove excess glue with a clean rag.
Tip! If the edges do not fit tightly to the wall, you can stick thin paper or a special paper tape for wallpaper under the seam. This way the fabric will stick more securely and the seams will be less noticeable.
The wallpaper near the ceiling is cut with a sharp knife.
First, they are pressed to the corner with a metal spatula, without removing it, and a straight line is drawn with a knife. If a plinth is installed below, the lower edges can be trimmed with scissors. All the same, the baseboard will cover the cutting line.
Press the wallpaper into a vertical corner with a plastic spatula, preventing the accumulation of glue and air bubbles there.
Cut the next strip from the roll. If the wallpaper has a pattern, it is more convenient to work with several rolls at once - this will reduce the material consumption.
The second strip must be glued, focusing along the edge of the previous one. The seam should be invisible, so the canvases are placed as close to each other as possible, but avoiding overlap. Non-woven wallpaper is very elastic; tightening it a couple of millimeters will not be difficult.
If the strip is crooked, you can tear it off the wall and stick it on again. However, you should not abuse this; with each tear, the glue will shift, forming clumps.
Recommendations from experts for beginners
To hang wallpaper correctly and beautifully, you cannot do without certain knowledge, which you can glean from the advice of professional finishers:
- Give preference to a stepladder rather than a scaffold - this is a more stable option.
- When gluing with non-woven fabric, there is no need to coat the strips with glue in advance. It is applied to the walls.
- A 1-2 centimeter allowance on the slopes will allow you to get a neat edge. Wait for the wallpaper to dry, then trim off any excess.
- Do not join the panels at the corners; make transitions from wall to wall with a large allowance, the size of which is equal to the length of the deviation of the wall in a vertical position.
- Remove excess fabric with a sharp knife blade.
Also, do not neglect the use of a building level - it makes it easier to glue the canvases.
Be sure to use a building level. It helps to hang wallpaper evenly, avoid unevenness, join corners, and do the job beautifully.
During the pasting process, it is important to keep your hands clean, promptly wipe them with a napkin, removing glue and dirt.
To avoid injury, experts advise laying plastic film on the floor after each sheet. But tiles and parquet are covered with cardboard or paper.
Pasting corners
It is quite difficult to properly glue wallpaper in the corners - it requires skill:
If the corner is in plain sight, it is better to place the panels end-to-end. One strip with a small allowance is placed at an angle (1.5-2 cm), and the second is combined with it without overlap.
For this method, the walls must be perfectly smooth. If the room has uneven corners, the wallpaper will wrinkle and will not lie as it should. The second method is more suitable here - a slight overlap. Literally a few millimeters are enough, but everything will depend on the degree of unevenness of the walls. Cutting the corner is considered the most effective method.
Adjacent strips are glued with a large overlap (3-5 cm), and the wallpaper is carefully tamped into the corner. Take a long strip or metal ruler, place it in the center of the corner and draw a line with a sharp knife. The scraps are removed, the edges of the wallpaper are coated with glue and a rubber roller is passed over them.