Today, not only city dwellers, but also the majority of country property owners prefer metal structures as entrance doors. In theory, they are much stronger, more reliable and durable than their wooden or plastic counterparts. But in fact, many solid-looking metal doors from the budget segment can be opened with a can opener, and a crowbar for them is a universal key. Not everyone can afford to install a massive, expensive structure, and high cost is not a guarantee of appropriate quality.
Therefore, craftsmen who have welding skills and the appropriate tool base prefer to make such doors themselves. In this situation, you can be confident in the strength of the frame, and in decent parameters of noise absorption and thermal insulation, and also give the appearance in the general style. FORUMHOUSE users have also mastered the process and are sharing the results. We study their experience and prepare a metal door.
Advantages of a homemade door
Making a metal structure with your own hands has a number of advantages over purchasing finished products. At a minimum cost, you can get an entrance door to your apartment without altering the doorways. When making metal doors yourself, you must follow safe work rules and perform all operations carefully and accurately at every stage. Advantages:
- by choosing the material for production yourself, you can be confident in its quality;
- can be made with an individual finishing option;
- You can make an iron door on a budget.
Doing it yourself can save a lot of time.
Taking measurements
Welding a metal structure
Even when using standard drawings to assemble an iron door, you will need to take measurements. Ideally even, symmetrical doorways simply do not exist. Therefore, it is necessary to be extremely careful when taking measurements.
One measurement will not be enough - you need to take measurements three times and then select the smallest number obtained. The door leaf should be measured at the top, bottom, and middle.
The height of the opening is determined in exactly the same way. If the old doors have not yet been removed, it is easier to measure them.
In most cases, the width of the canvas is a multiple of 10 cm - its width can be 70, 80 or 90 cm. Please note that the size of the future opening should be 1.5-2 cm smaller than the size of the opening itself. The remaining cracks are subsequently filled with polyurethane foam. After all, it will be difficult to insert and perfectly align a door cut exactly to the size of the doorway.
Immediately determine which direction they will open. According to SNiP, entrance doors must necessarily open outward, so that in the event of an evacuation or transfer of a sick person, it can be opened without hindrance. In this case, it will also be possible to save useful space in the hallway.
How to correctly measure the width of an opening
The opening side is selected taking into account comfort and convenience. Traditionally, doors are made right-handed so that upon entry they can be opened with the right hand. But this option can be changed taking into account specific circumstances.
After all, the door should open so as to occupy a minimum of free space without creating interference. In apartment buildings, the location of neighboring doors is also taken into account.
Proper preparation is one of the keys to success
Making a metal door with your own hands is quite a realistic task for an amateur, but there is one caveat: you must be able to work fluently with an angle grinder and have at least basic knowledge of a welding machine. But before you make the door itself, you need to prepare the tools and material.
Features and models
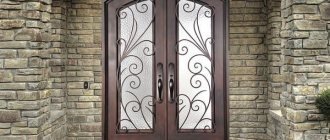
Entrance doors are installed both in apartments and in private houses. Regardless of the location of this structure, its direct purpose is considered to be reliable protection of housing from cold, noise and burglary. Therefore, when choosing this or that front door model, you need to take into account many nuances. Recently, homemade structures made of metal and wood have become extremely popular, while metal doors are distinguished by their functionality and design features; they are resistant to explosions, burglaries, fireproof and bulletproof.
As for wooden options, they are characterized by an original aesthetic appearance; doors with sliding systems also deserve special attention.
Today there are many types of entrance doors. According to their purpose they are:
- Fireproof and bulletproof. Such products are made of high-strength metal. In addition, these types of doors are additionally treated with reinforcing compounds.
- Shockproof. They are the most reliable option for protecting your home.
- Soundproofing. Prevents noise and sounds from entering the house.
- Sealed. Often installed in outbuildings.
Entrance doors can open in different ways. There are swing and sliding models of structures. In addition, doors are classified by the number of leaves and are:
- Single leaf. Made from solid fabric.
- One and a half. They are a structure consisting of two parts, where only one opens.
- Bivalve. Large doors with two opening leaves.
All entrance doors differ in appearance and shape, so a distinction is made between rectangular and arched products. Designs with a blind transom are also popular.
Recently, manufacturers have been trying to make the entrance to their homes unusual, so they often decorate the doors with glass.
Iron structure design
The process of manufacturing an iron door should begin with the creation of a drawing, which indicates the actual dimensions of the product. The resulting diagram will serve as the basis for the assembly and subsequent installation of the door.
You need to start by measuring the width and height of the doorway. The resulting measurements are transferred to paper, and a diagram of the future design is drawn with the specified width and height of the door leaf.
The standard size of the metal structure is 900 mm x 2000 mm. If the dimensions are larger, then an additional block is installed on top, covered with sheet iron, glass, grating, or a blind or hinged block is welded to the side. All elements are specified in the project.
The dimensions of the door frame should be 2 cm smaller than the size of the doorway. The resulting gap will subsequently greatly simplify the installation process of the box and allow it to be adjusted if necessary. The number of hinges is calculated taking into account the weight of the structure; as a rule, 2 - 4 canopies are used. To evenly distribute the load, the hinges are welded at the same distance from each other. In this case, the first and last ones are welded at a distance of 15 cm from the outer edge of the door.
The next step is to strengthen the door frame with additional stiffeners. The main stiffening element is located in the middle of the door leaf, and additional stiffening ribs can be placed from the corners of the product or from the hinges, which will evenly distribute the load over the entire area of the door. The main thing is that the stiffeners do not interfere with the insertion of the lock or the installation of the handle and eye. Stiffening ribs must ensure the strength of the finished product; their number is also chosen at your own discretion.
Don't miss: Door frames for interior and entrance doors
Making a door frame
Work must begin with accurate measurements of the opening. Most often, a standard opening has a width of 800-900 mm and a height of 2000 mm. In order to avoid errors in measurements, it is necessary to “get” to the end of the wall (concrete or brick) by knocking down a layer of paint and plaster in a short area and making a cutout using a hammer and chisel in the vertical platband, if any.
This operation should be performed on all four sides from the outside and inside of the opening. When you have decided on the true outlines of the opening, you can take measurements. After the dimensions of the opening are precisely determined, we begin making metal doors with our own hands.
The dimensions of the metal door frame must be such that there is a gap of 20 mm wide between the ends of the walls delimiting the opening and the frame. It will allow you to adjust the position of the door during installation if the opening is skewed. Upon completion of installation work, this gap is sealed with construction foam.
First of all, you need to cut a corner to the size of the box (with a shelf length, for example, 50x25 mm) of the required length and lay it out on some plane (preferably on a welding table) in the shape of a rectangle. Instead of a welding table, you can use sawhorses calibrated for flatness. To make sure that all corners of the box are equal to 90 degrees, you need to measure the lengths of the diagonals. They must be equal. Then the corners are welded.
Materials and tools
The necessary tools for assembling an iron door with your own hands include:
- Welding machine;
- Electric drill;
- Screwdriver;
- Grinder equipped with a metal cutting disc;
- Clamps;
- Set of files, grinding machine;
- Set of measuring tools.
Materials for the manufacture of standard designs include:
- Steel sheet (2 - 3 mm thickness with dimensions 100 x 200 cm);
- Metal corners for the frame (3.2 x 3.2 cm 6 r.m.);
- Profile pipe for the box and stiffeners (5x 2.5 cm 9 lm);
- Door awnings;
- Reinforcing plates for attaching the door frame to the wall (40 x 4 cm, thickness 2 - 3 mm, 4 pcs.);
- Door fittings (locks, handles);
- Anti-corrosion protective compounds, paint;
- Polyurethane foam, anchor bolts.
The range of door hardware and locks is quite diverse, the choice depends solely on personal preferences. But the most popular mechanisms are locks with bolts on three sides. Such products are much more difficult to install, but their protective functions are much higher.
If the iron door is intended for utility rooms, you can use a more simplified and financially low-cost option: the function of a rigidity amplifier will be performed by a reinforcing rod.
YOUR PASSPORT PLEASE! TECHNICAL CERTIFICATE
If the door is manufactured in accordance with GOST 31173-2003 “Steel door blocks. Technical conditions”, then there is no need to guess, as they say, “from the coffee grounds” regarding its functional qualities. Its “business card” must certainly be included in the quality document (passport) of the product in the form of a standardized product label.
Symbol structure
All that remains is to learn how to read this “Chinese script”.
Example of a symbol:
Chipboard PPVn 1-2-2 M2 U 2300-900 GOST 3117Z-2003 - external steel door block, single-leaf, right-hand design, with a threshold, with the door opening inward, class in terms of reduced heat transfer resistance - 1, class in terms of air and water permeability - 2, sound insulation class - 2, strength class - M2, reinforced design, height 2300 mm, width 900 mm.
Read more about the most important indicators.
Metal doors made of angle steel
Production from angle steel is relatively simple, so you can make such metal doors yourself. The manufacturing process does not require expensive equipment. As a result, finished products in this case will be an order of magnitude cheaper than those manufactured using a different technology.
A comment! However, it should be noted that doors made of angle steel are quite heavy, so their area of operation will be somewhat limited.
Corner metal structures can act as an entrance group both to an apartment and to any other room.
Metal doors based on profile pipes
Similar to the first technology, the production of such products from profile pipes with a square or rectangular cross-section also does not require powerful equipment. At the same time, such structures will be as heavy as corner ones.
Finishing works
The production of non-standard metal doors implies an original finish. The door can be sheathed with wooden planks or canvas, as well as upholstered with soft material or covered with a film with a pattern and “wood-like” texture. A less labor-intensive option is to simply paint the door. At the same time, decorative forged elements can be welded onto the canvas, which will transform the appearance of the product.
As you can see, anyone who is at least a little familiar with repair work and knows how to weld metal can make a metal door. While admiring the result of your labor, do not forget to note that your decision to do this work yourself allowed you to save a significant amount.
According to the described algorithm, almost all doors are made of metal. Exceptions occur only in the production of special products, for example, when fire-resistant metal doors are being manufactured.
Door assembly
The work of assembling a metal door is carried out in several stages.
Marking and preparing parts for assembly
At the stage of preparing parts, the design of metal doors, a drawing of which is drawn to scale, is drawn in the form of separate drawings - the elaboration concerns how the parts will be attached and what the sequence of work will be. Detailed drawings make it possible to minimize errors and waste when cutting metal.
When transferring drawings to metal, you need to clearly understand how a metal door is structured, which elements require special precision, and for which it is necessary to make a gap of 1-2 mm. For the door frame, it is important that all parts are made with the smallest deviations, especially if the profile pipe will be butt welded along 45 degree cuts.
It is recommended not to cut all the metal into parts at once, as this will make it easier to get confused. But gradually cutting off the required amount of pipe or corner gives you a chance to do everything right.
The first step is to prepare the door frame. Tolerances on the outside should be no more than 1 cm in relation to the doorway. But the inside must be perfect in all planes.
A do-it-yourself metal door, the drawings of which are developed taking into account the installation of safe locks with fixation at several points on the block, must be reinforced with an internal frame made of a profile pipe or corner.
In the process of laying out the door block parts on the assembly table, the installation location is determined:
- anchor bolts for fastening the block to the wall;
- door hinges;
- key holes and fixing the safe mechanism;
Even before welding the hinges to the metal door and connecting the block into a single structure, it is recommended to drill the necessary holes in the profile, and only after that proceed with final assembly.
We cook the doors
First we cook the door frame. We make it from a profiled pipe 40*40 mm. Cut pieces to size. If there is rust on the pipe, we clean it. We fold the clean blanks, set the corners, and grab them together.
Welded the door frame
After welding, we check the corners and measure the diagonals. If there is even the slightest deviation, we correct it (hitting the floor with an angle usually helps, the main thing is not to overdo it).
We weld the hinges. We retreat about 20 cm from the bottom and top, mark, cook, making sure that they are on the same straight line. A laser level is very useful here, and if you don’t have one, you have to measure the distances many times to set it accurately.
Next, we cook the internal frame from a 40*20 mm pipe. We calculate the dimensions so that the gap on all sides is 3-5 mm. In one of the long pipes we cut holes for locks.
Don't miss: Finnish doors: what are their features and advantages?
Holes for locks
We weld everything, check the diagonals, try it on. If everything is fine, you can weld the crossbars to increase the rigidity of the door leaf. We make them from the remains of a 40*20 mm pipe.
Frame and frame of a homemade metal door
We clean all welding areas, removing beads - everything should be even and smooth. You can grind off the excess with a file, but it’s faster with a corresponding disc on an angle grinder.
To prevent the frame from “bending” and to later have space for installing a rubber seal, we raise the frame by welding metal plates.
We weld the plates that hold the frame in a given position
The frame inside the frame is set at the required level (we check with a level or level so that everything is in the same plane), and we weld the counter hinges.
We place a sheet of metal on the finished frame and mark it. It should extend onto the door frame pipe by 3-10 mm. Only on the side of the hinges the overlap should be 3-5 mm, on the other sides it can be more. We place the sheet on the hinge side, mark the cutting line, and cut it using a grinder.
Mark where to cut
After cutting, we process burrs and other irregularities with a file until the edge is smooth. To speed up the process, you can use a grinder with an emery wheel. Then we lay out the sheet the way it should be and lightly grab the frame to the frame, the sheet also to the frame (not to the frame). The entire structure needs to be turned over, and it’s difficult to do it any other way.
We grab the sheet to the door frame
We turn over the almost finished metal doors and weld the sheet along the perimeter of the frame, then to the intermediate stiffeners. There is no need to make continuous seams - there is no need for tightness; we weld in small sections at equal distances. At the same time, we make sure that the clean does not “lead.”
We weld metal doors from the inside
We cut off the welded frame from the door frame, turn the doors over and remove the welded sheet from the tacks. We clean the former welding areas. Now you can install the locks.
Installing the selected locks
Insulation and finishing
Next we deal with insulation. Foam plastic 4 cm thick fits well into the welded frame of an iron door. We take it of low or medium density, since there will be no load on it. These metal doors took 4 sheets measuring 1*1 m.
We cut the PP to size, take polyurethane foam with weak expansion (if you take regular foam, the polystyrene foam will displace). Stepping back about 1 cm from the edge, we apply it along the perimeter of the rectangle in which we place the foam, make a few more strips of foam in the middle, and lay insulation. We also pass through the remaining gaps between the PP and the pipe with foam.
You can also glue the insulation using a universal glue that is suitable for metal and foam, for example, “Moment”.
Polystyrene foam laid
To save money, it was decided to use a sheet of oriented strand board available on the farm. The finishing is planned on a budget - self-adhesive film. As it turned out, this pair doesn’t go well together—the OSB putty took a lot of time. It would be much easier with plywood (moisture-resistant, furniture).
A sheet of OSB is laid on top of the metal doors that have already been made by hand on top of the insulation. It is secured around the perimeter with self-tapping screws. First, a hole is drilled for the self-tapping screw, then the fasteners are screwed in.
Attached OSB sheet
We drill mounting holes in the door frame - there are two of them on each segment. We paint the frame in a suitable color (using enamel in a can). The painted frame must be taken outside somehow. We insert long mounting screws into the drilled holes, use them to drag it outside.
Door frame for homemade iron doors painted
Then the problems began - the film can only be glued to a flat, smooth surface, and the surface of the OSB is far from smooth. At first there were attempts to sand it with a grinder. The result is unsatisfactory.
Attempts at polishing
There is only one way out - putty. We take putty, spread it, wait until it dries, and sand it. Then again - a layer of putty, sanding again. So - until the result is normal.
The surface must be flat and smooth
On the second side we also attach OSB, but it’s already puttied and sanded in advance - it’s easier. We cut out holes for the eye-handles and try everything on. Next we start gluing the film. In our stores, the widest one available is 90 cm, the doors are clearly wider. Therefore, it was decided to make a finish with imitation paneling, for which rubber self-adhesive furniture molding was purchased.
The film will be pasted “figuratively”
We find the center on the door, put 45 cm on both sides, and outline a strip. The central strip of film will be glued here. We wet the surface with water (spray from a spray bottle), carefully, without bubbles, glue the film.
Don't miss: How to recode the lock of an iron entrance door - step-by-step instructions for different types of locks
Carefully glue the film
We cut off the missing pieces and glue them on too. We close the joints of the canvases with molding.
This is what happened in the end from the street side
A lighter film is pasted on the room side
All that remains is to install the hand-made metal doors in place. They are installed at the entrance from the covered veranda to the house.
Homemade iron door installed
The doors look good. They turned out very heavy, can’t compare with store-bought ones. Most of the time was spent on finishing. If you choose another option, it will be much faster.
Decor options
Non-standard metal doors must be finished in an original way.
Most often they are:
- Sheathed with wooden planks;
- Upholstered with soft materials;
- Cover with a film that reproduces the appearance of natural wood;
- They just paint it the color you like.
Welded forged parts can look very stylish and attractive. They can radically change the appearance of the entire structure. In any case, regardless of the design method, you will have to start decorating with priming and painting.
To decorate a metal door, lining or other wooden trim screwed onto self-tapping screws can be used. In another embodiment, the canvas is covered with leatherette, hiding a layer of insulating material.
WHAT STRENGTH IS HIDDEN BEHIND THE INDEX “M”
As we said above, amateurs judge the strength of a door by its massiveness. But, of course, there is no direct relationship here. Not every door, even a very heavy one, is durable. And, conversely, a door does not have to be heavy to be strong.
In order to unambiguously assess strength, the standard establishes mechanical characteristics corresponding to three classes: M1, M2, M3.
In order to assign a door block to one or another class regulated by the standard, its qualified tests must first be carried out to determine the actual mechanical characteristics. The standard provides a set of tests of products for resistance to deforming (static and shock) loads:
- in the plane of the canvas
- in the area of the free corner of the canvas, perpendicular to its plane
- in the loop area perpendicular to the plane of the fabric
- in the direction of opening the door leaf towards the stop
- in both directions of door leaf opening
Depending on how much the door can “stand up for itself” (what standardized indicators does it correspond to?), it is assigned a strength class: M1, M2, M3. The strongest door blocks are class M1: such a door can withstand a bending load of 2500 N (approximately 250 kgf) applied in the free corner area.
How to properly install a lock on a metal door with your own hands (Photo + Video)
The lock in a metal entrance door is its most important part; the stronger and better quality the lock is, the safer the door you make will be. But, after all, not only the quality of the lock is important, it is also important how you install this lock on the door. Because if you insert this main part of the fittings incorrectly, there is a chance that the lock will simply break, then, of course, there can be no question of any security.
First, you need to determine on the door leaf the place where you will embed the door lock.
Most people embed the lock in such a way that the wings of the lock (which are screwed to the door leaf or soldered) protrude 2 millimeters from the door leaf; this does not turn out beautifully, and, moreover, it is incorrect; the creator of this door embeds the lock upside down, due to which The lock fits perfectly into the place prepared for it.
He cut a part of the pipe from the inner metal door frame from the side end to the size of the lock with wings. Then he firmly welded the metal corners under the wings of the lock (you can see them in the photo), and drilled holes in these corners for the screws on which the lock would be attached, it seems that there is nothing complicated, but many, nevertheless, as I already said they make mistakes.
Product cladding
Whatever method of finishing the door you choose, first it must be protected from corrosion - primed and painted. To do this, you need to remove slag from the welds, clean them and degrease the entire surface, and then apply 2 layers of primer. After drying, paint the product 2 times, starting from the back.
You can decorate your entrance doors in the following ways:
- insulate the inside with polystyrene boards, placing them on glue, and cover them with plastic panels;
- screw the outer and inner wood lining, in particular lining, with self-tapping screws;
- cover the canvas with leatherette, laying a layer of insulation under it;
- buy and install a ready-made kit for MDF doors.
You can make platbands from iron and paint them the same color
The finished product is installed in the entrance opening using anchor bolts, and the cracks are traditionally sealed with polyurethane foam. Here it is important to maintain horizontal and vertical lines so that the door closes well and the loot is not “piled up” inside the apartment. To hide the foam, the outside and inside of the box is lined with platbands made of wood, metal or plastic. The correct painting of the door leaf is described in detail in the latest video:
Entrance door threshold
According to the standard, its height should be 30 mm. But in most cases this parameter is not followed. The threshold can be made a little lower - about 20 mm. Too high will make it difficult to enter or drag heavy bulky objects into the house. Yes, and stepping over a high threshold is not very convenient.
Such a structure can be made not only from metal, but also from wood, stone or plastic.
- All debris and dust must be removed from the installation site.
- After taking measurements and cutting, grooves are prepared in the thresholds according to the size of the door frame.
- Holes are drilled in each part for inserting screws.
- There is no need to screw the threshold on right away - you just need to secure it with self-tapping screws and check whether it interferes with the opening/closing of the door.
- If it moves freely, without effort, we finally attach the threshold, and cover the locations of the screws with the help of special covers, which can be purchased at a furniture store.
Threshold for entrance door
ADVIСE
- When choosing a door, check how well and neatly the hinges are welded
- Keep in mind that the response holes in the box must be made not as one “window”, but separately for each bolt (bolt) of the lock
- Make sure that there is no treacherous gap in the rebate area, which is used by burglars as a “fulcrum” for pressing the door
- Ask if it is possible to replace the external finishing panel in case of vandal damage
- Keep in mind that it is more reasonable to adjust the door to the opening, and not to seal the opening to the size of the door: its fastening to a main wall is much more reliable than to a brick lining
- When installing the door block, do not allow a gap between the wall and the platband, which would dangerously reduce the door’s resistance to burglary.
- It cannot be ruled out that in order to replace or repair those locks (for example, particularly secure locks) it will be necessary to dismantle the interior finishing panel. If it is secured with corners or screws, removing it will not be a problem. But if the panel is secured with glue or rivets, then it is unlikely to be dismantled without damage.
How to avoid mistakes?
To prevent unforeseen situations from taking you by surprise, you must:
- take correct measurements;
- create a drawing of an object;
- carefully measure angles and parallels;
- adjust the frame and canvas;
- treat materials with protective compounds.
Making a front door takes time and patience. Only by carefully following all the recommendations can you achieve a good result. Accuracy is important in the work, so you need to measure the doorway in several places. If it is uneven, it should be strengthened with cement mortar.
Sources
- https://ODveryah.ru/montazh/izgotovlenie-metallicheskih-dverej
- https://filippovdoor.ru/dveri/dver-iz-profilnoj-truby-svoimi-rukami.html
- https://dekoriko.ru/dveri/vhodnye/svoimi-rukami-kak-sdelat/
- https://o-dveryah.ru/metallicheskie/zheleznaya-svoimi-rukami/
- https://aystroika.ru/remont/metallicheskie-dveri-kak-sdelat.html
- https://rezhemmetall.ru/metallicheskaya-dver-svoimi-rukami.html
- https://melt-spb.ru/oborudovanie/dveri-iz-profilnoj-truby.html
- https://gorodverey.ru/izgotovlenie-zheleznoj-dveri-svoimi-rukami.html
- https://vitdoors.ru/dveri/izgotovlenie-metallicheskoy-dveri-svoimi-rukami.html
- https://stroy-podskazka.ru/dveri/vhodnye/metallicheskie/svoimi-rukami/
- https://novamett.ru/dver/vhodnaya
- https://krrot.net/zheleznaya-dver-svoimi-rukami/
- https://VseoDveri.ru/vhodnye-dveri/vhodnaya-dver-svoimi-rukami/
[collapse]
Post Views: 2,209
Slope fastening
The appearance of our door is still far from ideal - polyurethane foam and pieces of broken plaster stick out from all the cracks. It is necessary to bring the entrance structure to perfection by making slopes.
Of course, the doorway can simply be plastered over. But it is quite difficult to perfectly align its corners. It is much easier to install slopes - to decorate the part of the wall framing the door frame with panels, for example, made of MDF, laminated or veneered chipboard.
To do this, it is enough to correctly mark, cut out the parts and attach them to the wall.
There are three ways to install slopes:
- using polyurethane foam
- on plaster mortar or special glue called liquid nails
- on a pre-assembled frame
Slope fastening
After fastening the slopes with self-tapping screws or gluing with liquid nails, the platbands are attached. The screws are recessed a couple of millimeters deep and then sealed with putty matched to the color of the platbands.
What is necessary
We will make an iron entrance door from a profile pipe and sheet metal. To work, you will need a flat work surface, a welding machine, a drill, an angle grinder, it’s a good idea to have a level (laser level) and something to measure - a carpenter’s square, for example.
Standard metal doors. This is roughly what we will do
Materials you will need:
To “ennoble” the door, you will need metal paint (preferably hammer enamel), a wooden batten, insulation (foam or mineral wool), plywood, OSB or other similar material, plastic or any other finishing material, a door peephole, a lock.