Many city residents are familiar with the situation when, after the start of the heating season, the long-awaited warmth in the house is not observed. At the same time, the neighbors say that they are feeling hot. In such a situation, it is not Energosbyt who should be blamed, but the people who made mistakes when installing or replacing heating radiators in the apartment. The situation is difficult, unpleasant, but completely solvable. In most cases, to stop freezing, you need to change the batteries or the central riser running through the floors. In this case, it is necessary to take into account a number of nuances related to the technical and legal side of this issue.
Who should change the batteries in the apartment?
With an autonomous heat supply, the batteries must be changed by the homeowner.
Replacing heating batteries in an apartment in a multi-storey building is an event that requires careful preparation. In accordance with current legislation, one of its stages is to find out information regarding ownership of the heating circuit. In most cases, the system, unless a private autonomous boiler is installed, is public property, with which it is prohibited to perform any independent actions, with the exception of bleeding air.
If there is any doubt about this, you should write a statement to the management company and wait for the expert opinion. It is carried out by studying construction and technical documentation and inspecting communications.
Based on the survey, the following conclusions are drawn:
- The method of servicing the premises in the apartment and their relationship to the general network.
- The presence or absence of a separate riser, which is intended to heat only one property.
If the housing is independently supplied, the owner has the right to replace the heating independently. When it comes to part of the general communication, repair and installation of radiators can only be carried out by a master who has the right of access to shut-off and control valves.
Why might a replacement be needed?
The main reason for replacing radiators is their malfunction.
In most cases, the lack of heat during the heating season is due to malfunctions of communications and heating elements. To get confirmation of this, you need to go to the neighbors or go down to the basement. Your hand will immediately feel the difference in temperature.
Reasons for replacing heating batteries:
- Clogged channels with dirt and construction debris. Foreign bodies appear in pipes after repairs have been carried out on the heating main using the open method.
- Limescale deposits. This phenomenon is typical for buildings and communications that are several decades old. The narrowed channels slow down the movement of the coolant and it cools quickly.
- The need to change the design of the room, into which the old heating equipment does not fit - untidy cast iron products covered with several layers of peeling paint.
- A leak has appeared. This is a dangerous phenomenon, indicating corrosion and wear of the metal or the beginning of the destruction of gaskets. Immediate replacement of heating radiators is required, as the hole can quickly increase and massive flooding of neighbors will occur.
- For prevention purposes. Heating elements should be changed regularly in accordance with the manufacturers' instructions.
To replace radiators, it is recommended that you contact professional contractors. You can install batteries yourself only if you have the necessary skills and equipment to carry out this procedure.
Tools and materials required for replacement
Radiator Replacement Tools
To replace outdated heating equipment, you must have a set of tools and accessories that you will need to remove, repair, and install heaters.
To work you will need:
- gas key;
- welding machine;
- plumbing pliers;
- hammer;
- core;
- perforator;
- grinder with cutting disc for metal;
- taps and dies for thread cutting;
- soldering iron for welding polypropylene pipes;
- scissors for cutting sections from PPr;
- roulette;
- level;
- marker;
- construction gloves;
- protective glasses;
- respirator.
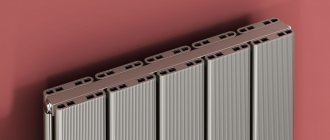
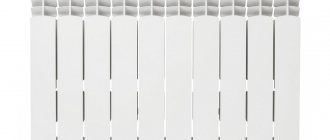
Types of heating radiators
To install new heating equipment, you need to purchase:
- radiators approved by the management company;
- brackets for hanging batteries;
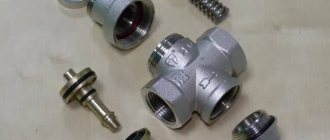
- Ball Valves;
- Mayevsky taps for removing air pockets;
- plugs;
- tow or FUM tape;
- pipes that meet technical specifications;
- set of fittings for wiring.
Since changing heaters is accompanied by water spillage, you should stock up on rags for emergency collection. This will prevent unpleasant situations with damage to the flooring or flooding of neighbors.
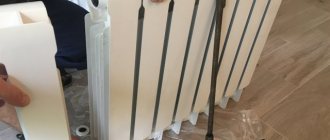
Self-removal of radiators
Unscrewing the threaded connections at the radiator inlet
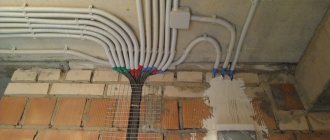
Before removing the old equipment, you should consider the feasibility of replacing the internal wiring. Pipes can become clogged with limescale and dirt, especially at joints and bends. Instead, it is advisable to install modern polypropylene sections.
Removing batteries is carried out in the following sequence.
- Unscrewing threaded connections at the radiator inlet. If the joint does not yield, it can be heated with a torch. If the product is to be disposed of, it is simply cut off from the pipe.
- The battery is carefully removed from the brackets. To facilitate further transportation, the water must be drained from it. There is no point in throwing away the dismantled element, as it can be profitably sold for scrap at a railway collection point.
- The pipes are cut at a distance of 15-20 cm from the riser. The ends are threaded, to which adapter fittings for plastic wiring are screwed.
- To improve the heat transfer of the heaters, foil penofol is attached to the opening where they will hang. The base is first cleared of debris and primed. This will ensure uniform distribution of the heated air flow throughout the entire volume of the room.
When cutting and welding metal, it is recommended to protect walls and floors with plywood or cardboard shields moistened with water. Sparks can damage the finish and cause a fire.
Installing new batteries
Battery installation diagram
Before you begin installing new heating equipment, dismantled products should be removed from the room so that they do not interfere with work. The floors should be covered with dense material so as not to be scratched by the sharp edges of the heaters.
Further work is carried out in the following sequence:
- Applying markings for attaching brackets. Distances are specified in the instructions supplied with the products. Vertical and horizontal are verified using a level.
- Drilling holes. Plastic dowels are inserted into them and holders are screwed in. Here you need to maintain the exact distance to the wall so that the heaters fit accurately and firmly into the grooves.
- Hanging radiators on brackets. If the choice is made in favor of cast iron products, it is better to invite an assistant, since the batteries are very heavy.
- Making wiring. Depending on the selected material, metal welding or a soldering iron for polypropylene is used for this. Before entering the radiator, you must install a ball valve.
- Making squeegees, attaching them to the inlet and outlet openings. After this, the entire system is assembled and looped.
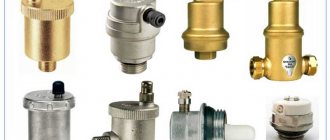
- Installation of Mayevsky crane. This is done on the upper floors, where the riser ends. The replacement part is screwed in place of the plug on the upper part of the battery opposite the insert. The tap is needed to bleed air after powering up the system.
- Attaching the plugs. They are placed in the unused ends of the radiators, making them sealed. To achieve greater reliability, it is worth wrapping tow or FUM tape on the thread.
It is recommended to carry out an initial check before supplying water to avoid an emergency. To do this, use a brush and soap solution. The presence of poor-quality joints will be indicated by swelling bubbles. Such units need to be redone and re-inspected.
Aluminum heating radiator - Disassembly and assembly of the heating structure
In order to remove and disassemble, and then assemble and install an aluminum heating radiator, you will need a small set of special tools:
- Set of wrenches;
- Screwdriver Set;
- radiator key;
- gas key No. 2;
- regular mount.
Removing an aluminum heating radiator
Aluminum heating radiator - dismantling the heater
The first stage of plumbing work is removing the heating battery from its installed location. To do this, we perform the following steps:
- We shut off the supply of thermal fluid in the heating system and relieve the pressure.
- To avoid injury or other incidents, let the radiator and the fluid inside cool completely.
- Next, using a suitable size wrench, unscrew the threaded connection where the battery is attached to the pipe.
- We move the unscrewed coupling along the pipe and remove the aluminum product. We drain the remaining liquid into the batteries and place them on a specially placed plastic film on the floor. Place the radiator face up.
- Immediately remove and wash the filter. This action cannot be put off for a long time, since the dirt can dry out and clean it will be problematic, which means that reusing this filter may become impossible.
Aluminum heating radiator - Disassembly of the structure
Next, we move on to the next stage of plumbing work, that is, disassembling the battery into separate sections. Before you begin repair work, you need to know that the sections of the aluminum radiator are connected to each other using nipple nuts - these are hollow nuts inside with external threads in both directions and grooves for installation inside.
Nipple nut
Radiator key
Radiator nipple wrench
To disconnect the battery into sections, we use a radiator wrench specially designed for working with nipple nuts. Visually, this tool is a wrench with a spatula with notches on the rod, which corresponds to the width of the sections of aluminum radiators. It is not possible to purchase a radiator key - making it yourself will not be difficult for a person with technical skills.
To separate the aluminum radiator sections, place the blade in the grooves of the corresponding nipple nut in the hole at the top and make a couple of turns counterclockwise. After which, we remove and insert the radiator key into the hole from below into the grooves of the corresponding nipple nut and, as in the first case, turn it a couple of turns. Then, return the key to the upper nipple nut and vice versa. In a word, we repeat all movements until the sections are completely separated.
When unscrewing the nipple nut, it is necessary to strictly follow the sequence of actions to avoid distortion. For convenience, in order to be able to apply the necessary force to the tool, there is a through hole at the end of the radiator key, into which, if necessary, as a lever, you can insert a pry bar, a large screwdriver or any metal rod of appropriate diameter.
Aluminum radiator - unscrewing the nipple nut
Radiator repair and cleaning
After the heating radiator is completely disassembled, we clean and wash it from the inside. Be sure to change all gaskets and seals.
If it is necessary to eliminate a defect or crack in a structure, for this you need to prepare a special solution - add bronze powder to the epoxy resin and mix thoroughly. Be sure to thoroughly clean the damaged area before applying the prepared solution. After applying the solution, wait for it to dry completely, 20 - 40 minutes. All repair actions must be done quickly, since the prepared composition quickly sets (dries).
After completing the necessary repair measures: maintenance and troubleshooting of the aluminum structure, the next steps are assembling the battery and installing it in its original place.
Aluminum heating radiator ‒ Product assembly
The sequence of plumbing (repair) actions when assembling an aluminum radiator:
- To assemble an aluminum heating radiator, place it on a flat surface. Then, we carefully examine all threaded connections of the product for cracks and chips;
- We clean each connection, removing debris and dirt. If you plan to add new sections, you need to thoroughly clean the ends. For this, as a rule, fine (fine-grain) sandpaper is used. It will not leave deep scratches on the surface that could cause leakage of the heating liquid;
- We degrease the ends with solvent or high-octane gasoline. We treat the gaskets with soapy water;
- Next, we proceed to connecting the sections of the heating product. We put paronite sealing rings on the nipple nut and attach them to both sides of the product section. Next, we twist it with a radiator wrench, repeating in reverse order the actions that were performed when disassembling the aluminum battery. We turn the radiator wrench until the tool rests and stops turning without effort. Next, using a lever, we tighten the structure. At the same time, you should not apply too much effort. Aluminum is a soft material and it is very easy to damage the integrity of the thread. And so, repeating all the assembly steps, we assemble the entire aluminum product;
- At the end of the heater assembly, on the one hand, we screw in the plug, and on the other, the Mayevsky tap. It is designed to prevent air locks in the heating battery.
- Afterwards, we install the aluminum heating radiator - we connect it to the heating system of the house. At the same time, be sure to pay close attention to the tightness of the connection. After that, we perform pressure testing (checking) of the structure. We let water into the system and check. Let's look at the result: the quality of disassembly and assembly of the aluminum heating battery.
What time to carry out work
Example of an application for radiator replacement
It is allowed to replace parts of the heating system in the spring-autumn period, after the water has been drained from the pipeline. At this time, repair work will not cause any trouble to others. After all the measures have been carried out, the tightness of the circuit is checked using special equipment by injecting compressed air into the riser and monitoring the maintenance of constant pressure in it. This service is paid, but damage from flooding to neighbors can be hundreds of times more expensive.
Since utility services are scheduled months in advance, applications for special services must be submitted in advance. Otherwise, you will have to replace the heating devices yourself, without permission, at your own peril and risk. It should be taken into account that in the event of an emergency, you will have to pay for repairs to your neighbors and a fine from the management company.
Type of heating device.
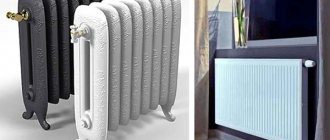
Three types of radiators are suitable for installation in the central heating system of an apartment building from modern heating devices:
-cast iron
-bimetallic
- steel tubular.
The advantage of cast iron radiators is their versatility, due to which their operation does not depend on the direction of coolant supply through the riser, but there are 2 serious drawbacks. Cast iron is a fragile material, so it is not recommended to install them in systems with high pressure, therefore, according to the project, you will never see cast iron radiators in modern high-rise buildings with more than 9 floors. Cast iron also cannot be processed in the same way as steel and aluminum, so the surface of cast iron radiators is always rough and requires additional painting.
Of the bimetallic radiators, it is worth highlighting two models that stand out from the entire variety on the market due to their construction and design: Rifar Monolit and Rifar Supremo.
Rifar Monolit.
Rifar Supreme.
These two models, unlike all other bimetallic radiators, have several important design features:
- radiators have an all-welded manifold, eliminating leakage between sections.
-inlet diameter to the manifold Du-20 (3/4″), which eliminates the need to install a transition fitting mounted on a gasket, which can eventually lose its elasticity and cause leakage.
- wide mounting spaces for brackets, thanks to which the radiator slides without causing any extraneous sounds during thermal expansion on the risers.
The advantage of tubular steel, as opposed to bimetallic, is the absence of a large number of thin plates, which in rare cases can cause acoustic discomfort.
steel tubular radiator .
The latest radiators are very expensive, but I have good news for you: domestic manufacturers have mastered the production of affordable steel tubular radiators under the RadStal brand, which in their design and appearance are no different from the German Arbonia.
Is it possible to replace without disconnecting the riser?
In accordance with current regulations, batteries can only be changed during the off-season. But no one can guarantee that an emergency situation will not arise during the heating season.
Options for action in such cases:
- There is a ball valve in front of the entrance. The water flow is blocked, after which you can safely unscrew the radiator from the supply and return. It is then repaired or replaced with a new product.
- There are no ball valves. The riser is closed and the water is drained. The pipes are cut off and shut-off valves are screwed to them. Water is supplied to the riser, and the owner of the apartment replaces the faulty battery in a calm environment.
In all cases, your actions must be coordinated with representatives of the management company. It is prohibited to independently interfere with the operation of the general heating system.
Connection errors
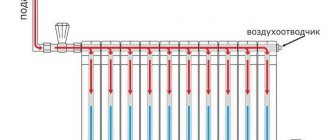
The biggest connection error is the feedback circuit. The correct scheme is to bring the coolant to the upper inlet and remove it from the lower part of the pipe. When the tape changes direction, the heating power is halved. A professional plumber will not make this mistake; this is a common problem with self-assembly.
Possible mistakes
Another important cause of errors is the removal of air pockets. The process involves tilting the pipe. The hot water supply line should be directed to an expansion vessel where air can escape. The slope of the return pipe must be directed into the boiler. At the end of the return, a drain pipe is installed to remove the refrigerant from the heating system.
Procedure time
It will take approximately 2.5 hours to change the batteries.
If you have the necessary equipment and experience in handling it, you can replace heating devices quickly and efficiently.
Calculation for one product:
- drafting - 10 min;
- cutting off supply and return - 5 minutes;
- removal and removal of the old radiator - 5 minutes;
- installation of a heat shield - 15 min;
- installation of brackets - 10-15 minutes;
- assembly of the circuit with a ball valve - 40-60 minutes;
- fastening the Mayevsky crane - 5 min;
- connection of wiring - 10 min;
- assembly quality check - 10 min.
It will take no more than 2.5 hours to replace the battery in one room. For repairs in a standard two-room apartment, 8 hours are enough, including a lunch break.
Let's summarize the above
And so, let's summarize the above. Disassembling and assembling an aluminum radiator with your own hands (on your own) is quite realistic and possible. Will you be able to carry out all the required repairs and plumbing operations in a high-quality and professional manner? It depends only on you and on the quality of assembly and crimping of the heating battery. You must understand that an unforeseen, sudden breakdown may entail unforeseen, large expenses.
Therefore, it will not be superfluous, before disassembling and assembling an aluminum radiator yourself, to thoroughly weigh the pros and cons. And, if there is even the slightest doubt, then it is better not to take on such repairs yourself, but to order aluminum radiator repairs from a real professional. So, be sure to call a plumber to your home.