- What materials are needed
- Wet screed
- Leveling a wooden floor
- How to level the floor in the kitchen
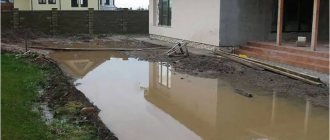
Owners of apartments and houses, a year or two after laying laminate or parquet boards, begin to complain that the locks on the boards come apart, and they have to put pieces of cardboard or felt under the legs of the furniture. Owners of offices, laboratories, and industrial workshops also face a similar problem. The main reason is that the floor has not been leveled.
This process is not always associated with the elimination of bumps and holes. Often the concrete or wooden base has a significant slope, and the joints between the wooden joists are not sealed. Finish coatings are sensitive even to small differences: linoleum, laminate, parquet. Installation of plumbing fixtures, furniture, household or office equipment becomes more complicated. Without a high-quality substrate, they will last no more than a couple of years. And then ugly supports will peek out from under cabinets, tables, office or commercial equipment. A crooked base will interfere with laying the tiles. If you try to compensate for unevenness with a thick layer of glue, the consumption will increase many times over. And manufacturers do not recommend making a substrate larger than 9 mm.
When you can't do without leveling
A rule or a laser level will help determine whether leveling is necessary. When using the latter, you will get values accurate to the millimeter. What do the experts say? If the height differences exceed 3 cm, you will have to wait to lay the finishing coating. First – getting rid of the “mountains”.
If differences are within 1-2 cm, the type of finishing is used. When laying tiles, glue will help eliminate unevenness. For laminate or linoleum, bumps are unacceptable. An exception is laying on top of logs with OSB boards or plasterboard. Then you don't have to pour concrete. If the level shows that the height differences do not exceed 5 mm, you can ignore them.
Next, we will consider in detail how to level the floor in an apartment, house or industrial premises.
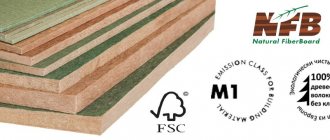
Moisture-resistant chipboard
This material is capable of withstanding very high mechanical loads and can be laid both on frame joists and on leveling backfill. It has a slight variation in thickness and allows you to create a fairly even base. Please note that this must be high-density chipboard (used in furniture countertops or window sills). Chipboard has good sound and heat insulating characteristics.
In Europe, ready-made tongue-and-groove panels are made from chipboard (including those with additional insulating layers). If you use these slabs, then, like plasterboard, they are laid in two layers with glue and coated with a water-repellent compound. If you have special requirements for soundproofing the floor, then you can lay a layer of technical cork on top (on glue). It is recommended to use chipboard only in dry rooms under parquet, linoleum or carpet.
How to prepare the floor for leveling
It all depends on the base material. In the best case, the building owner has concrete floor slabs. They are carefully checked. If there are remnants of the old coating, pieces of wire or fittings stick out, they are removed. The same applies to varnishes, paints, and anything that impairs adhesion. Excess dust is collected with a construction vacuum cleaner. A primer will help bind the remainder.
If there is a concrete screed, inspect it too. Deep cracks and unevenness are not masked, but a new foundation is poured. The old concrete is cleaned with a hammer drill until it is covered.
In frame or timber buildings, the subfloor is often made of wood. Pouring concrete on top will not work. For leveling you will have to use, for example, plywood. But here, too, the foundation needs to be prepared, nails, knots, and splinters removed.
Rotten boards or joists are replaced. If mold is already there, it will not be possible to remove it at all. You can only slow down the process with the help of special compounds. It will not be possible to control the condition of the lags after finishing. It is better to eliminate potential problems in advance. Otherwise the boards will creak.
What tools are needed?
The minimum set of tools includes the following types of equipment:
- squeegee for self-leveling floor;
- needle roller;
- notched spatula;
- level;
- container for diluting dry mixture (bucket, can);
- padding polyester roller for self-leveling floor;
- respirator;
- gloves;
- special shoes (wet shoes);
- beacons for self-leveling floor;
- Sander;
- construction mixer or drill;
All of these tools will certainly come in handy during your work, so it’s worth understanding what each of them is.
We recommend reading: damper tapes for floor screeds.
Floor leveling methods
Irregularities in the base are removed with particle boards, concrete and self-leveling mortars. All options have features, advantages, and disadvantages. You need to know about them so you don’t have to deal with repairs endlessly.
Leveling the floor with sheet materials
You can level the floor with plywood or plasterboard, or other materials based on wood chips. They can be used to eliminate imperfections, if liquid adhesives are not used afterwards. In addition to the finishing option, it is important to consider the height of the ceilings. If plywood is laid on top of the joists, at least 10 cm of the height of the room will be “eaten up”. In addition, it is necessary to level the floor in the entire room at once if you do not want to see ugly thresholds in the doorways.
What you need to level the floor with sheet materials
Plywood or drywall are not all that is required for the job. Still to buy:
- dried boards for logs;
- waterproofing;
- screws or nails;
- hammer, screwdriver;
- building level.
Rice.
1. Materials for leveling a wooden floor For completeness, we will indicate approximately how much different sheet materials cost:
Rice. 1. Cost of plywood and drywall to level the floor
How to determine the quality of drywall/plywood
In a hardware store, drywall is presented in dozens and hundreds of options. GKLV and GKLO are suitable for leveling the floor. The former can withstand constant contact with high humidity, the latter withstand fire. The edges must be straight. It is worth examining the sheets carefully. Any swelling, separation, or crumbs are not allowed.
If you decide to use plywood, choose grade E. The absence of knots, mold, cracks, and chips is guaranteed. The sheets are made from dried wood of one species: birch, pine or spruce. Combined modifications are of worse quality, since the starting materials have different properties.
The process of leveling the floor with sheet materials
If the floor slab does not have significant defects, there are no height differences, plywood or plasterboard is laid on concrete (frameless method). Often they don't even use glue. Two layers with offset joints will be required. They are fastened together with self-tapping screws.
The frame method of leveling the floor with plywood is more complicated. It is used on large slopes. First, the future floor level is marked on the walls. Then the base is covered with a waterproofing membrane and the assembly and installation of the logs proceed. If there are large gaps, put wood chips and boards under the boards. The excess is cut off from above. To attach the lag to the base, you will need anchors or dowels. Only on a fully prepared system can plasterboard or plywood be laid.
The advantage of the method is a quick transition to finishing. On the ground floor, the space between the joists can be additionally covered with expanded clay for insulation. Heated floor pipes are also laid here. There are also disadvantages. Dry screed is not suitable for rooms with low ceilings and it will not be possible to lay tiles on top of it. The material will get wet. Concrete solution weighs quite a lot. The water will evaporate within a month. Particle boards may simply not withstand the load.
Self-leveling and self-leveling floors
Self-leveling and self-leveling floors are different. In the first, gypsum or cement is used as a base in combination with adhesives and plasticizers. The dry mixture is diluted with water in accordance with the manufacturer's recommendations. All existing modifications are divided into:
- thick-layer;
- thin-layer.
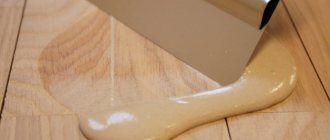
Self-leveling floors help eliminate significant defects. The rough surface is pre-polished. The mixture is simply poured onto the base. Under its own weight, it is distributed over the concrete slab. After complete drying, they proceed to laying laminate, linoleum, and tiles.
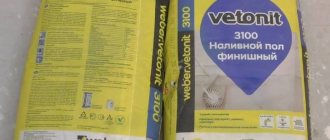
Rice. 3. Self-leveling mixtures
Leveling the floors in an apartment or house with self-leveling flooring is carried out without subsequent finishing. These mixtures are suitable for eliminating small cracks and chips. Epoxy resin, polyurethane, and cement are used as a base. For industrial enterprises and refrigerators, compositions made from methyl methacrylic resins are recommended.
The self-leveling floors should not be exposed to sunlight until they are completely dry, and the humidity should be maintained within 40-60%. The original screed is smooth, without the slightest defects.
Rice. 4. Self-leveling floors
What materials are needed
To work you will need:
- A large container that can withstand the weight of the solution (filling is carried out in the entire room at once, otherwise distortions cannot be avoided due to differences in setting).
- Direct mixture for leveling a concrete floor. The price depends on the composition, form of sale (dry powder or semi-liquid options), packaging. Total costs depend on layer thickness. 12.5-15 kg of dry mixture is spent per 10 mm.
- Spatula and needle roller. For tools, taking into account the brand, you will have to pay up to 1000 rubles.
- Construction mixer. This tool is purchased for repairing large objects. Its price reaches 10,000 rubles.
Rice. 5. Tools for working with self-leveling floors and self-leveling mixtures
Specifics of the work
If you are going to level the floor in an apartment, house, or office with your own hands, follow the following procedure:
- Prepare the base.
Self-leveling mixtures are not recommended for rooms with a significant vertical slope. It is first eliminated with concrete. Cracks are puttied, debris and dust are removed. The joints of walls and ceilings are filled with sealant. The primer will improve adhesion. It is selected taking into account the recommendations of the mixture manufacturer. - Prepare the solution.
Once again, we must not forget about the user manual. It indicates how much liquid is required. The dry mixture is poured into water, and not vice versa, with constant stirring. - Perform the filling.
The finished composition cannot be left to stand; you must begin pouring immediately. Start from the corner farthest from the entrance and move without interruption. Additional leveling is carried out along the walls. - Remove the air.
Rolling with a needle roller to remove air bubbles. - Dry and proceed to finishing.
This stage is the longest. It depends on the composition of the solution, the additives used, the number and thickness of layers. Drying may take from several hours to two to three weeks.
To avoid spoiling the result, eliminate drafts and maintain humidity at the same level. To check drying, cover a small area with plastic wrap. If after a day there are no drops of water on it, leveling the floor with a self-leveling mixture is complete.
Pros and cons of the method
The advantages of the compositions include:
- resistance to mechanical shocks;
- absence of allergens;
- tightness, the ability to obtain a clean coating suitable for use.
The disadvantages are:
- inelasticity of epoxy resins;
- rapid polymerization of methimethacrylate mixtures (pouring in all rooms is carried out simultaneously and careful ventilation is required due to the strong unpleasant odor);
- Careful preparation of the base for pouring a polyurethane-based composition will be necessary (it should not have even the smallest defects).
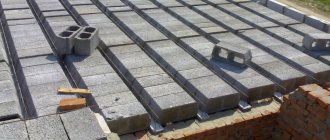
Screed
Despite the regular appearance of new materials, screed remains the most popular method of floor leveling. According to installation technology, it can be wet, dry and semi-dry.
According to the method of coupling with the base, the screeds are:
- Related
. They are rigidly connected to both the original floor and the walls. - On the separating layer
. A layer of waterproofing separates the screed from the floor slabs. Moreover, it is connected to the walls. - Floating
. There is no contact with the concrete slab or walls.
To make a floor leveling screed, use:
- Cement-sand mixture
. It is considered universal, suitable for both residential premises and industrial workshops. - Cement-lime mixture
. This option is a budget option, but it shrinks greatly when dried, so it is practically not used. - Gypsum mixture
. The material dries quickly, but is not recommended for wet rooms and outdoors. It quickly absorbs water and swells. The fine finish will become unusable in a short time.
Wet screed
It does not lose its relevance among those who decide how to level the floor in an apartment, house, store, or utility room. The prepared base is poured with a liquid mixture of cement and sand.
This method has its own characteristics:
- The floor slab is covered with a waterproofing membrane or ordinary polyethylene film in several layers. This is done to prevent water from flowing to the neighbors below. If they have already made repairs, they will have to compensate for the losses.
- Drying takes at least a month. The surface must be moistened to prevent overdrying and cracking. Experts recommend covering with black film;
- The strength of the finished coating depends on compliance with the technology when preparing the solution. If the cement is of poor quality, delamination will occur and cracks will appear.
To fill a wet screed you will need:
- cement M400 (1 part);
- river sand (3 parts);
- water.
Rice.
6. Materials for screed If you take M500 cement, you will need 2 parts of sand, and with M600 - 4 parts. Additionally, you need a mixing container, a waterproofing membrane, spatulas, and usually a construction mixer. The latter can be rented.
Rice. 7. Materials and tools for wet screed
Let's look at how to level floors using the wet screed method:
- Prepare the base. It is dusted off, pieces of concrete or previous coating are removed, and covered with a primer.
- Install the waterproofing membrane in accordance with the manufacturer's recommendations.
- Install beacons.
- Prepare and pour the solution. For a large area, you can order a ready-made mixture of the desired consistency. They start pouring from the farthest corner and move towards the exit.
- Level the surface according to the beacons as a rule.
A day later, the beacons are removed and the holes are filled with solution. If you are leveling the floor under laminate or linoleum, then every other day it is recommended to grout it with a fresh solution. Then wait a month and move on to finishing. It is not recommended to speed up the drying process. The water will evaporate from the outer layer, but will remain inside. Residual moisture is not important for tiles, but can destroy wood.
Semi-dry screed
Semi-dry screed differs from wet screed by lower water content in the original composition. It resembles not liquid, but wet sand.
To work you will need:
- sand and cement M400 in a ratio of 1:3;
- water;
- damper tape for gluing borders on walls, waterproofing membrane;
- rule;
- tank for preparing the composition;
- trowel and pneumatic blower for mixing cement and sand.
Rice.
8. Materials and tools for semi-dry screed Leveling a concrete floor with a semi-dry screed begins with gluing damper tape and laying waterproofing. Further:
- install beacons;
- load the components into the pneumatic supercharger and proceed to filling;
- Level the surface using a rule and compact it manually or with a vibrating plate.
A day later, grouting is carried out with a special machine. Walking on the surface is allowed after 24 hours. You can lay tiles after 72 hours. Proceed to working with laminate, carpet, linoleum - after 12-25 days, depending on the manufacturer’s recommendations.
The advantages of leveling the floor with a dry screed include:
- minimum ripening time, since it is performed mechanized;
- lack of reinforcing mesh (if there is concern that the base will delaminate, fiber fibers are added to the mixture);
- reduction of manual labor.
Dry screed
- Neither concrete nor cement are required in this case. It differs from wet and semi-dry in the complete absence of a ripening period. You can immediately proceed to the installation of the final finish. But it's not that simple. Let's look at the features of dry screed in more detail. To work you will need:
- damper tape, waterproofing membrane;
- expanded clay or expanded clay sand;
- metal profiles and plywood (plasterboard with seam edge).
Rice.
9. Expanded clay and drywall for leveling using the dry screed method. Additionally, you will need a rule, a building level, a screwdriver (drill), beacons, and self-tapping screws. Leveling a concrete floor involves:
- Gluing the damper tape. It will become a delimiter between the screed and the wall and will enhance the soundproofing properties of the structure.
- Laying a waterproofing membrane.
- Installation of beacons.
- Filling the filler with compaction and leveling according to the rule.
- Assembling metal profiles and laying plywood or drywall. The connection is a lock connection. Self-tapping screws are required to attach to the guides.
The advantages of dry leveling floors in an apartment include quick installation and the absence of “dirty” work. You can fill in expanded clay even after finishing the walls. The method has many more disadvantages. Dry screed:
- expensive;
- not resistant to moisture;
- requires careful compaction of expanded clay. Otherwise, after a very short time, voids will begin to form in the underground space, and crunching and squeaking will be noticeable when walking. Heavy equipment and massive furniture cannot be placed on top.
You can read more about all types of screeds here.
Production of CBPB
Cement particle boards are a relatively new material. Its production takes place in several stages:
- A solution based on water with the addition of salts, liquid glass and aluminum is poured into the mixing container.
- Then pour in the shavings for mineralization in the prepared solution. By the way, shavings are also used in chipboard, fiberboard and OSB.
- After this, cement is poured and water is added. The composition is thoroughly mixed.
- The finished mixture is fed under a press, where it takes the form of a smooth cast slab.
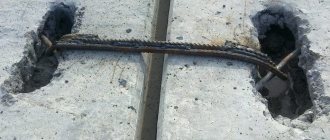
Installation of screed for heated floors
Warm floors are used for heating living rooms, bathrooms, large premises, verandas, and production workshops. But when deciding how to level a concrete floor or wooden floors under a warm floor, it is important to choose the right type of screed. It all depends on the nature of the heating elements:
- Water polypropylene pipes or electrical cable.
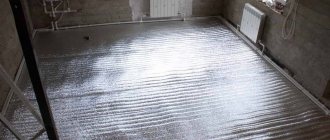
Floor slabs are lined with a waterproofing membrane. It is also laid out on top of the mineral wool. Directly under the pipes there is heat-reflecting foil. The screed for underfloor heating can be semi-dry or wet. If its thickness exceeds 50 mm, a reinforcing mesh will be required. There are no restrictions on finishing; - Infrared heating mats.
They are laid directly on concrete slabs. The best finish is tiles. - Film heating elements.
They are laid under plywood, drywall, fiberboard. Any finishing, except tiles and mosaics.
GVL sheets
There is another option for slabs that can be used to level floors. These are gypsum fiber boards, that is, sheets made of gypsum fiber. They include, as you might guess, ordinary gypsum, which is mixed in production with cellulose fiber necessary for sheet reinforcement, as well as a number of special substances that make it possible to achieve strength and high quality products. This is a material quite similar in some characteristics to drywall.
On a note! It is easy to distinguish gypsum board from plasterboard - the former does not have a cardboard shell, unlike the latter.
GVL sheets for floors
GVL sheets have the following advantages when compared with analogues:
- suitable for any type of work related to finishing floors, walls, partitions, ceilings;
- are able to regulate the level of humidity in the room and dry the room;
- do not release heat from the room;
- easy to install, do not crack during processing;
- do not burn and will not cause a fire in the house, meet fire safety requirements;
- lightweight, which greatly simplifies their installation;
- they can be laid on both concrete and wooden bases, you can make a dry screed;
- are not afraid of exposure to low temperatures.
Comparison of GVL with analogues
How to Level Different Types of Floors
We have collected useful information on leveling different types of floors. It will help carry out repairs quickly and without alterations.
Wooden base
If the condition of the boards is generally good, small knots, bumps, and depressions can be eliminated by sanding. A mixture of small sawdust, varnish and putty will help fill cracks, chips, and cuts. After drying, grind and polish.
If you are wondering how to level a wooden floor and correct minor defects, and at the same time create a base for laminate or linoleum, pay attention to plywood. For height differences not exceeding 5 mm, the slabs are laid directly on the boards. In other cases, lathing will be required.
Leveling a concrete floor
In this case, there are no restrictions on the type of alignment. The screed can be wet, semi-dry and dry. When choosing a specific leveling option, you should take into account the type of finishing, the depth of the differences, and the presence of a slope. For example, it will not be possible to lay tiles on top of plywood.
We must not forget about the installation of heated floors. Concrete is used with water pipes and electrical cable. The film heating system is covered with plywood or OSB.
Leveling for tiles
The master, by varying the amount of glue, can easily eliminate small defects when laying the tiles directly. Large potholes require a different approach. They are leveled with self-leveling compounds, wet or dry screed. The first option leads to a significant increase in the cost of the entire repair. It is useful if the depth of the depressions does not exceed 1 cm.
The wet screed dries up to 1 month when the temperature is maintained within the range of 25-280C. Correct installation of such material allows you to proceed to laying tiles in 3-4 days.
Leveling under laminate
In most apartments, offices, educational and medical institutions, the floor is decorated with laminate. But the material is quite capricious; even if there are small potholes, it will quickly fail. Leveling floors under laminate is carried out in the following ways:
- wet or semi-dry screeds are indispensable if differences reach 3-5 cm;
- self-leveling mixture will help eliminate defects up to 1 cm deep;
- plywood, plasterboard, OSB boards are laid on top of the joists if the original wooden floors are present.
The surface is dried before finishing. Residual humidity - no more than 2.5%.
Rice. 10. For different finishing options, you need to choose the most suitable leveling method
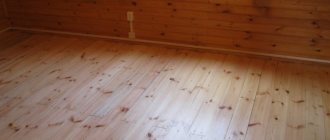
Leveling under linoleum
Leveling wooden floors is carried out by sanding or plywood. There are no restrictions for concrete. But do not forget about the recommendations of the linoleum manufacturer. In some cases, a mandatory gypsum board substrate is required.
Leveling for parquet
The parquet board has become a rarity. It is used quite rarely, but you need to know a few basic installation rules. The original surface (concrete, wood) must be perfectly dry. There are no special restrictions on materials, but you will need a high-quality substrate, for example, plywood or moisture-resistant drywall.
conclusions
When choosing a material for installing a floor, it is difficult to immediately answer the question of which is better: OSB or plywood. There are many factors that determine the characteristics of sheets. Both varieties have similar properties, are durable, tolerate contact with moisture, but can behave differently under the same conditions.
When installing plywood, the coating does not bend, because this material fits well and does not “play” under pressure. It better withstands mechanical loads, but does not have sound insulation, and therefore requires the use of substrates. OSB is a sheet that is distinguished by its versatility, which is due to its low content of harmful components and affordable price.
How to level the floor in different rooms
When choosing a screed, it is important to consider not only the type of floor finish, but also the purpose of the room.
How to level the floor in the kitchen
Here it is better to immediately abandon plywood, drywall, and other types of wood. If this is not possible, choose options with water-repellent impregnation. Sheet materials are not the best support for tiles. It is better to lay it on a concrete screed (wet or semi-dry) or a self-leveling mixture.
Leveling the floor in the bathroom
The same rules apply here as in the kitchen. A wooden base in conditions of constant humidity will rot or become covered with mold spots. Dry screed is also not suitable for bathrooms. It is not designed for significant loads. Preference is given to semi-dry cement-sand options. Plaster gets wet very quickly. It is not recommended for use in damp areas.
How to level the floor in residential premises
In residential premises, everything depends on the condition of the original floor and the wishes of the owner. Large differences are eliminated with a concrete screed, but it takes a long time to dry. You can speed up the processes through semi-dry modification. Wooden boards are leveled with plywood laid in a frame or frameless manner. On the ground floor, the best option is dry screed. You can lay any material on top of it.
How to level the floor on a balcony
When arranging a balcony, it is important to consider the following parameters:
- if the balcony or loggia is glazed and heated, the same materials can be used to level the floor as in the living rooms;
- If there is glazing, but no heating radiators, you should turn to moisture-resistant options - screed and self-leveling floors.
The most difficult case is an open balcony. In this case, defects are eliminated with a semi-dry screed. For wet you need strong formwork.
How to level a garage floor
In this case, practically the only available option is concrete solution. It will withstand temperature changes, exposure to moisture and significant weight of the machine. It can be left as a finishing touch or covered with tiles. Neither laminate nor linoleum are suitable here.
A concrete screed can become a continuation of a monolithic foundation. If desired, it is poured after construction is completed. Recommended air temperature is from +50C to +250C. When carrying out work in winter, special additives are used to prevent freezing of concrete.
OSB or plywood - choosing the best option
Each material has positive and negative properties. It is advisable to compare them with each other, taking into account operating conditions, load level, and intensity of exposure to moisture. Advantages of plywood:
- creates an even coating, which is important when installing under laminate or parquet;
- returns to shape after short-term wetness;
- provides thermal insulation;
- resists the effects of loads, while the material does not deform, which is due to its structure;
- there is a choice of environmentally friendly materials for rooms with high and low humidity levels (different types);
- ease of preparation for installation.
Installation
The work is done with simple tools.
If you are interested in the technology of leveling with dry OSB screed, then you will find our instructions useful:
- Along the short wall of the room, we install a beam with a cross section of 50x50 mm on the floor in increments of 50 cm. We align all the beams strictly horizontally; for this we use pads made of thin plywood treated with an antiseptic. Next, we lay out the sheets for the floor and determine the places of their joints, taking into account gaps of 12 mm from the walls and 3 mm on each side, and install crossbars (lintels perpendicular to the joists) from the same timber in these places;
We lay the logs, which we fix to the floor with dowels;
- We begin laying 20 mm thick slabs on the floor. The distance to the walls is 12 mm, the distance between the sheets is 3 mm, all joints must lie on the joists and crossbars, the seams are offset like brickwork;
The rules for laying sheets are simple and clear from the diagram.
- We cover the entire floor, then lay the second layer, but at the same time lay the slabs so that the joints of the previous layer overlap;
We cover the floor with another layer, hammering nails (screws) every 15 cm.
- We fill the gaps with elastic sealant.
We fill the gaps and cracks with sealant.
Important! If tongue-and-groove material is used, then we glue the joints with assembly glue for wood, and do not seal the joints after installation.