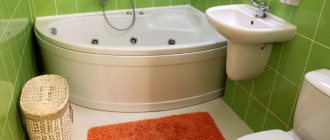
The need to heat bathrooms is obvious. At the same time, bathrooms are rooms with specific functionality and special operating conditions, so solving the issue of heating them requires knowledge of the technical characteristics and features of the entire variety of heating devices that are offered to consumers today.
Let's take a closer look at the types of devices suitable for this, and which of them can be used as a heater for a bathroom or bathhouse.
Recommendations for choosing a bathroom heater
The requirements for bathroom heaters are:
- should take up little space, since most modern bathrooms do not have a significant footage;
- be maximally adapted to rooms where there is high humidity and temperature changes;
- protection against water getting inside the device and onto its live parts is necessary;
- the more spacious the room, the more powerful the device is needed;
- the design is completely safe for children, adults, and pets;
- The appearance of the device is matched to the existing interior.
The bathroom heater must be adapted to work in a humid environment
Selecting a thermal insulator
To insulate the bathroom ceiling, non-hygroscopic, moisture-repellent materials should be used.
To insulate the bathroom ceiling, non-hygroscopic, moisture-repellent materials should be used. See tips for choosing thermal insulation materials here. The insulation must be safe for human health and maintain its thermal insulation properties in conditions of high humidity and significant temperature changes.
To insulate the bathroom ceiling, it is not recommended to use cotton wool insulators due to their high hygroscopicity and the need to additionally install a supporting frame. It is best to give preference to extruded polystyrene foam, polystyrene foam or polyurethane foam.
Which heaters are best installed in the bathroom?
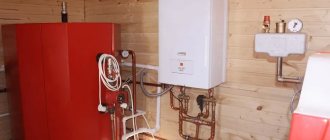
Manufacturers of heating devices offer a wide range of products that meet the safety and ergonomic requirements for the bathroom. Steam heating is a budget type suitable for wet rooms.
Heating batteries
There are several options for energy-saving bathroom radiators:
- aluminum;
- cast iron;
- steel;
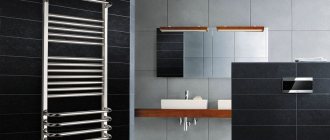
- heated towel rail;
- bimetallic.
Aluminum radiators have a pleasant appearance and are easy to install. When contacting hot water, the metal releases gas, so additional gas outlet pipes are installed.
Aluminum sectional batteries heat up quickly and cool down quickly
Domestic-made cast iron radiators are considered a budget type of equipment. Modern designer radiators not only heat, but also decorate the room. These models are expensive. Advantages - long service life, maintain heat for a long time during an emergency shutdown. Disadvantage: heavy weight, long initial heating time.
The modern design of cast iron radiators can decorate a room
Steel batteries have an attractive appearance; they are manufactured individually according to customer sizes. Radiators have high heat transfer. Lightweight and easy to install.
Steel radiators have a long service life
Heated towel rails do not warm up the bathroom well. They maintain positive room temperature. They are not used as an independent type of heating device. Experts recommend combining a heated towel rail with other types of heating, such as “warm floor” or “hot baseboard”.
The heated towel rail is connected to a general heating system or to a hot water main.
Bimetallic radiators consist of 2 metals, aluminum and copper. Their low weight makes it easy to install the equipment; they maintain the required level of moisture in the room.
Bimetallic batteries heat up quickly and cool down quickly
Oil radiator
The most common type of heaters among consumers. The oil radiator is equipped with a moisture-resistant metal housing with an electric spiral. The internal space is filled with mineral or synthetic oil.
The oil heater consists of finned sections. The heat transfer of the device depends on their quantity. The disadvantage of the device is slow heating.
Modern manufacturers provide models of oil-filled heated towel rails that are compactly installed in the bathroom
Advantages of an oil cooler:
- safe high coolant temperature (600 0C);
- silent operation;
- mobility;
- heating temperature switch.
Infrared heater
A distinctive feature of the device is that it is not the air that is heated, but the objects in the room. The infrared heater for the bathroom consists of a quartz emitter and a heat-insulating plate, which heats up to 260 0C.
The infrared heater can be wall, floor and ceiling mounted
Convective-infrared modular heaters consist of a heating element containing a nichrome thread filled with powder. The modular design allows you to change the power. Using a thermostat, the heating temperature is changed.
The module meets safety requirements and is suitable for the bathroom
Panel electric convectors are a type of IR heater for the bathroom. Aesthetic panels are produced as an imitation of natural stone or with a glossy, decorative, colored or plain coating.
Modern models of panel infrared heaters can decorate any interior
Electric convector
The wall-mounted electric bathroom heater consists of a metal body and a heating coil. They produce wall and floor models. The power of the device reaches 2500 W.
Manufacturers produce thin models for bathrooms with high heat transfer with a quartz plate. Convector advantages:
- safety;
- waterproof housing;
- silent operation;
- mobility;
- ease of installation and maintenance;
- economical;
- aesthetics of execution.
The heater body warms up to 650C and does not burn the body
Attention! Experts highlight the disadvantage of the device: silent models have low heat transfer, so they slowly warm up the room.
Models with a built-in fan to disperse air and increase heating speed are noisy and consume a lot of electricity. A convector without a fan is considered an energy-saving device.
Heat fan
This type of electric heater for the bathroom is a budget one. Features a high heat transfer rate. A small bathroom space warms up quickly. Device power 2000-2500 W. Typically, models are small in size and easy to carry.
The device consists of a housing, a heating coil and a fan. The latter transmits heated air to the bathroom. The heating element heats up to 800 0C.
The lightweight body of the product allows you to install the fan heater on furniture with a flat surface. Place it on the floor and hang it from the walls.
They produce wall and ceiling models; they have greater heat transfer power, but are more expensive. Such products are equipped with deflectors that change the direction of the air. These devices are most suitable for the bathroom, because their housing is more protected from dripping.
Ceiling models prevent the formation of condensation, which protects the cladding from destruction.
The heating element of the device is spiral, tubular or ceramic
For the bathroom, models with a ceramic heater are installed. In order to increase heat transfer, the fan heater housing is decorated with an aluminum grille. These devices reduce their electricity consumption as they heat up. The quality of the device increases its value.
Inverter air conditioner
This is a good option for an electric heater for the bathroom on the wall. The device works by drawing in fresh air from the street, heating it to the required temperature and transferring it into the room. This work is performed by an inverter pump. The split system consists of a wall module, remote control and external fan.
Foam ceiling tiles
Foam ceiling tiles and other products can be purchased at Leroy Merlin in Moscow at low prices. Select the product you are interested in on the website and buy it in our online store. The range of products presented in the catalog is extremely wide. Among them there will certainly be a position suitable in all respects.
All products presented in the “Foam plastic ceiling tiles” section are produced by well-known companies that have proven themselves to be of high quality for their products.
You can always place an order and pay for it online on the official website of Leroy Merlin in Russia. For residents of the Moscow region, we not only have low prices for products in the “Foam plastic ceiling tiles” category, but also fast delivery to cities such as Moscow, Balashikha, Podolsk, Khimki, Korolev, Mytishchi, Lyubertsy, Krasnogorsk, Elektrostal, Kolomna, Odintsovo , Domodedovo, Serpukhov, Shchelkovo, Orekhovo-Zuevo, Ramenskoye, Dolgoprudny, Pushkino, Reutov, Sergiev Posad, Voskresensk, Lobnya, Ivanteevka, Dubna, Yegoryevsk, Chekhov, Dmitrov, Vidnoye, Stupino, Pavlovsky Posad, Naro-Fominsk, Fryazino, Lytkarino , Dzerzhinsky, Solnechnogorsk, Istra and Zhukovsky.
Determining the power of heating equipment
In order not to make a mistake with the purchased device, first of all you will need to decide on its power. Since the ability of the equipment to heat a room of the required area depends on it.
Before you buy a heater for your bathroom , it’s a good idea to measure the room. And in the store make your choice based on these indicators:
- 500 W will be required to heat about 5-6 sq.m.
- 700-800 W – for 7-9 sq.m.
- 900-1100 W – 11 sq.m.
- 1250 W – 12-14 sq.m.
- 1500 W can heat a room of 16 sq.m.
- 1750 W – 18-19 sq.m.
- 2000 W will heat 20-23 sq.m.
- 2500 W will heat a room of 24-27 sq.m.
Instructions on how to properly foam a steel hot tub?
Typically, this method is used to insulate and soundproof steel bowls, but it can also be used for acrylic bathtubs.
Be sure to read articles about other methods of insulating and soundproofing bathtubs.
STEP 1: Place the bathtub upside down on the floor. Don’t forget to first place pieces of cardboard underneath it so as not to scratch the enamel surface.
STEP 2. Be sure to thoroughly wipe off dust from the surface on which you are going to apply foam. Then you need to degrease it; for this you can use a universal degreaser, alcohol or dishwashing detergent.
STEP 3. Before use, it is better to prepare the balloon. It needs to be shaken well and heated a little by placing it under running warm water for 5 minutes. It would be enough.
Under no circumstances should you heat the cylinder in a kettle or boiler, as many resources advise. Due to a significant increase in pressure, it can explode.
STEP 4. Spray the bath generously with water using a spray bottle. This way the foam will stick to the surface much better. If the bowl dries out during application, repeat the procedure.
STEP 5. Place the can on the gun and get to work. It is better to apply the foam in dense layers using a snake. Start with flat surfaces and gradually work your way up. There are no special recommendations for the sequence of surface coating
It is important not to leave any spaces
Sometimes the drain needs to be replaced, so it's best to leave a little space around the hole.
STEP 6. Now you need to leave the font until completely dry for 5-6 hours. After the foam has completely dried, cut off any excess foam at the leg attachment points using a knife.
Additional heating methods
In addition to the main methods of warming up the bathroom, there are alternatives:
- "warm floor";
- "hot baseboard";
- installation of heated towel rails.
Warm floors perfectly maintain the required temperature in the room; they are created by laying electrical cables in the form of loops and waves. It is only important to perform high-quality insulation and waterproofing. The thickness of the floor here is relatively large, and the cost of work is high.
The electrical system provides comfortable heating of the floor surface in a city apartment
In private homes, water-heated floors are more common, which are cheaper to operate.
Hot baseboards are special parts in the form of corner floor panels with heating elements hidden inside. This heating is very efficient and takes up almost no space.
Baseboard heaters distribute heat more evenly and create a comfortable temperature at a height of up to 1.5 meters from the floor
Heated towel rails come in the form of water heating pipes or electric ones and are perfectly combined with any other heating devices.
There are countless models of heated towel rails available, from which you can choose the right option for any interior.
The most effective are models in the form of a ladder
Warm baseboard
Heating elements are located in the contact area between the floor and the wall. The parts on top are covered with a decorative overlay. The device does not violate the harmony of the design and does not occupy useful space.
A warm baseboard can be an alternative to heating, but in the bathroom it is better to use models with a water operating principle. The design includes:
- thin plate radiators;
- coolant pipes;
- module for water.
The liquid is heated in the boiler, then distributed through the pipeline along the walls of the bathroom. Hot flows evenly heat the partitions. Fungus and mold will never appear in rooms with warm baseboards.
Water in such a system cannot be heated above 70 C. Comfortable temperature for humans and optimal for furniture is 40 C. Before entering the system, the liquid enters the collector, where it is cooled to the desired temperature. The operation of the equipment can be adjusted using automation or regulated independently using thermal valves.
Water view for the bathroom Source par-torg.com
What if you remove the radiator from the bathroom?
There is a category of citizens for whom not only the radiator in the bathroom, but even the heated towel rail is in the way and they decide to eliminate them. Immediately there is more space, neat and minimalistic, in a word – fashionable. But you can get the following results:
- temperature decrease below a comfortable level;
- increased humidity - as a result, the appearance of fungus;
- imbalance of the heating or hot water system.
This means that it is impossible to change the battery in the bathroom without employees of the service organization. They install the heat exchanger taking into account the design data of its hydraulic resistance. This is necessary for the system to be balanced. It is prohibited to even move the radiator to another place, much less completely dismantle it. We strongly do not recommend removing heating appliances from the bathroom.
Deciding on the choice of heated towel rail
When choosing a water radiator for a bathroom, you need to take into account its operating pressure. It must correspond to the nominal pressure in heating systems and domestic hot water systems. In this case, the operating pressure of the device must be no less than the pressure in the system. If there is a possibility of water hammer, then you should choose radiators with an appropriate safety margin.
It is very important to choose the right radiator power. To facilitate this task, many manufacturers include power calculation tables in their technical documentation. The previous section described the principle of choosing the power of electric heaters. The same principle can be used when choosing any radiators with known thermal power. We remind you that there should be 100-120 W of thermal power per 1 m².
Of course, this is an average calculation, since it does not include such an important parameter as the height of the room. A more accurate calculation can be made by a specialist who will take into account the cubic capacity of the bathroom, as well as the number of windows, floor, wall material, their insulation scheme and the cross-section of ventilation ducts.
Only after the power of the radiator has been determined can we move on to its aesthetic side. Here the shape and material from which the heated towel rail is made comes to the fore. Standard models are often made in the form of a ladder or coil. These simple and effective forms have already become traditional for bathrooms. Fans of exclusives will love designer heated towel rails, the shapes of which will amaze the imagination. Naturally, their price will be an order of magnitude higher than that of simple models.
As for materials, according to experts, stainless steel has proven itself best. Bathroom radiators can also be made of chrome steel, aluminum or brass. There are also models painted in various colors that suit the interior of most bathrooms. When choosing a painted model, you need to be sure of the quality of the coating, since simple paint quickly loses its original color as a result of exposure to extreme conditions. Radiators of brand brands are painted with high-quality paint and using special application technologies, so their products practically do not change color.
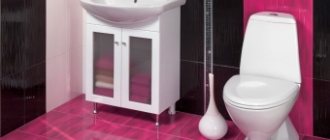
How to hide a battery in the bathroom
How to make a radiator less noticeable? There are four ways to disguise radiators in the bathroom:
- Construction of a plasterboard box. To do this, you need to use moisture-resistant plasterboard sheets, because ordinary ones will not cope with extreme temperature conditions. The structure is constructed in the simplest way: a box is made from profiles, sheets cut to shape are placed on it. You need to make several holes in the top sheet so that warm air can escape into the room.
- Decor using tiles. This method is similar to the previous one, but differs in an increased level of energy consumption.
- Disguise behind plastic panels. This method is the simplest and relatively cheap. The low level of fire resistance is the main disadvantage of this method.
- Disguise with blinds. This method is suitable for those who value the usable space of the bathroom. Blinds allow you to have constant access to communications.
In addition to these four methods, there is also a radical one - installing the battery directly into the bathroom wall. However, due to the complexity and impossibility of servicing during an unusual situation, it is better not to tempt fate and not to commit rash acts.
Nowadays this is becoming less and less common, but some still have a cast-iron radiator in the bathroom, which was installed under the Soviets. It is clear that during repairs it is replaced with a heated towel rail, the thermal power of which is usually sufficient. In an apartment, the bathroom is small, but in cottages, for example, bathrooms are made large, so just a towel is not enough to heat it. You need to install an additional battery.
What is the best way to heat a bathroom?
Most people prefer batteries or small radiators. This solution has its pros and cons:
| Advantages and disadvantages of using radiators | |
| Flaws | Advantages |
| Heaters are best at heating the ceiling, but worst of all are the floors, where you can feel the cold even after leaving the bath or shower. | They heat up quickly, so in a relatively short time we can reach the set temperature (up to several minutes) - this is possible due to the low thermal inertia |
| A radiator-based system does not always cope with cooling the room with air passing through the ventilation ducts | They also cool quickly - just turn off the radiator and wait 5 to 12 minutes. Thanks to this we save energy |
| Traditional radiators operate on a conditional principle - air movement, in addition to heat, can also spread dust and other contaminants | They allow you to dry laundry and towels |
| They take up a lot of wall space and most models are not very aesthetically pleasing. | They are easy to assemble |
| They are characterized by a low price compared to more advanced heating systems | |
| It is possible to buy decorative models | |
For this type of heating, it is important to first decide whether you have a so-called high-temperature installation, which will allow you to use many heaters and heat your bathroom. This can also be a good solution if your house or apartment is not well insulated.
Step-by-step installation of a battery in the bathroom
The first step is to prepare materials and tools. The tool is selected depending on the type of water supply pipes in the room. If installation is carried out through PP pipes, then it is necessary to ensure the availability of ball valves, mounting brackets, polypropylene pipes, a soldering iron and a knife for PP pipes.
The next step is dismantling the old equipment. Here you will need to do some preparatory work - if necessary, agree with the house management company on the possibility of disconnecting the riser from the water. Well, then - depending on the situation. If the coil is welded to the riser, you just need to cut it off with a grinder; if it is screwed on, unscrew it and dismantle it.
Step three. We install bypass and ball valves. Of course, the battery mount can be installed without a bypass, but following the recommendations of experts, it is better to install it. Ball valves must be installed at the ends of the dryer. This will allow you to shut off the water without turning off the riser.
The final step is installing the dryer coil. The process here is the same as with nailing a shelf to the wall. The only condition is to align the coil vertically and maintain the permissible distance from the wall.
Bathroom renovation with plastic panels
Finishing a bathroom with plastic panels has several undeniable advantages:
- Ideal for the room in question as it has excellent insulating properties. Plastic is not afraid of exposure to moisture; it retains its original characteristics for a long time.
- Plastic panels are inexpensive. They are ideal if the budget is very limited.
- Working with plastic panels is very simple. There are surfaces to which they can even be secured with a construction stapler. A person without experience and skills can easily cope with repairs, even if he has to act alone.
Repair of walls with PVC panels. Step-by-step instruction
Modern PVC panels are virtually a universal material. It can be used anywhere, including the bathroom. Plastic does not react to moisture at all; it can be quickly washed and put in order. But first you need to read the instructions for installing such material on the walls:
- Old finishing is removed. The walls are leveled and primed. To complete the primer faster, you can use a roller. It is dipped into a primer and then applied to the wall. It is better to do 2-3 layers so that the waterproofing is really high quality.
- Wooden sticks for the frame are treated with antiseptics. Then the bars are cut to the required length.
- The frame is assembled on the wall. You can make large cells, the main thing is that each panel is fixed in at least 2 places.
- When the PVC panels themselves are cut out, a small gap should be left between the ceiling and the panel. Subsequently, the panel will be straightened and smoothed, and space is left for this.
- The panels are secured to the frame with self-tapping screws. You can use special dowels for this, which will be invisible on the surface.
- After installing all the panels, the moldings are cut. These are special decorative corners that hide the unevenness of the panels and create an attractive appearance in the room.
- The last step is to install the ceiling plinth. The floor plinth is installed after the finishing of the floor is completed. Therefore, until work on the floor has begun, the lower plinth is not installed.
In addition to the proposed method, you can also use the direct gluing method. To do this, you need to level the wall, then apply glue to the back of the tile, and then press the panel against the wall. After a few seconds it is fixed. Then take the next panel and proceed in the same way until all the walls are filled.
Ceiling repair with PVC panels. Step-by-step instruction
PVC panels are reported to be a universal finishing material. It can be used to decorate not only walls, but also ceilings. The panels are light enough, so one person can handle the ceiling repair. And the work is roughly similar to decorating walls.
It is inconvenient to work with the frame on the ceiling. Therefore, you can use the frameless installation method. For this:
- Pre-finishing work is carried out with special care. The surface must be perfectly leveled, checking the level each time. To do this, you can use a special composition that is sold ready-to-use.
- Buy tile adhesive and mix it according to the instructions. The panels must first be cut so that they are ready for installation after mixing the glue.
- The first panel is taken and glue is applied to the reverse side. It is better to cut the panels not too large so that you can press them tightly to the ceiling surface with both hands while standing on a stepladder. Then the product is well fixed. If the panel is long, it is physically impossible to secure it well.
- The next panel is taken and the procedure is repeated.
Attention: when fixing the panels, you must leave a little space from the wall (1-2 cm) to eliminate the possibility of deformation
It is also extremely important to start working on the ceiling first and then move on to the walls. This approach is always used, regardless of the characteristics and purpose of the room with which work is being carried out.
This approach is always used, regardless of the characteristics and purpose of the room with which work is being carried out.
It is also extremely important to start working on the ceiling first and then move on to the walls. This approach is always used, regardless of the characteristics and purpose of the room with which work is being carried out.
Advantages and differences from conventional heaters
Thousands of people choose electric convectors for the bathroom due to the following advantages:
- Low noise level. This aspect plays an important role in choosing a device for the home, because when the device does not interfere with its intrusive sound, it is very pleasant and convenient. This type of heaters has shown one of the most worthy results in this area.
- High efficiency, reaches 95%. This fact suggests that the convector converts almost all the electricity that enters it into heat. This is very beneficial from a financial point of view.
- Complete protection from moisture. It is this advantage that plays a decisive role in choosing a heater for the bathroom. After all, conventional devices do not have this property, and for conditions with high humidity this point is key. You don't have to worry about the durability of the work and your safety.
Water heated towel rails
These are the most common special heating devices for bathrooms. Their work is simple: hot water flows through tubes, where it gives its body to the room. The most popular used to be the so-called. coils. This design remains relevant today, but only modern coils are much more beautiful and efficient.
There are several ways to supply heating circuit water to heated towel rails. The classic connection diagram implies the presence of a hot water supply and a heating circuit connected to the bathroom. In apartments, the central heating circuit is already present in the bathroom.
In private houses where autonomous water heating is used, it is easier to choose a heated towel rail for the bathroom. This is due to the fact that the coolant in the system is usually clean and does not destroy the walls of the radiators. In apartments, when choosing a heated towel rail, there are some restrictions regarding its material. For example, non-ferrous metal models are of little use there, since hot water, saturated with antagonistic metals, represents an aggressive environment for them.
The disadvantage of connecting a heated towel rail to heating circuits is their seasonal use, i.e. In warm weather, it will not be possible to dry a towel or robe. However, this problem can be solved by combined models that can operate on both hot water and electricity.
Practical advice from professionals
Example of an electric and infrared heater
- How to cover the radiator in the bathroom? Special plastic screens are sold for this purpose. You can also “sew up” the radiator with plasterboard or hide the radiator under the bathtub, if space allows.
- Installing and replacing the battery in the bathroom is quite simple. If this concerns electric drying, then you need to mark the place for the brackets, connect the socket and hang the structure on the wall. You can also connect the dryer to the “warm floor” system. If this is a water dryer with a battery for the bathroom, it is better to turn to professionals, since incorrect connection threatens to create an air lock in the entire water supply system.
- If you need a battery under the bathtub, it is best to take a medium-section pipe and run it along the lower level of the baseboard (you can run it around the perimeter). But it is extremely important to avoid sharp corner transitions, since the passage of water flow in them may slow down.
Advice! New designs are often complemented by accessories. There are batteries in the bathroom with shelves, stands or hooks. This allows you to use the entire usable area and facilitates drying options.
When choosing an electric convector for the bathroom, a simple heated towel rail or an oil radiator, do not look at beauty, because the design can always be decorated. But practicality, durability, service life and power should come first. And, of course, the price of the device.
Tiles for wall insulation
Finally, the question of insulating the house has come to a head. From the outside it is clear how to thoroughly insulate the building. But I would also like to insulate the inside a little. Only the walls in the house are thin, filled in, with ordinary shingles on top. There is no point in installing a plasterboard structure with heavy insulation. What if you stick polystyrene foam finishing ceiling tiles on the walls? Although thin, it is still foam. It will perform two functions at once: insulation and decor. Has anyone encountered such a situation?
Timberk TCH AR7 1000
Best cost of infrared heater Country: Sweden (manufactured in China) Average price: 1,700 rubles.
Rating (2020): 4.5 The IR type model is in consumer demand, since the low cost does not in any way affect the quality of the product. The product is only limited in functionality, and those that are present do not cause any complaints. The thermal heating element is safe to use and quickly generates heat over an area of up to 10 square meters. m. In general, the device is a great space saver, because it can be placed on a wall or ceiling.
Mechanical control does not create any difficulties. The owners of the accessory cite the lack of a thermostat as a significant disadvantage. At the same time, engineers have provided for an emergency shutdown in case of overheating. The advantages also include the low noise operation of the device, compactness, and absence of unpleasant odors. The fine-mesh metal grid of the housing prevents foreign objects from getting inside.
Ceiling tiles
Ceiling tiles and other products can be purchased at Leroy Merlin in Moscow at low prices. Select the product you are interested in on the website and buy it in our online store. The range of products presented in the catalog is extremely wide. Among them there will certainly be a position suitable in all respects.
All products presented in the “Ceiling Tiles” section are produced by well-known companies that have proven themselves to be of high quality for their products.
You can always place an order and pay for it online on the official website of Leroy Merlin in Russia. For residents of the Moscow region, we not only have low prices for products in the “Ceiling Tiles” category, but also fast delivery to cities such as Moscow, Balashikha, Podolsk, Khimki, Korolev, Mytishchi, Lyubertsy, Krasnogorsk, Elektrostal, Kolomna, Odintsovo, Domodedovo , Serpukhov, Shchelkovo, Orekhovo-Zuevo, Ramenskoye, Dolgoprudny, Pushkino, Reutov, Sergiev Posad, Voskresensk, Lobnya, Ivanteevka, Dubna, Yegoryevsk, Chekhov, Dmitrov, Vidnoye, Stupino, Pavlovsky Posad, Naro-Fominsk, Fryazino, Lytkarino, Dzerzhinsky , Solnechnogorsk, Istra and Zhukovsky.
AEG WKL 753 S
Model with automatic climate control Country: Sweden Average price: 6200 rub.
Rating (2020): 4.6 The convector-type device features an optimal power of 750 W for the bathroom, a moisture-proof housing, looks aesthetically pleasing, and the device is safe for health. A significant advantage of the design is that it is equipped with a remote control and the possibility of automatic climate control. The operation of the device is based on mechanical control, which even a beginner in operating such equipment will quickly master.
In reviews, the owners of the model indicate the presence of a thermostat, which helps create a comfortable microclimate near the bathtub. A special fuse protects the device from overheating and the consequences of power surges. Among the disadvantages are the lack of a timer, the weight is 4.2 kg, so it is recommended to mount the accessory on the wall not above your head. In general, the build quality of the product and equipment correspond to its price.
TOP 3 best heaters
Not every household appliance is suitable for use in the bathroom. Equipment must be safe, easy to maintain and functional. Among the popular electric models, we will highlight 3 of the best.
Nobo NFK 4S 07
The power of the convector heater is 750 W, which is enough for a room of 11 square meters. The body of the device is made in an ultra-thin design - 55 mm. When installed on a wall, the device hardly sticks out, therefore saving usable space.
The control of the convector heater is electronic, but without a screen. Mechanical switches (sliders) are located on the rear panel. The equipment operates in 2 modes, there is an auto-shutdown function when overheating, tip-over protection and heat maintenance at sub-zero temperatures. High cost is the only drawback.
Convector model Source expertology.ru
Veito Blade
Modern technologies, new materials Country: Türkiye Average price: 23,000 rubles.
Rating (2020): 4.7 This brand produces unique carbon infrared models to create comfort in different types of rooms. Veito Blade is one of the flagships in its line, which provides wide functionality. The accessory is mounted using the included set of fasteners on a tripod, wall or ceiling. The positive point is that during operation, the angle of inclination can be easily adjusted, creating separate heating zones. Remote control occurs via a remote control at a distance of up to 5 meters.
The most attractive advantages for consumers are touch control based on an LED display, 4 adjustable power modes (800-2000 W), a battery is included with the remote control, and a heating area of up to 25 square meters. meters. Durable carbon fiber is wear-resistant and the heating element is guaranteed for up to 5 years. The length of the power cord is about 2 meters making the device less dependent on the outlet. The best moisture protection class IP 55, the presence of a timer, overheating and fall protection are also among the positive design features.
Vibroplast
The material absorbs vibration well and consists of a layer of embossed aluminum foil and a sticky polymer layer covered with anti-adhesive paper. Easily sticks to uneven surfaces without additional heating. Vibroplast does not absorb moisture and has the properties of a sealant. Suitable for use in the temperature range from -45 to +100°C. Good noise and heat insulator.
- a piece of the required size is cut from vibroplast
- remove the protective paper
- Place it on the surface of the bath and level it
- roll with a roller
Advantages of vibroplast:
- non-toxic
- low price
- withstands a wide temperature range
- moisture resistant
Comfort “Umnitsa” TKV-2000 W
Minimum weight Country: Russia (produced in China) Average price: 2200 rub.
Rating (2020): 4.8 The fan heater is designed for wall mounting. Its flat body is made of high-quality plastic, which is resistant to temperature changes and does not deform or crack over time. The electric device is equipped with towel holders, which users call among the best design features of the model along with the weight of 1.6 kg.
But the positive aspects of bathroom equipment do not end there. It is equipped with 2 power modes - 1000 and 2000 W, which are set by simply switching the mechanical regulator. The ceramic heating element is considered the most environmentally friendly, since its operation does not lead to the combustion of oxygen. Additionally, the device has a thermostat with 3 types of airflow. The overheating protection option prevents fire and premature failure of the device.
Preparation
To properly insulate a steel washing container with your own hands, you need to carefully prepare the bathtub for use. If you apply polyurethane foam or glue thermal insulation material to an unprepared surface, you will not be able to achieve the optimal result. Before performing insulation, perform the following operations:
- You need to put cardboard, soft material or wooden blocks on the floor of the bathroom to place the washing container on them.
- Disconnect the font from the drainage system, disconnect the siphon and overflow.
- Turn the bowl upside down, and then lower it onto the prepared bars.
- Clean the outer surface of the bowl from dust or dirt.
- To degrease steel baths, use gasoline, alcohol or solvent.
Polaris PCH 1096
Best-selling model Country: Russia (produced in Russia, Italy, Israel, China) Average price: 2500 rubles.
Rating (2020): 4.8 This stylish bathroom accessory attracts attention primarily with its unobtrusive, universal appearance. Ergonomic shape, almost completely closed heating element, a large number of small holes for uniform heat distribution. The product has an optimal weight of 3.5 kg and is easily moved using a wheel base or mounted on a wall.
The heater power of 1000 W is quite enough for the bathroom. The main working element of X-Shape is made of aluminum and is considered one of the most reliable, with a good service life. Using a mechanical regulator, the desired heating mode is set, there are three in total, including energy-saving. The convector is protected from overheating, moisture, and tipping over. Owners in reviews point out the silent operation of the device, ease of maintenance, and the absence of foreign odors.
Polystyrene foam ceiling tiles
Expanded polystyrene ceiling tiles and other products can be purchased at Leroy Merlin in Moscow at low prices. Select the product you are interested in on the website and buy it in our online store. The range of products presented in the catalog is extremely wide. Among them there will certainly be a position suitable in all respects.
All products presented in the “Expanded polystyrene ceiling tiles” section are produced by well-known companies that have proven themselves to be of high quality for their products.
You can always place an order and pay for it online on the official website of Leroy Merlin in Russia. For residents of the Moscow region, we not only have low prices for products in the category “Expanded polystyrene ceiling tiles,” but also fast delivery to cities such as Moscow, Balashikha, Podolsk, Khimki, Korolev, Mytishchi, Lyubertsy, Krasnogorsk, Elektrostal, Kolomna, Odintsovo , Domodedovo, Serpukhov, Shchelkovo, Orekhovo-Zuevo, Ramenskoye, Dolgoprudny, Pushkino, Reutov, Sergiev Posad, Voskresensk, Lobnya, Ivanteevka, Dubna, Yegoryevsk, Chekhov, Dmitrov, Vidnoye, Stupino, Pavlovsky Posad, Naro-Fominsk, Fryazino, Lytkarino , Dzerzhinsky, Solnechnogorsk, Istra and Zhukovsky.
Heliosa EH110/FM
The best efficiency of the device Country: Italy Average price: 10,000 rubles.
Rating (2020): 4.9 The development belongs to the type of infrared (IR) heating devices and can be installed both in bathrooms or bathhouses, and in open areas. The device has a classic design for this type and is light in weight (2 kg). Its most important advantage is its high water protection class IP23.
Another important feature is cost-effectiveness. The device can be used for zonal heating of a room area, in particular, a bath sector or a place for drying clothes. In addition, heated objects retain heat for a long time, gradually saturating the air with it. The presence of a special stainless steel grill in the design protects against burns. Among the advantages of the model, owners highlight the durability of the lamps, a durable steel case that protects them from mechanical stress. The only disadvantage of the IR device is its high cost, but its performance and long service life make it popular among consumers.
Electric heaters
If the bathroom does not have a connection to the heating circuit or the house does not have central water heating at all, then electric models of heated towel rails come to the rescue. They work on the principle of oil radiators and only require connection to an electrical outlet. Electric heated towel rails are designed in such a way that coolant circulates freely through their tubes due to convection formed as a result of contact with the heating element. There are models with power from 100 to 1500 W. Such a wide power range allows you to choose the optimal device for any bathroom.
Advanced models of electric heaters for bathrooms are able to cope with their basic functions, spending no more energy than an incandescent light bulb. Of course, the cost of such devices will be higher than that of more wasteful ones. Economical heaters last longer and manage to pay for themselves many times over during their operation.
One of the main advantages of electric heated towel rails is that they can be turned on and off as needed. Not all water models can provide this opportunity. Electric models are equipped with operation timers, with which you can set a schedule for the operation of the device. So, when you wake up in the morning and go into the bathroom, you can take a shower at a comfortable temperature, which is considered to be 24°C.
Based on the optimal temperature and area of the bathroom, it is necessary to select an electric heater of appropriate power. To maintain a temperature of 24°C, it is necessary that for each square meter there is 100-120 W of heating device power. If there is a window in the bathroom, the power must be increased to 130-150 W/m².
Electric models of heated towel rails are mainly made of stainless or low-carbon steel. The former are more expensive, but have a very long service life. Low-carbon steel models are less resistant to corrosion, but can last up to 15 years. By choosing products from well-known manufacturers, you can be confident in the guarantee of their quality.
Ballu BEC/EZER-2000
Effective combination of price and quality Country: Russia Average price: 4000 rub.
Rating (2020): 4.9 The most unpretentious device in terms of placement conditions is equipped with its own wheelbase, and therefore does not require special installation, although the wall-mounted version is structurally acceptable. It moves easily around the bathroom regardless of the type of floor covering. The moisture-proof housing of the convector is quite sealed, practically does not heat up, and does not have protruding or other traumatic elements. It is characterized by maximum stability, but in case of capsizing, as well as overheating, a shutdown is provided.
If necessary, such a device can be installed directly next to the bath and regulate the temperature. In general, according to users, this accessory is effective on an area of up to 25 square meters. m. The build quality deserves attention, as does the cost of the model. The electronic type of control is complemented by a display and a timer function, which can be set for a maximum of a day. Of the useful features, the undoubted advantages are the options for blocking buttons and air ionization, which suppresses the activity of bacteria. The relative disadvantage of the heater is its weight of 4.7 kg.
How to insulate a metal font with your own hands
Below are detailed step-by-step instructions for insulating an iron bathtub using foil polyurethane foam (penofol).
For detailed instructions on thermal and sound insulation of a bathtub using polyurethane foam, see our special article.
Step 1. Place the bathtub against the wall or lay it upside down on the floor, after covering it with cardboard or cloth. This is necessary to avoid damage to the enamel.
Step 2. The next step is to degrease the surface. A universal degreaser is perfect for this. But if you don’t have it, it doesn’t matter, you can use alcohol or regular dishwashing detergent. Wipe the entire surface thoroughly and let it dry for 10-15 minutes.
Step 3. If you have insulation in rolls, cut a piece of the required length so that the bowl is covered crosswise from side to side, as shown in the photo. Don't forget to peel off the film from the adhesive layer.
After you have glued the sheet to the bathtub, you need to trim off the excess and once again iron the insulation tightly with your hand so that there are no bubbles.
Step 4. Measure the width of the most even areas and cut strips of 15-25 cm. Then glue them to the bowl in the same way, cutting off the excess.
Step 5. Next, glue the remaining empty spaces with the same small strips.
Don't forget to cut a hole for the drain.
Step 6. Tape the insulation joints with reinforced tape.
Step 7. Remove the insulation from the mounting points of the legs.
REDMOND SkyHeat 7002S
Convenient control via smartphone Country: Russia Average price: 5800 rub.
Rating (2020): 5.0 Users liked this convector because it is perfectly adapted for installation both in the bathroom and in other rooms. This rather compact device received from the developers a reliable waterproof housing that is not afraid of drops of water or steam. The narrow device is easy to hide in small niches, and installation does not take much time. As for functionality, the owners note the useful power, thanks to which the area is about 20 square meters. m is filled with warmth in just half an hour. The built-in regulator allows you to control the heat distribution. When overheating occurs, automatic shutdown occurs.
The advantages also include electronic control via Bluetooth. Despite the lack of Wi-Fi support, owners note the simplicity and speed of the application and the ease of working with settings. If noise level is important to you, then this heater will not disappoint, as it operates very quietly.
Creation of a polyurethane foam thermal insulation layer
When insulating a floor with polyurethane foam, there is no need to lay vapor and waterproofing layers, since the insulation itself is a vapor-permeable, moisture-repellent material.
When insulating a floor with polyurethane foam, there is no need to lay vapor and waterproofing layers, since the insulation itself is a vapor-permeable, moisture-repellent material. The liquid thermal insulator is sprayed directly onto the existing base; the high adhesion of the material ensures reliable adhesion of the polyurethane foam to the insulated surface. As a result of spraying a liquid thermal insulator, a monolithic thermal insulation layer is obtained that has no seams or joints.
Due to the low thermal conductivity coefficient, the thickness of the insulation layer is minimal and allows you to save the usable area of the room. After the liquid thermal insulator has hardened, a concrete screed is applied on top of it and the floor covering is laid. Polyurethane foam is highly durable, therefore, there is no need for additional reinforcement of the thermal insulation layer.
The only difficulty when installing a polyurethane foam thermal insulation layer is the need for special spraying equipment, so thermal insulation work cannot be carried out independently. It is best to seek help from specialized companies whose specialists have the necessary skills in working with polyurethane foam.
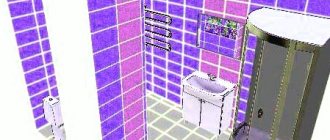
Work order
To insulate a bathtub you need to take only three steps, which are shown in the diagram below.
Stages of insulating a bathroom.
And now about each of them in more detail.
Stage 1 - Surface Preparation
As you understand, we will insulate the walls and ceiling. But first you need to prepare these surfaces for work. The sequence of actions is as follows:
- I empty the bathroom of furniture and plumbing fixtures. This is precisely one of the disadvantages of internal insulation technology. To install polystyrene foam on the walls, you need to remove the bathtub, sink, washing machine, and so on from the room. Therefore, thermal insulation measures are usually timed to coincide with general repairs in the plumbing unit.
First of all, you need to dismantle the plumbing fixtures.
- I remove decorative trim from the walls. In my case, all surfaces were tiled. So I knocked down all the parts using a hammer drill with a chisel attached to it. Moreover, you need to get rid of not only the tile itself, but also the remaining glue to get as smooth a surface as possible. In the case of other materials, you can proceed as follows:
- The wallpaper is simply torn off the walls, after which the surfaces are protected with a spatula from remnants of the backing and glue.
- You don’t have to remove all the paint, but get rid of only those areas that are already swollen or crumbling. The rest of the layer will not interfere with the work.
The ceramic tile or other trim is then removed.
- I carry out repairs to wall and floor surfaces. Before laying the insulation, you must make sure that the surfaces do not have cracks, potholes and bumps that could interfere with the adhesion of the foam or cause moisture to penetrate into the thickness of the insulating layer:
- Small and shallow cracks need to be slightly widened with a grinder with a diamond disc installed on it, and then filled with polyurethane foam. After hardening, the latter is cut flush with the wall or floor.
- Large recesses are cleaned with a chisel to get rid of crumbling areas, and then filled with cement repair mortar. If reinforcement is visible in the recess, then before repair it must be cleaned with sandpaper and coated with a rust converter.
Cracks and defects in concrete walls and floor slabs need to be repaired.
- I clean the surface from dust. It is best to do this with a vacuum cleaner, which will remove even the smallest particles of dust and mineral chips.
A vacuum cleaner is best for cleaning concrete.
- I prime the walls and floor. The composition I have chosen not only improves adhesion, removes dust from concrete slabs and gives them antiseptic properties, but also kills all microorganisms that already live on the surface of the slabs. Priming is carried out according to the following scheme:
- First, using a roller (or, to speed up the process, a sprayer), the walls are coated with a primer in one layer.
- After this, you need to give the composition time to dry. This usually takes about 4 hours.
- Then the walls of the room are coated with primer again. After the second layer has dried, you can proceed to gluing the foam.
The walls and floor need to be primed in two layers.
- I'm laying out the electrical wiring. If you need to lay electrical cables and install sockets in the bathroom, you need to do it now. For installation, polyvinyl chloride cable channels are used, which in the event of a short circuit will prevent the insulating layer from igniting. And the polystyrene foam itself is easy to process, so you can then hollow out recesses in it to mask these cable channels.
You need to worry about the wiring in the bathroom in advance.
Stage 2 - Installation of thermal insulation on the walls
Let's start insulating the walls. I’ll say right away that although the gluing process seems simple, it contains many small nuances on which the quality of the work performed ultimately depends.
The technology is as follows:
- I hit the zero mark. To do this, you need to mark a mark at a height of about 52-55 cm from the floor, following which, using a water or laser level, draw a strictly horizontal line over the entire surface of the walls in the bathroom, which will serve as a guide for gluing the foam sheets.
The zero mark can be marked using a laser level.
- If necessary, I carry out marking and cutting of foam sheets. The material is easily cut using a utility knife, a hacksaw with sharp teeth or hot metal wire. Let me point out a few nuances:
- When cutting, maintain the dimensions very precisely so that when gluing, the seams between the individual sheets are minimal.
- To ensure a tighter fit of the sheets, after sawing off the part, you need to process its end using a foam grater.
Operating principle of cutting wire for foam plastic.
- I am preparing a reinforcing composition for polystyrene foam. For this, a dry construction mixture is used, to which water is added, after which everything is stirred and brought to homogeneity using a mixer connected to a drill. In this matter, it is important to pay attention to several points:
- After mixing, it is necessary to leave the glue for 5-7 minutes so that the additives and plasticizers included in its composition are activated. After this, the solution should be mixed again.
- Prepare only the amount of glue that you can use in about 40 minutes. After this time, the performance properties of the solution deteriorate.
- To prepare a new portion, you need to use a clean container (or wash the old one well). Otherwise, frozen lumps from the previous batch can spoil the glue and interfere with the correct alignment of the foam boards.
The solution is mixed using an electric mixer.
- I spread glue on the first sheet of foam. The glue application pattern will be the same for all sheets, but it has several features that are important to know:
- If the wall is smooth and there is no need to level it with polystyrene foam, then glue is applied to the entire surface of the foam plastic, after which it is spread with a notched trowel.
- If you need to level the wall, then apply the glue with a roller along the edge (at a distance of 5 cm from it with small gaps for air to escape), after which several lumps are placed in the middle so that at least 40% of the area of the material is covered with the composition.
- Polyurethane glue from a balloon is applied in the form of separate lumps (about 6-8 pieces), distributed over the entire surface of the insulation.
- If the foam sheets are joined at an angle of 90 degrees, then the area that is adjacent to another part of the insulation does not need to be coated with glue.
- During work, you should carefully ensure that the cement-based adhesive does not get into the seams between the sheets of expanded polystyrene.
Applying glue to foam sheets.
- I secure the first sheet of foam. You need to start work from the corner above the zero level line (drawn in advance on the walls). The system is like this:
- You need to fix the part on the wall, and then align it vertically, controlling the location using a water level.
- After this, further strengthen it with four umbrella dowels. You need to drill a hole in the wall directly through the foam, then insert the dowel, but do not hammer in the core, but only insert it all the way, otherwise you can knock down the level of the foam sheet.
To make work easier, you can install the support rail at the zero mark.
- I glue the remaining sheets on top from the zero mark. When applying glue and leveling, you need to act as indicated in the previous two paragraphs, as for the remaining nuances:
- When joining two adjacent sheets of the same row, it is necessary to ensure that the parts fit as tightly as possible to each other. If necessary, you can use a polystyrene foam grater.
- When installing the top row on the bottom, you need to make sure that the seams of the material run apart, that is, the seam of the top is separated from the seam of the bottom row of foam at a distance of at least 20 cm.
- In the corners, the foam should be connected according to the principle of a ladder. That is, first a sheet comes from one wall, then from the other, and so on in steps to the very top.
- If the wall has too much vertical difference, a polystyrene foam pad of suitable thickness can be glued under the bottom of the foam sheet.
- All sheets of foam plastic are also additionally reinforced with four dowels, the cores of which are not hammered in completely until the glue has completely dried.
- To glue sheets to a cold wall that protects the bathtub from the street, you need to use polyurethane glue if the work is carried out in the cold season.
Installation of expanded polystyrene sheets on the wall.
- I glue the sheets from below the zero line. It is important to secure them correctly, for which pads are used under the lower part of the part. If necessary, trim the insulation using a knife or saw.
- I fill the foam seams with polyurethane glue. You need to pour the foam so that it fills the entire space between the foam sheets, and not just at the top of the seam.
- I secure the insulation sheets with dowels. This must be done after all the glue has dried. First, the cores of those parts that were already inserted during gluing are completely hammered. Then the number of dowels increases to 6-8 per sheet. It is also advisable to drive fasteners into the seams between the sheets to strengthen them too. The dowel must be hammered in so that its head is submerged and does not rise above the surface of the polystyrene foam.
Scheme of fastening foam plastic with dowels.
- I perform final cleaning of the foam surface. To do this, use a polystyrene foam grater. With its help, it is necessary to especially carefully process the foam seams (if there are small differences in height) and outer corners (if any).
A grater for cleaning foam plastic.
- I reinforce the outer corners of foam plastic. In the bathroom where I was renovating, the wall has a complex shape, so the foam insulation formed two outer corners. They need to be reinforced using a corner with a mesh. This is done like this:
- A small layer of reinforcing compound (glue that was used to glue the insulation) is applied to both sides of the corner.
- A corner is applied, after which, using a plaster float, it is pressed inside the insulation.
- Then a little more solution is applied on top with a spatula, which is distributed in the direction from the corner outward.
Part for reinforcing corners and method of its installation.
- I reinforce the surface of the foam with mesh. A pre-purchased fiberglass alkali-resistant mesh is used:
- A reinforcing compound is applied to the surface of the insulating layer.
- A mesh is glued onto it, after which it is pressed into the solution with a grater.
- A little more composition is applied on top, which is then carefully leveled.
- At the junction of individual sheets and in the corners of the room, the mesh should be overlapped.
- When leveling, use the blunt side of a plastering float to avoid tearing the reinforcing layer.
Polystyrene reinforcement with mesh.
- I complete the final plastering of the wall surface with cement mortar. Further technology depends on the chosen finishing material. If you are going to glue tiles, then you do not need to bring the surface to perfection, but for painting and wallpaper you will have to carefully plaster, putty and sand everything.
The last stage of wall insulation is their decorative finishing.
Stage 3 - Floor insulation
To insulate the floor, instead of polystyrene foam, I took extruded polystyrene foam from the Penoplex brand. This material has a high density, so it better tolerates mechanical loads exerted on the insulated surface.
I will describe the work scheme briefly so as not to abuse your attention:
- A polyethylene film is laid on the prepared floor. It plays the role of a waterproofing membrane and is used to prevent penoplex from getting wet.
- Sheets of thermal insulation material are laid. You can lay one layer 5 cm thick or two layers 10 cm thick. In my case, 5 is enough, since below there is also a living space and there is no need to protect yourself from the severe winter cold. The styling features are:
- The material is simply laid out on the floor without fastening. There will be a cement screed on top that will firmly hold the insulation sheets in place.
- The ends of the penoplex are designed in the form of a step, which allows you to tightly connect the parts and avoid the appearance of cold bridges.
- When laying the material in two layers, you need to ensure that the seams of the bottom row are at intervals with the joints of the top row.
Laying penoplex on the floor.
- Reinforcing mesh is installed. What is needed here is not fiberglass, but a metal mesh made of steel wire with a mesh size of 10 cm. The laying technique is as follows:
- Individual sheets of mesh are laid out on polystyrene foam in such a way that they overlap each other at a distance of one cell.
- Plastic legs are placed under the mesh, which will hold it at a height of 2-3 cm above the level of the insulating material.
- The sheets of the reinforcing layer are connected to each other using steel wire.
Reinforcement of penoplex with mesh (photo from another object).
- Beacons are being installed. For this purpose, special aluminum parts and brackets are used. The beacons need to be leveled using a water or laser level in order to achieve a perfectly flat floor in the end.
- The screed is being poured. A solution is prepared, poured into the space between the beacons and leveled with an aluminum rule.
Performing a foam screed with simultaneous installation of a heated floor.
Features of bathroom insulation
A bathroom is a room with a specific microclimate, characterized by significant temperature fluctuations and very high levels of humidity. Therefore, its thermal insulation requires a special approach and I have no right not to mention some nuances.
- The need to destroy the bathroom interior. To insulate the bathroom, you will have to dismantle the finishing and then re-cover the walls with tiles, plastic or plaster. All these operations increase the cost of the project, time for its implementation and labor intensity.
- Reducing the area of the sanitary room. It’s unlikely that anyone’s apartment bathroom is spacious. So, an insulating pie will make the room even smaller. So think about whether all the necessary furniture and equipment will fit there after insulation.
- Impaired air infiltration. Vapor-tight insulation does not allow moist air to pass through the walls, therefore, to regulate the humidity in the bathroom, you need to design not just effective ventilation, but forced ventilation - using powerful ones.
- Danger of mold and mildew. This misfortune can only be feared if the thermal insulation is not done correctly.
- Reducing the service life of enclosing structures. If you install insulation inside, the walls of your home will constantly freeze and come into contact with atmospheric moisture, which negatively affects their integrity.
However, in my case, I was not able to install insulation on the 20th floor of a city apartment building, since I cannot pretend to be a monkey dangling at a dizzying height. And I didn’t want to hire a specialist either.
That's why I resorted to internal insulation. Although there are some nuances that need to be mentioned:
- for internal insulation of the bathtub, it is necessary to use materials that have hydrophobic properties and do not lose their performance properties when wet;
- it is better to choose materials with the lowest thermal conductivity coefficient so that the insulating layer is as thin as possible;
- For internal insulation, materials with great strength are required to maintain integrity during finishing and possible mechanical stress.
What can be insulated
When planning a major renovation of a bathroom, you can insulate:
- metal bath;
- ceiling and walls;
- floor base.
Let's take a closer look at how to do the above work with your own hands without the help of professionals.
Making a metal bath less noisy and warmer
Don’t rush to buy an acrylic bathtub, as a metal one can be insulated
First, I’ll tell you how to insulate a steel bathtub and how to make it less noisy.
Steel or cast iron have high thermal conductivity, so the water in such bathtubs cools faster than in acrylic counterparts. A casing made of polyurethane foam prevents the transfer of temperature from the metal to the external environment, as a result of which the thermal conductivity of metal frames is equal to the thermal conductivity of acrylic analogues.
The main stages of insulation are listed in the following diagram.
Instructions for insulation with polyurethane foam
When carrying out the planned work we will need:
- Dismantled bathtub with communications removed;
- White spirit and lint-free rags;
- Polyurethane foam and a gun for working with it.
Thermal insulation instructions are as follows:
If the bathtub has already been used for its intended purpose, disconnect the drain and overflow pipes from it;
Applying foam to pre-cleaned metal
We dismantle it from the base and turn it upside down;
Drain hole
After the thinner has completely dried, we moisten the working surface with water and apply polyurethane foam;
Hole for overflow
After about a day, the foam will dry completely and the bathtub can be installed in its original place and all previously dismantled communications can be connected to it.
At the bottom of the bath we leave recesses for brick counters
Explanations for installation:
- It is necessary to wet the metal in order to ensure better adhesion of the foam to the surface;
- There is no need to be afraid of corrosion due to moisture under the insulation layer, since the foam will absorb all the water without leaving a trace;
- Before use, shake the foam container for a minute;
- Adhered foam can be washed off within 10 minutes after application with a rag soaked in thinner, after which this will be difficult;
- In order not to stain the bathtub with foam, the sides around the perimeter and the holes for the drain/overflow should be taped with masking tape.
Materials and tools for bath insulation
As insulation we use polyurethane foam and sheet foam 2-3 cm thick. We calculate the approximate consumption of materials as follows. Find the surface area of the bathtub by treating it as a rectangular box. To do this, measure the dimensions on the inner sides. An ordinary steel bathtub 1.5 m long has internal dimensions of 1.4 x 0.55 x 0.4 m. We find the perimeter (1.4 + 0.55) x 2 = 3.9 m. Multiplying the perimeter by the height 3.9 x 0.4 = 1 .56 m 2, we get the surface area
Of course, due to the curvature, the area will be smaller, but in practice this is not so important, since polystyrene foam is sold in meter-long pieces
We calculate the approximate foam consumption from the thickness of a conventional layer of 2 cm, that is, we will need about 30 liters of foam (1.56 x 0.02/1000 = 31 dm 3). A 500 ml bottle should be sufficient.
Since we will apply the foam twice, it can be purchased in addition if necessary.
It is better to apply foam using a gun. It is not expensive, about 300 rubles, in addition, if you consider that such a gun saves foam up to 20%, its actual cost will be even lower.
Some pistols are equipped with interchangeable nozzles of various sections and shapes. If you purchased a device without attachments, you can make a homemade tip from a polyethylene or PVC tube of suitable diameter. We heat the end of the tube and flatten it, leaving a narrow gap so that the foam comes out not in a stream, but in a strip.
If insulating an iron bathtub with your own hands is not part of the overall home renovation, you can do without a gun by using ordinary (“household”) cylinders.