The end of the summer season is the right time to treat the cellar and basement so that a “mold kingdom” does not develop in them over the winter. First of all, in dry weather, take all the jars outside and dry the room, and then treat the walls and other structures with an antiseptic (this procedure must be repeated every few years).
As an antiseptic, you can use a solution of copper sulfate (100 g per 1 liter of water).
Those who like to solve problems in a radical way recommend using a sulfur smoke bomb to treat the basement. Seal all ventilation holes in the empty room, cover metal parts (if any) with polyethylene. Check that there is no one in the house (you will have to leave it for a day), and then light the fuse of the checker, go out and close the doors tightly. Upon return, thoroughly ventilate all areas.
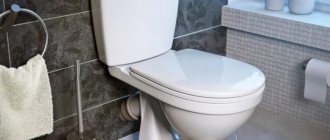
How to replace a toilet with your own hands - dismantling, installation and connection
You may need to install or replace a toilet under a variety of circumstances: moving, renovation, or unexpected breakdown. If you don’t have time to wait for a plumber or want to save money, then it’s quite possible to do it yourself.
Tools and components
Before replacing the toilet, you need to make sure that everything you need is at hand.
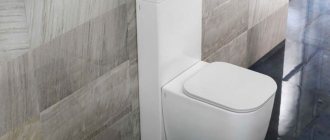
- Toilet with cistern. It is better to opt for monoblocks, in which the toilet itself is attached to the cistern. They are well adjusted to each other, there is no need to worry about leaks. A rubber seal - trapezoid - between the tank and the toilet is included in the kit. If the tank and toilet are purchased separately, then you definitely need to buy it. Bolts for screwing the toilet to the floor are also often included in the kit; if they are not available, then select fasteners of a suitable diameter, usually 10 cm long.
- Hoses and pipes. You will need a flexible hose in a metal braid of sufficient length to connect the tank to the water supply, as well as a corrugated pipe to connect the toilet to the sewer. They need to be paired with rubber gaskets and a sealing collar for the corrugated pipe. Flexible pipes allow you to slightly vary the installation location of the toilet and make this work easier, although water supply and drainage can also be done using polypropylene pipes, the connection of which we have already written about.
- thin piece of dense rubber 1-2 mm thick for the backing under the toilet to prevent cracking of the tiles on the floor.
- Tools: hammer drill with 10 mm concrete drill, wrenches, screwdriver, pliers. If the pipes are metal, then you will need a grinder or a hacksaw.
Preparation: removing the old toilet
Before work, remember to turn off the cold water supply and empty the drain tank. The water supply pipe and the sewer pipe are disconnected.
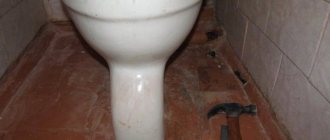
The old toilet is unscrewed from the floor. If the joint has been coated with cement or glue, you need to clean it off as much as possible with a screwdriver or chisel. If the toilet is very firmly glued to the base, you may need to carefully break it with a sledgehammer. To completely remove all the water from the toilet siphon, the device is tilted back.
If other repairs to the toilet are planned, the toilet is installed after they are completed. When replacing only this device, you still need to try to level the floor underneath it using rubber pads or cement mortar.
Installing a toilet
First you need to mark the installation location. Most toilets come with a paper template that makes this easy to do. If it doesn’t exist, then you can simply make it yourself, and drill holes along it and insert dowels into them. A thin layer of rubber is placed under the base of the toilet, the toilet itself is placed and the hex head screws are tightened. It is important not to overtighten them so that the tiles do not crack. The toilet must stand firmly, without swaying or moving. The joint between the toilet and the floor is sealed with silicone sealant to prevent water and dust from entering it.
The joints between the toilet and the sewer pipe with the corrugation are coated with sealant, then gaskets moistened with water are placed, and the pipe is attached to them. The end of the pipe can be connected to the toilet outlet pipe even before installing the device, this will facilitate further work in a cramped room. You can connect the toilet to the sewer inlet using only a cuff, if you place it close to the wall.
Toilet models come with 3 types of drain pipe placement: parallel to the floor, at an angle of 30-40 degrees, and into the floor. The latter are rare and are installed mainly in private homes. When choosing a toilet, you need to take into account what type of connection the sewer pipe is designed for, then installing the toilet will be easy.
When the toilet is securely fixed, you can install the flush tank on it. A rubber trapezoid is placed on the platform at the rear, and the tank itself is bolted together using rubber washers. First, the bolts are inserted inside the tank, and then pass through the holes in the toilet and tightened with nuts from below. The drain hole of the tank must exactly coincide with the hole in the toilet.
The internal structure of the tank differs among different models, and when assembling it, you must follow the manufacturer's instructions. Finally, using a flexible hose with nuts at the ends, water is connected from the water pipe to the tank fitting. The connections are glued with sealant or FUM tape, tightened with a wrench and checked for leaks.
After installation, it is necessary to carry out several test flushes to ensure that no water is leaking.
Advice. If you plan to replace a toilet in an old house, make sure that the water in the apartment can be shut off. Otherwise, you will have to wait for help from a plumber and turn off the water in the basement.
Main types of dry toilets
- Peat. Purchasing such a model will allow you to solve the sewage problem and obtain fertilizer for your site (if you choose a composting variety). When used, constant backfilling with fresh peat is required.
During the installation process, you will need to take care of creating an exhaust hood and drainage for pumping out decomposition products. Installation is only possible in frost-free areas. Remember that the lower the temperature, the slower the waste processing processes will occur. If the installation location is a house, then the peat option can be considered - it is inexpensive and convenient.
Chemical . When answering the question about which dry closet is best for a summer cottage in winter, you should start from the installation site. Chemical models are suitable for installation both inside the house and in an insulated external cabin.
By design, these are two tanks connected to each other. The first contains a toilet with a water pump, the second is used to accumulate waste. An indicator indicates how full the second compartment is. When it fills, you need to pump out the waste through a special valve.
If you plan to operate it in winter, check whether it is possible to fill the tanks with antifreeze to prevent the water from freezing. The main advantage of the purchase is that you will not need to spend money on installing drainage and connecting the electrical network. The flip side of the coin is that special decomposers can be expensive, especially if used frequently.
Electric - if the dry closet can be connected to a 220 V network. Waste here is divided into two categories - liquid and solid. Liquids are immediately drained into the drain, while solid waste is collected and dried.
This is an expensive type, quite difficult to install and connect. Constant power supply with electricity makes it possible to provide normal exhaust and heating - with it, such a dry closet can be installed at the dacha in winter, even in a booth on the street. The site must have a sewerage system or an equipped septic tank.
Place on the site for a country toilet
For each type of building on the site, location rules are defined. Since the structure is equipped with a cesspool, increased requirements are placed on it.
According to SanPiN standards, an outdoor bathroom must comply with the following installation rules:
Best answers
adikolol:
Before dismantling the toilet, flush the water in the usual way. then they shut off the pipe supplying the tank with water and take out the insides. If you forgot to drain, now you only have to scoop it up with a ladle.
Mother of Doom:
Ladle!
Guy from the Future Future:
soak it up with a sponge...
Alexey Lurie:
Should you drain the water from the tank or from the toilet itself? If from the tank, then simply turn off the water and press (pull) the drain. If from the toilet itself, then this is called a water seal (water plug so it doesn’t stink). You can drain the water from the water seal anywhere after dismantling the toilet. Or you don’t have to drain it.
Vladimir Petrov:
First, turn off the water in the drain tank, then drain all the water from the tank, remove the flexible line and use a jar or scoop to scoop up water. How much can you drain? Then unscrew the fastening screws, remove the toilet corrugation and completely drain the water from the toilet.
Evgeny Longinov:
If there is no separate valve for the toilet, then turn off the common one. Drain the tank, unscrew it and do what you need to do. There is no need to block the sewer - it is at an angle (pipe) and will not trample back. Just cover it with a rag so it doesn't stink.
Cat's smile:
I didn’t flush it at all - you just tilt the toilet towards the fan and the excess will drain out on its own, then carefully not tilting it too much to the side)...
Can't find a light?:
It won’t spill out anywhere—on the contrary, you’ll have to tilt it, gently holding it in your arms.
Peter of Sevastopol:
don't do what you don't know. Doing repairs for neighbors is a troublesome task
Georgy Glurjidze:
First, turn off the common valve in the apartment so that water does not flow into the toilet cistern.
Then drain the water from the tank, and only then remove the toilet.
IF YOU FORGOT TO DRAIN THE WATER FROM THE TANK -
there are only 5-10 liters of water - drain it into any sink or bucket,
You can also take a bath - the water is clean.
BETTER IN THE BATH.
PLACE IT DIRECTLY INSIDE THE BATH WITHOUT TILTING.
THEN TILT AND EVEN TURN IT UP so it all comes together.
If you forgot water in the toilet itself, there are about TWO liters of water there.
Drain in the same way.
How can we make this into a catastrophe on a universal scale?
Grandfather Au:
Entrust the matter to a specialist. Otherwise you'll drown your neighbors
ff:
When you unscrew it from the floor, tilt it towards the pipe, some of it will spill out, but you can take it out without incident.
Forester:
Turn off the water to the flush tank, drain all the water from the tank, remove the tank, you can scoop the water out of the toilet, just soak it up with a rag and squeeze it out, then remove the toilet itself, maybe a little water will remain, no problem
Stilmas:
turn to the specialists of ct-servis /services/kanalizaciya who will come, salt, remove, what needs to be trimmed, installed and use it for your health))) in such things, I try to entrust everything to those who do this professionally, change the mixer, light bulb or socket - it’s easy... but here... I wouldn’t risk it myself))) then scoop up the poop from yourself and from your neighbors, and then there’s someone to blame it on later)))
foxxxr —-:
It’s strange that no one said about communicating vessels: First, as always, turn off the water and press the flush button to empty the tank.. Then take any flexible hose, for example an old flexible hose from a tap about a meter long, so that one end can reach the bottom toilet, hung over the top of the toilet and the second reached to the bottom of the bucket (to the floor). Pour a full hose of water from the tap. Close either end with your finger so that the water does not spill out. Immerse the end not covered with your finger into the toilet; lower the end closed with your finger into the bucket to the very bottom and release your finger .The water will flow from the toilet into the bucket. When the water stops flowing, raise the end of the hose from the toilet higher so that all the water goes into the bucket.
Release
There are three forms of release:
- The vertical one was used in Stalin buildings built in the mid-20th century; The sewer outlet to the riser was located under the ceiling of the neighbors below.
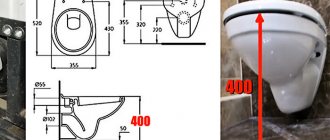
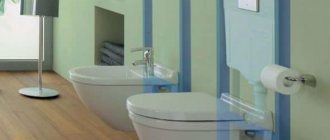
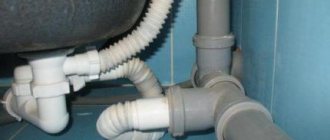
- An oblique outlet is an invariable attribute of all toilets in houses built at the end of the last century. A toilet with a horizontal outlet can also be connected to an inclined sewer socket; For this purpose, so-called corrugations are used - flexible plastic sewer pipes with sealing cuffs.
- Finally, the actual horizontal release , which came to us from Europe. This type of release has no special advantages; sealing is more difficult; however, it allows you to place the toilet closer to the sewer riser by inserting the toilet outlet directly into the tee on the riser.
Where to stop? If alteration of the sewer system is not planned, the shape of the toilet bowl outlet should correspond to the shape of the socket in your toilet. Don't forget - any adaptation of the outlet to the sewer is possible, but it will eat up some space in the toilet.
All three types of releases. Very clear
Advice: if you are designing a sewerage distribution system from scratch, primarily in a private house, a vertical outlet will be more convenient because the sewerage system will be hidden in the floor.
In addition, again, you can place the toilet close to the back wall.
Straight
Such toilets are installed in dacha conditions, where it is not always possible to supply a water supply for flushing, so they do not have an elbow with a water seal and a flush tank. The discharge is carried out vertically down into a storage tank, septic tank or cesspool.
Straight toilets can be made from standard sanitaryware or from chemically resistant plastics.
Often such products are produced assembled with a stand or even built into a cabinet.
When choosing a toilet of this type, special attention should be paid to the quality of the material, since such a toilet must withstand large changes in temperature and humidity, and in addition, a plastic toilet must be mechanically strong and resistant to the aggressive effects of ammonia released from waste products of the human body.
Exchange contacts with neighbors
If you still don’t know your neighbors in your summer cottage, correct this immediately. This is necessary not only to fit into the framework of social etiquette, but also for mutual assistance “in case something happens.” Exchange phone numbers or other contact information with your neighbors. Agree to contact each other if you suspect something is wrong with a neighboring property.
In addition to all of the above, do not forget about the flower garden: dig up and store perennial plants that require it, cover roses and other flowers. Read about what else needs to be done in the garden in our material:
We use bricks for construction
If you make a winter toilet out of brick with your own hands, it can be used at any time of the year in the presence of cold, snow, rain or, conversely, high temperatures in summer. This material for the construction of a bathroom building has the following advantages:
- This building material has high thermal insulation properties. This allows you to create
Brick toilet
maximum comfortable indoor conditions both in winter and summer. In this case, there is no need to additionally apply thermal insulation;
- The brick walls are very strong. They will not be destroyed by strong wind or other mechanical stress;
- there is no need to perform additional finishing of brick walls;
- a structure that is built of brick has a long service life. It can be used for 50 years.
In addition to these advantages, a brick toilet has significant disadvantages. First of all, making such a structure with your own hands is not so easy. You need to be able to do masonry, build a solid foundation, the quality of which determines the durability of the toilet.
Bricklaying Tools
The brick structure is stationary, which is not always relevant in the conditions of a summer cottage. Often there is a need to move it to another, more favorable place. Also, erecting brick walls and other structural elements of such a warm toilet will require much more money than using wood or metal.
A guide to assembling a spacious outdoor toilet
Preparing the toilet.
The largest water plug in terms of volume is in the toilet, and this is understandable - the largest traffic is through the toilet. In addition to the fact that this plug is the largest, it is located in the elbow of the ceramic toilet bowl, which has very low deformation properties. Simply put, when the water in the toilet bowl freezes, the bottom of the knee simply breaks off. Sometimes this happens very nicely and neatly, so that the broken part can be glued back in place, but it’s better not to take risks.
When preserving a dacha for the winter:
- flush the water from the toilet tank several times,
- Shut off the water supply to the toilet tank and flush the water from the tank.
- unscrew the lid of the tank and make sure that there is almost no water left in the tank; if you wish, you can remove the remaining water with a rag or sponge (this is not necessary if there is not much water left in the tank).
- Scoop out as much water as possible from the toilet bowl. It is best to use a special scoop for this, made with a wallpaper knife from a plastic bottle, shaped like a ladle. However, you can scoop out water using any available means.
- Remove any remaining water from the bowl with an old rag or sponge.
- To prevent odors from the sewer network from entering the house in winter, tightly plug the hole in the bowl with a rag.
- You can also throw some rags on top and even close the lid, although this is not necessary:
The tank does not fill up to full volume
Of course, if there are a couple of liters of water splashing in the tank, the flush will also be weak.
Causes
- Float valve not adjusted . It turns off the water too early.
- The tank flows through . Water simply does not have time to get into it.
- Adjust the float . In old tanks, this can be done simply by bending the brass lever; in newer tanks, the float level is adjusted with one or two plastic screws (or latches).
Solutions
Location of drain holes in the toilet
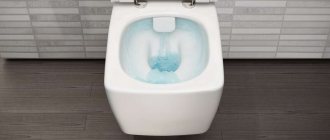
The toilet flush system can be rear and circular.
Rear drain
Water from the toilet tank flows in one stream, the entire flow passes along the back wall of the bowl.
Advantage: it is the back surface that gets more dirty; a powerful stream of water cleans it better.
Disadvantage: splashes remain on the front wall of the toilet. More often it is necessary to clean it using household chemicals.
Circular drain
Water from the tank enters the toilet through several holes around the circumference of the bowl. As a result, its entire surface is washed.
The opposite situation: the back wall is cleaned worse, but the bowl as a whole is cleared of splashes.
Which plum to choose is a matter of personal preference. Typically, sellers praise the circular drain system; In the deeply personal opinion of the author, the rear drain is still preferable.
This is how the water flows are directed in each case.
Acid solutions of different concentrations
Folk remedies are suitable if the dirt has not accumulated for years. To remove thick plaque, the old technique uses strong acids.
Oxalic acid
Oxalic acid is considered a technical agent that is used in preparing surfaces before applying enamel. The powder is used dry or diluted with water. The prepared mixture cleans the toilet from both urinary stone and rust. The product is toxic, so you cannot work with it without a respirator and hand protection.
Phosphoric acid
A component of Coca-Cola, orthophosphoric acid, can be used in apartments with plastic pipes: its action will not disrupt the operation of the sewer system. But it will cope with rust removal successfully. Exposure time is 15-20 minutes. Operating procedure:
- 100g of the substance is placed in a tank;
- 100g is poured into the toilet;
- After 15 minutes, treat the inner walls with a brush;
- Wash off the solution;
- Refill the reservoir and rinse.
Hydrochloric acid
Unlike the previous option, hydrochloric acid is not suitable for plastic pipes; the solution will damage the system.
200 g of the substance is placed in a container and the mixture is smeared inside with a brush. The toilet lid is closed after the procedure. The exposure period of the base is about 10-15 minutes. You need to rinse off the component well and ventilate the room.
Localization of the blockage
It is important to determine the location of the plug. For this purpose, check how the water leaves the washbasin or bathtub. If everything is in order, then the blockage has formed in the toilet siphon, outlet or cuff connecting it to the sewer pipe. If the water from the bathtub also does not flow well, the blockage is localized somewhere in the common pipe.
If the drains flow out of the toilet like a fountain, then the riser is clogged. Residents on the upper floors should be asked not to use the sewer and immediately call plumbers.
How to drain/replace water from the toilet in the winter?
At the dacha there are 2 ordinary shocks. In winter, the temperature in the house is outside. There is water in the tank, as well as in the toilet itself. Well, draining the tank is not a problem. How to remove water from the shock itself without dismantling it so that it doesn’t rupture when it freezes? So far it has only occurred to me to buy a car anti-freeze solution, pour it into the tank and drain it several times. But it will be a bit expensive and not environmentally friendly. How can I replace isopropanol so that it is cheap and harmless (in the sense of vapors)?
Discussion closed by moderator
We pour half a pack of salt down the toilet flush
Re: How to drain/replace water from the toilet in the winter? Pour anti-freeze for glasses. Or vodka there. If it freezes, it will be like porridge - at least it won’t burst. In theory, 5 liters should be enough (the water in the drain tank seems to be 4 liters).
Re: How to. Of course, sooner or later, vodka still ends up in the toilet. But first you still need to let it pass through yourself.
we have 7 > (there seems to be 4 liters of water in the drain tank).
Re:Elementary, Watson! The biggest enema. Device from a pharmacy. I've been using it for 8 years. After the procedure, you plug the hole with a piece of foam rubber in the shape of the hole. so it doesn't smell. The flight is normal.
blow out the line with compressed air and caulk it with tow
presented;)) a compressor for jackhammers is brought up, a high-pressure hose is thrown. grunting. the fountain of the septic tank carries the septic tank hatch into low-Earth orbit;))
and grilled pension :). Wow, you sucked :). After taking a rest, such an idea came up
