- June 5, 2020
- Tools and equipment
- Igor Nezhvinsky
The quality of the tool always plays an important role, and especially when working with wood. Wood is a soft and warm material, responsive to handwork. The market offers a wide range of machines for precise and high-quality wood processing, but to this day only the hand of a master can create a masterpiece.
The art of wood carving has a long history that has given the world unique works of art. Working with wood and creating beautiful things is easy. All you need is patience, perseverance and a good tool. Experience and knowledge will come with time.
TOOLS
All beginning carvers ask: “What tools do I need first?” First we will need a small number of tools. Instead of buying a full set of cutting supplies, purchase tools as you need them. Usually, when you buy a set, you don't save a penny, but there are always things left that you hardly need. Buy the best quality tools you can afford; good, sharp, high-carbon steel tools will last you a long time and save you money.
Set 6 pcs. BISON 18373-H6
Photo: https://pokupki.market.yandex.ru
Chisel 18373-H6 from ZUBR is a high-quality tool that is used for creating carvings, contours and recesses and chamfering wood materials. The basis of the working part is chrome vanadium steel - a heavy-duty material with a width of 6-12 mm, which allows you to sharpen the chisel as needed. The wooden handle of the chisel has an impact-resistant fixation with protection against premature destruction.
Set 6 pcs. BISON 18373-H6
Advantages:
- quality
- reliability
- convenience
- comfort
- safety
Knives
You will need a good knife - one that will be comfortable to work with. There are three types of knives - with a folding blade (pocket knife), with a fixed blade and knives with a replaceable blade. I prefer to use fixed blade knives because they are the safest. Knives also vary in blade shape and steel type.
I recommend a high-carbon steel blade with a hardness of 55 to 60 RC - it will retain its sharpness longer than a stainless or low-carbon steel blade. For finishing and creating shapes, I use a blade 4 mm thick and 3.8 to 5.1 cm long. A knife with a narrower and shorter blade is better for detail work. Some carvers prefer knives with replaceable blades because instead of sharpening the knife, you simply need to change the blade. Another advantage is this. that the handle of such a knife can be used with small chisels.
Children's room and bedroom
The surfaces of shelves, cabinets, tables, chairs are smooth and even. This does not apply to legs, arms or ornaments. As a rule, artistic cutting can be applied along the edge of the surface of a table or bedside table, but most often it consists of making additional elements.
A carved handle for a cabinet door, a carved leg for a table or a horse chair for a child will require a simple tool. For example, a set of chisels of various shapes can be used to mark a horse’s mane or make a tail.
Types of tools and wood carving for household use is a technique of personal creativity. A person does not set himself the goal of creating a masterpiece. In his opinion, a masterpiece will be a children's room in which his child will feel comfortable; a set of simple wooden toys that will develop motor skills and imagination. The bedroom will be decorated with a unique lamp made from a tree stump modified with a Bogorodsk knife or a book shelf with a light ornament.
Wood cutting for the interior of a living space is significantly different from cutting figurines, sculptures or artistic paintings. Everything here is simple and easy to use: the most affordable materials and tools. Wood carving in everyday life is the art of designating, clarifying, and decorating.
For a beginner, “household cutting” is an excellent school of skill.
Chisels
Chisels come in different widths and curvatures. Curvature is indicated by a number. The steeper the curvature, the larger the number. So, a chisel with number 3 is almost flat, and number 11 has a U-shape. Of course, a number 10 or 11 chisel cuts deeper and removes more wood than a number 3. On the other hand, a number 3 chisel is useful for finishing. The number 12 V-shaped chisel has a wide range from 24 to 90 degrees, but the most common chisels are those with an angle of 60 to 70 degrees.
When choosing a chisel, pay attention to the handle so that the tool does not roll onto the floor when you place it on the table. Otherwise, you will constantly have to repair the blade.
When choosing a chisel, also keep in mind the size and type of carving you want to make. For manual work, palm-sized chisels are more suitable, and for small parts you will need even smaller tools. Sculpted and relief carvings require the use of standard chisels with heavy handles.
Work surface and vice
Wood carving tools should be within easy reach. The desktop must have a perfectly flat, horizontally leveled surface. At least one vise must be firmly fixed to the workbench.
A metal corner, a level, clamps, and wood glue must be purchased immediately, and they should always be at hand.
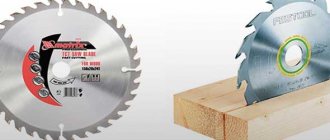
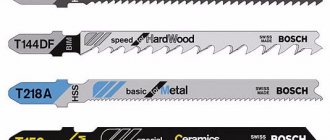
Auxiliary equipment is a sharpening machine, a hand-held circular saw with the possibility of stationary installation, a grinding machine, and an electric jigsaw. A hand jigsaw, a set of needle files and files will come in handy.
Additional equipment and tools are not associated with wood cutting, but without this you will have to spend time doing auxiliary work elsewhere.
A good master should have everything at hand.
Saws
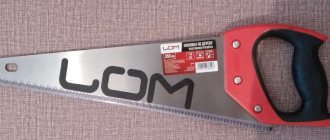
Carvers use a variety of saw types depending on the task, but the most commonly used is a bow saw (“snake”).
It includes a replaceable high carbon steel blade mounted on a steel frame with handle. A bow saw can be used to create narrow, curved lines, although a fair amount of patience is required to prevent the blade from breaking or warping. The saw is also used to remove excess wood.
Abrasives
Files and rasps remove excess wood quickly and smoothly. They differ in the nature of the surface, which can be rough, medium or relatively smooth. Always use flat, semicircular or round shaped tools with a handle. Riffler-type files and rasps have teeth on both ends and come in a variety of shapes. They are used to penetrate hard-to-reach places and remove small chips. Tools with a rough surface are used for cleaning small areas.
The flexible sanding belt is useful when working on curved surfaces. Sanding cylinders as part of a hand drill or press are indispensable for final finishing. Polishing tools differ in surface texture and the nature of the material, meeting a wide variety of needs. Use sandpaper only after finishing the job, otherwise abrasive particles will get stuck in the wood and your tools will quickly become dull.
Household ornament and “kitchen” cutting
The kitchen is the most popular place in the house. The whole family often gathers here, friends come here, and the interior of the kitchen should always be at its best. A kitchen tool is important for a good housewife, and its quality should be better than others.
To decorate a shelf, rack or cutting board, there is no need to perform figured cutting. Household ornaments should be beautiful, simple and easy to clean quickly. Here it is necessary and sufficient to have a simple set of wood carving tools.
As a rule, a set of chisels will be enough to give a unique look to any wooden item for use in the kitchen. Any surface in the kitchen must be clean. From this point of view, it is more convenient to use an electric tool for wood carving - this will allow you to get straight and smooth lines, an easily cleaned ornament and avoid grooves and recesses in which dirt can accumulate.
The choice between manual work and the use of a machine is up to the master, but the cleanliness and “cleanability” of the product should be in the foreground.
Electrical tools
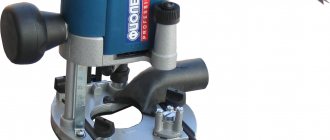
When you start making workpieces yourself, you will need a band saw. A huge selection of blades will allow you to make the most difficult cuts with ease, far surpassing anything that can be done with a bow saw. An openwork saw will help to process the inner surface, but not every tree can handle it. Belt and disc sanders are good for both finishing and removing bark. Many carvers use rotary tools with a wide range of heads to machine parts such as feathers. There are hand-held grinders and small high-speed cutters. There are also at least four types of electric chisels with a reciprocating motion, allowing arthritic people and people with tennis elbow to enjoy carving.
What kind of cutters will be needed for the job?
There are about 15 types of cutters on a standard machine. Each of them is designed to perform a specific turning technique. You cannot use an unsuitable cutter that performs identical functions. This may give effective results, but will lead to equipment failure.
The cutters are the most important part of the mechanim. In manual and automated machines, they are replaced by a specialist with each stroke. The only exceptions are specialized options that can be configured so that the cutter is automatically changed to the required one a step or two ahead. This feature saves a lot of time. Automatic lathes change the cutter automatically, that is, without human intervention. This is very convenient, since there is no risk of injury, especially when testing functionality, and it also saves significant time and resources.
Specialized machines are equipped with several cutters, since they work with a specific shape and type of part. But universal ones are equipped with dozens of cutters with different sizes. In the largest versions there can be 15 varieties, all of different sizes. Kinds:
- straight cutter;
- thrust mechanism;
- bent through cutter;
- cut-off not passable;
- groove cutter;
- boring mechanism;
- countersink;
- drill;
- cutter for carving;
- scan;
- shaped option;
- tap;
- knurling.
Please note that the knurling cutters have a directional arrow indicating how the tooling moves when the workpiece rotates.
Strengthening devices
If you are holding a workpiece in a vise, select a tool that will not leave marks on the workpiece (or insert some material between the workpiece and the vise). I often use a 6mm capercaillie and a wing nut to secure the workpiece to the workbench. If you are a beginner, you can wear a steel wire glove to protect your hand.
I have an old friend, also a carver, who wears a heavy leather apron when working toward the chest. When finishing or dyeing a product, you can use an awl or a paint stick.
SUPPORT
In order for the workpiece to hold better when you cut wood with a snake saw, I advise you to use a support - an ordinary board that supports the wood during sawing. Simply attach it to a workbench or table and hold the saw vertically in the V-section as you cut the workpiece.
BENCH VICE
If you are planning to do relief carving, I suggest you also make a simple bench vise. One clamp holds the vise at the bottom in a stationary position, while the angle formed by the other two at the top prevents your workpiece or workpiece from slipping out of your hands while you work. Place a bench vise on your work surface.
The beginning of time
The woodworking master begins with a wooden block, which for an unexpected and incomprehensible reason attracted his attention, and a sharp kitchen knife. The situations can be very different:
- needed a spice rack in the kitchen;
- the door fell off the closet in the bedroom;
- you need to make a rack for children's toys;
- decorate a jewelry box with an ornament;
- you need to put a lock on the front door, etc.
Such tasks are not wood carving, but you will have to cut, drill, saw, sand, etc. If the result is in demand and it has captured the attention of the beginner, then a new star lights up in the sky, and the young master begins his journey of transforming wood into unique and practical products.
Instrument care
You should periodically inspect your tools and wipe them with an oily cloth to prevent them from rusting. Store tools in individual compartments or wrapped in cloth to protect them and reduce sharpening time.
TOOL SHARPENING
Make sure your tools are always sharp and stop working from time to time to sharpen them. All the carvers I know have developed their own dressing system; everyone found their own procedure that was convenient for them personally. Some use whetstones with oil, others with water, and others use electrical devices.
The first step is to sharpen the blade using a fine-grained abrasive such as diamond chips or sandpaper. First, one side is processed until burrs appear on the metal, then the other. At the next stage of editing, the surface irregularities that arose initially are eliminated. Finally, you should polish the blade with a special compound to a mirror shine, reducing friction between the blade and the wood.
How can you tell if a blade is sharp enough? Take a piece of scrap wood and run a knife across the grain. If a smooth mark remains, then the blade is sharp. If the fibers stick out in different directions and the mark is rough, then you need to sharpen the blade more.
Basic techniques for working with the machine
Techniques for working with a lathe are required. User safety directly depends on this. Important:
- check the serviceability of the mechanism before starting work, including the fastening of parts and shields;
- Lubricate the drive shaft and screws every time you use them;
- check the filling level;
- turn on at idle speed - check the lever, trigger, caliper, speed and gears;
- monitor the guide and bed;
- Avoid abrupt switching to reverse or switching the gearbox to another mode.
Be sure to clean the mechanism upon completion of work. Remove any remaining shavings and wipe with a cloth soaked in kerosene.
