Lining is a type of lumber that is similar to edged wood. The only difference is the presence of longitudinal grooves, which ensure adhesion of the elements without the formation of gaps. Finishing from lining creates a microclimate in the room suitable for relaxation, while its arrangement does not require experience in finishing, as when working with wood. To obtain the expected result, it is enough to follow the step-by-step instructions and select materials in accordance with accepted rules.
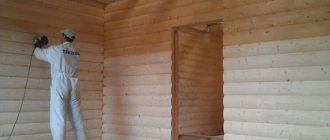
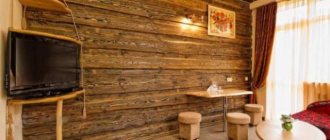
Cladding inside the house
Lining is a leader among finishing materials.
It is used both inside and outside the house, only with different treatments (impregnations and paints are used for external or internal work). It comes in different types. It's not just about different types of wood or different board widths. There are also different profiles: smooth, wavy, imitating timber or log house. There are several options in the photo below. The most popular types of lining for interior decoration of a wooden house inside
The interior decoration of a wooden house can also be made from lining with a non-standard profile
To decorate the inside of the house, use thin lining: 1.5-2 cm is enough. It costs less and will perform its functions. The slats can be placed horizontally, vertically, or at an angle. From combinations of all these directions you can get amazingly beautiful panels, but this is a labor-intensive task.
When nailing the sheathing or planks, you need to remember about the shrinkage of the log house and the ability of the wood to swell and shrink. Near the floor and ceiling, do not nail the trim and sheathing tightly; leave 2-4 cm to compensate for these expansions.
Both the walls and the ceiling are finished with lining. In both cases it looks more than decent, and such finishing is relatively inexpensive. It’s cheaper (and easier to do) to just cover it with plywood and stick wallpaper. This, by the way, is a popular option for decorating a country house inside an economy class home. With a sufficient level of execution, this method can be used to decorate premises not only in the dacha version. The only objection is the glue that is used to make plywood. But if you take it in emission class I (approved for use in children's institutions), then probably nothing terrible will happen.
Mounting methods
Previously, they were not particularly worried and nailed the lining into the face (into the front surface) right through. At best, they used nails without heads or finishing nails (their heads are very small). Sometimes the caps were covered with wood putty and sanded, sometimes the screw holes were covered with pins. This is for the most fastidious and demanding of quality finishes.
Ways to fasten the lining
Today, even this method is considered not the most aesthetic: the traces can still be seen. To make sure nothing is visible, secret methods are used:
- nails or screws are driven at an angle into a tenon or groove;
- using clamps (clasps).
Both of these methods require patience and accuracy: thin, small nails are used, and they must be nailed in such a way as not to damage the front surface. To make it easier, you can hit not with nails, but with staples from a construction stapler. Staples are taken with a narrow back and long legs, made of stainless steel with sharpening. Although there are models of staplers that “shoot” nails with a very small head. For fastening the lining - just right. Self-tapping screws are also used. A comparison of the two methods is made in the video.
There is one caveat. If you bought the lining that was not chamber dried (its humidity is 7-8%), it will gradually dry out. Gaps will appear between the planks and you will either have to put up with them or re-nail all the planks. Sometimes two or three times. There is no way to avoid this. You can only choose a profile in which the cracks will be invisible (the “Softline” and “Standard” profiles in the figure in the previous section). In this regard, you need to think carefully about how best to secure the lining for the first time: it will have to be removed. Therefore, it is advisable to make it so that it is not difficult and so that it does not collapse. Here everyone decides for themselves: for some it is more convenient to work with self-tapping screws, for others with nails. Both methods are not ideal (it is difficult to pull out nails, and you need to drill a hole under the head of the screw), but both are acceptable.
Sometimes it becomes necessary to connect the lining to a wall made of logs. Difficulty may arise due to the fact that the wall has a non-linear shape. You can outline it using a small piece of lining, to which a simple pencil is attached. Having placed the plank and moving it along the wall with a piece of clapboard with a pencil, transfer the shape of the log onto the plank. By carefully cutting along the intended line, you can achieve an almost perfect match.
You might be interested in reading about how to lay laminate flooring.
Thinking through the design
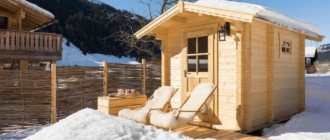
The first room of the sauna must be warm, which eliminates drafts. And the main question related to this is whether it is necessary to make a window in the waiting room? On the one hand, it can become a source of draft, but on the other hand, it can serve as natural ventilation and an additional source of light.
Equipping a dressing room with windows imposes a number of requirements:
- The absence of gaps, which can be achieved by installing double-glazed windows or double frames, in the case of wooden windows.
- Choosing triple or, in extreme cases, double glazing to minimize heat loss through the glass.
How to sheathe correctly
In articles about insulating a bathhouse, we describe in detail the layers of the “pie” from which it is composed. Go through the materials in this section, everything is listed there in groups - ceilings, walls, the latter, in turn, according to material: brick, wood, block.
Here we will remember the basics and give more specifics on the question “how to properly line a steam room in a bathhouse with clapboard.”
Steam rooms are often insulated using specialized heat insulators, for example, special mineral wool for baths and saunas, which contains few binders that can evaporate when heated and harm human health.
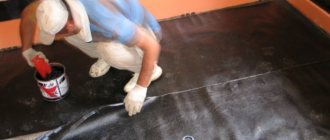
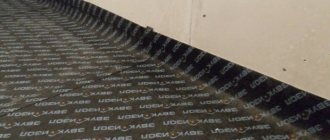
In addition to heat insulators, foil is also popular. The “pie” diagram is as follows:
- first of all, a steam and waterproofing membrane is attached to the walls;
- then a sheathing is erected over it;
- then a heat insulator is inserted into its gaps;
- everything is covered with vapor and waterproofing, which can be used as foil or foil material - paper or polyethylene foam;
- a new layer of sheathing is packed to form a ventilation gap;
- The clapboard is attached to the last sheathing.
Now we will not give arguments for and against foil; enough has been written about this too. Let's just say that instead, you can cover the heat insulator with a membrane film.
And now the details of working with the lining.
There are two common ways to attach its slats - vertically or horizontally. In the first case, the lathing on the insulation is made in the form of horizontal strips, in the second - vertical ones.
The pitch of such sheathing is 50-60 cm vertically (depending on the width of the insulation minus a couple of cm, so that it holds on itself and does not fall out), horizontally - optional, but in general the range for both is 40-80 cm.
The lining is fastened directly to the sheathing beams, and since no one wants to see nails on the front side of the lining for both aesthetic and practical reasons (they will rust), it is fastened through the groove in any of the following ways:
- for small finishing nails or screws;
- on clamps;
- for staples up to 40 mm long.
Here's a video showing how to fix the paneling using staples and a pneumatic gun. Very fast and very high quality work:
The advantages and disadvantages of vertical fastening are as follows: if you have a Russian bathhouse with high humidity, each of the lamellas is heated and moistened unevenly along its entire length, this is not good for the wood and leads to its damage. In addition, the connections are unprotected if water is directly spilled on the walls - it flows into the grooves.
But there is no high humidity in the sauna (no more than 15%), so a vertical set of linings is quite acceptable. It is usually done for aesthetic reasons - to make the steam room look more “slender” - illusoryly stretched in height.
A horizontal set of lining can be called more traditional in every sense - and the original railway lining was fastened this way, and it looks like laying a log or beam, in general, it’s more common this way. But there are also advantages: each lamella is located in its own temperature “zone” and heats up evenly.
IMPORTANT! To properly sheathe a steam room in a bathhouse, turn the lining on the walls with the groove down and the tenon up. This will eliminate problems with water flowing into the grooves. You can sheathe the steam room and sauna and Russian bath horizontally
Horizontally you can sheathe a steam room, a sauna, and a Russian bath.
ADVICE! When installing the lining, do not forget to use a level, especially for grade B, but grade A may also have problems. Check the evenness every 5 lamellas; if there is any misalignment, compensate for it by pressing or loosening the tongue-and-groove connection.
Kinds
The classic version of lining is considered to be a wooden board, but thanks to modern production technologies, recently you can also find products made from other materials on sale. They may differ in design, but they are all united by a single installation principle and shape. Depending on the type of raw materials used in creation, lining comes in several types.
Wooden
This material is highly environmentally friendly, creates a breathable coating on the surface of the walls and can be painted or varnished.
Since wood comes in different classes, wooden lining is divided into 4 types.
- Extra class - the board is of excellent quality, has no defects, is reliable in operation, but is expensive. As a rule, it is used not only for internal but also external wall cladding. The thickness of this lining allows the material to be used for frame construction; its design is characterized by beautiful execution.
- “A” class – such boards may have small knots, but they are in no way inferior in quality to extra class products.
- “B” class is a fairly durable finishing material, but various types of defects are noticeable on it. Since the product is highly durable, it is used for cladding walls in bathhouses or on balconies.
- “C” class is considered the cheapest board; it is often chosen for finishing non-residential premises and inside outbuildings.
A wooden board may differ in its shape, so a distinction is made between eurolining and regular lining. Eurolining has the closest possible appearance to natural wood. Such a log-like board looks original in the interior, which can be used to decorate the inside of a wooden house. No less popular are options for finishing rooms with timber-shaped materials. As for ordinary lining, it has standard sizes and shapes.
Plastic
Such decorative panels are best suited for covering ceilings, since the material is too fragile and cannot withstand large mechanical loads on the walls. Dies come in a variety of colors and textures, so they fit harmoniously into any style of room, filling the space with a touch of modernity.
It is undesirable to use this type of material for wall cladding in the kitchen or bathroom, since high humidity in these rooms will reduce the performance characteristics of the finish.
Plastic lining has numerous varieties and differs not only in design, but also in color and installation method. Boards with imitation marble, granite and natural wood are extremely popular. The thickness of the plastic lining is significant, the strength is high, so it is also installed outside the premises.
MDF
Externally, the material is very similar to natural wood, is quickly installed and comes in a chic choice of colors. Ideal for decorative finishing of ceilings and walls. The only drawback of such a board is considered to be instability to moisture: when wet, it begins to deform and delaminate.
Lining can be produced not only in different shapes and sizes, but also differ in the presence or absence of chamfers.
Depending on this, the material is divided into the following types.
- Regular – characterized by a flat surface. On the front side of the board there is an additional chamfer, thanks to which, upon completion of installation work, seams are created on the surface. As a rule, the chamfer is angular and rounded.
- “Calm” - in this lining there is no chamfer, so the joints are invisible when covering. The material perfectly imitates walls made of timber and is produced in a thickness of no more than 25 mm.
- “Landhouse” is one of the most expensive types of lining, since special processing technologies are used for its production, and the front side of the board is milled. As a result, wood patterns in the form of knots and carvings are formed on the outside of the board.
- “Blockhouse” is a profile that allows you to imitate timber cladding. Since the board has a rounded front part, after its assembly the wall will look as if the house was built from real logs.
Tips and tricks
- It should be taken into account that a bathhouse built from a log house has the peculiarity of settling during the first one and a half to two years. Therefore, it is better to do the cladding after this period, otherwise it may become deformed. And the cladding itself will interfere with the normal shrinkage of the log house.
- To attach the shelves, install strong additional bars under the sheathing where they are attached to the wall.
- All internal wooden structural elements must be dry and thoroughly treated with an appropriate antiseptic.
- And the last thing you should definitely pay attention to. Do not forget to lay electrical wiring with heat-resistant insulation under the wall cladding of the steam room. Of course, if it is provided.
- The above method of insulating a bathhouse is also suitable for thermal insulation of brick walls. The difference can only be in the materials used and their main characteristics. But this will be in subsequent articles.
- Below are the main sketches of the completed work:
Go to the main article-contents: interior decoration of the bathhouse.
Return to content
More articles on the topic of how to build a sauna with your own hands:
- How to attach drywall to a log wall
- How to make a ceiling in a bathhouse
- DIY bath floor
- How to make a door for a bathhouse
Dear friends! If it’s not difficult, share it on these social networks with your friends. Thank you!
Which fixation option should I choose?
It is important to decide on the method of fixing the board materials. You can sheathe a wall using several methods: Through view of fasteners
This is the simplest solution that does not require much effort. The idea is that the screws are screwed directly through the front side. This method involves applying markings so that the fastening points are located on the same line. In addition, holes are drilled on the carriage board in advance, which will prevent the wood from deteriorating and cracking. When screwing in the screws, make sure that their heads are completely recessed into the wood. This can be easily achieved if you pre-drill out a place for the head with a large-caliber drill. The resulting holes are masked with special eraser plugs or filled with putty. Among the disadvantages, this method significantly disrupts the external aesthetic appeal of the coating.
Through view of fasteners. This is the simplest solution that does not require much effort. The idea is that the screws are screwed directly through the front side. This method involves applying markings so that the fastening points are located on the same line. In addition, holes are drilled on the carriage board in advance, which will prevent the wood from deteriorating and cracking. When screwing in the screws, make sure that their heads are completely recessed into the wood. This can be easily achieved if you pre-drill out a place for the head with a large-caliber drill. The resulting holes are masked with special eraser plugs or filled with putty. Among the disadvantages, this method significantly disrupts the external aesthetic appeal of the coating.
The lining can be attached to the wall using decorative nails. Their hats were initially decorated to match the color of the material.
- Hidden nails without heads would be an excellent option. The peculiarity is that such nails can only be driven at an angle of 80 degrees. This will make it possible to hide those areas that have been violated.
- If you have a professional stapler on your farm, you can use staples for fastening.
The method of attaching the lining to the wall is selected individually, based on the specific situation. But we note that recently it is the clamps that have become the most popular.
Necessary tools and accessories
- Electric drill with a set of wood drills.
- Electric jigsaw.
- Wood saw.
- Set of wood rasps.
- Hammer.
- Hatchet.
- Mallet.
- Furniture stapler with a set of staples.
- A device for sawing bars at an angle.
- Level.
- Roulette.
- Yardstick.
- Carpenter's square.
- A ruler for drawing the outline of a log house.
- Plumb.
- Rope.
- Metal clamps for lining.
- Pencil.
Additional materials on the tool can be found here and here.
Return to content
Carrying out installation
The process of installing wooden panels does not require any skills; therefore, finishing is not a difficult task for a beginner. However, there are still a number of specific requirements that must be met. See also the article finishing the veranda with clapboard.
For example, it is worth using lining with the required level of humidity; it is advisable that the products pass through an autoclave. In principle, raw products can be purchased at the end of spring, after drying them in the summer, installation can begin in August.
Wall cladding tools
- The lining itself, which can be made of various types of wood. Most often, aspen is used to cover the walls of a room. Provided that a sharp jump in temperature is not planned in the room;
- Special bars that are necessary for installing the sheathing. Their fastening is necessary in increments of 40 or 50 centimeters;
- To fix the structure, self-tapping screws or dowels are needed, everything depends directly on the material of which the walls are made;
- To attach the planks to the base, clamps are needed. From the video you can see that more nails and staples will be required;
- Stapler, small hammer, it is more convenient for the final stage;
- The last step in installing the lining is to apply the finishing layer to the finished structure; for this purpose you will need any paint or varnish. You should choose a coating depending on what conditions are planned in this room;
- Wood requires a special high-quality primer.
Installation of sheathing
Often, wood panels can be attached directly to the old wall surface, provided that the surface is level and at the same time strong and durable.
However, if you are wondering how to cover a log house with clapboard, it is better to do the preliminary installation of the sheathing.
It’s not difficult to create a sheathing; the most important thing is to observe some points and nuances.
- The load-bearing element of the sheathing has standardized dimensions; they should not exceed 20x40mm. If installation of thermal insulation is necessary, its thickness should be taken into account when installing the sheathing. As for the length of the racks, it depends directly on the dimensions of the room;
- The sheathing should be fastened depending on the material from which the walls are made. For a wooden base you will need to use self-tapping screws, while for stone or brick only dowels are suitable. A step of more than 50 centimeters is not rational and dangerous;
- The racks are located perpendicular to the panels, and the elements of the future coating themselves can be installed vertically, horizontally, or even diagonally at will;
- It is worth noting that all components of the frame must lie in the same plane; to obtain an even result, you must use a level. Pre-prepared wooden wedges can help with leveling.
Panel installation
If you are going to think about the question of how to cover walls with clapboard, you should decide on the choice of installation method. In addition, you should cut the required number of boards, which requires measuring all the original surfaces. This will allow you to use the material rationally.
Fixing the panels to the sheathing can be done in the following three ways:
- Use of clamps. This is the most optimal option, since there is no need to drive any elements into the wooden paneling. As a result, the cladding is very neat and quite reliable;
- Using a stapler and staples. This fixation is called hidden, since the fasteners are installed at an angle of 45 degrees. The installation location for the brackets is the tenon of each panel. Each successive board will fit into the previous one without problems;
- Use of nails. This fastening is also considered secret, and its principle is similar to the use of staples. The difference is in the use of fasteners; in addition, the use of a hammer is important, which allows you to sink the cap.
The photo shows how to cover a window opening with clapboard.
Further processing
To complete the installation of the lining, you should apply a finishing layer, this can be varnish, paint, special impregnation or glaze. It is common to use paints that usually strip the wood of all its natural properties.
In principle, you can also find coatings on the market that allow air to pass through, but their color range obscures the natural pattern. When planning to solve the problem of how to properly cover walls with clapboard, you need to study in advance all the properties of paint and varnish coatings.
The cost of installing the lining
Installing wooden lining is a labor-intensive process, consisting of many operations: preparing the walls, installing the sheathing, attaching the material to the walls and final impregnation.
If you have difficulty installing it yourself, it is recommended to contact a specialist. The approximate cost of one square meter varies from 800 rubles.
The detailed cost of the work looks like this:
- Assembly and preparation of the sheathing costs 180 rubles.
- Wind protection device 150 rubles.
- Coating structural elements with an antiseptic costs 30 rubles.
- Installation 400 rubles.
- Impregnation with varnish or paint 70 rubles.
For a more accurate answer to the question about the cost of work, you should contact representatives of the construction company.
What wooden material to use for interior decoration
There are two options for lining:
- Standard. A distinctive feature of the material is the presence of a groove, which is formed when installing adjacent strips. Such a groove is necessary to hide the place where the elements join. If it is absent, the joint will look like an ordinary gap, which does not look beautiful enough. Standard lining is used for finishing walls indoors, except for lining entrance doors. When assembling all types of material with your own hands, the ridge of one part is inserted into the groove of the adjacent one, which forms a flat, solid surface.
- "Block House" lining. Used for cladding external surfaces. It has improved characteristics achieved by treating wood with special compounds. Visually, this material can be distinguished from standard lining by its shape, which imitates a rounded log or timber.
Wooden lining is classified as:
- Class "A". Such material may have captive knots on the surface, no more than one per linear meter and a half, up to two resin spots on the lath and no more than two small cracks. Quite high quality, such brick lining can be used for covering walls in any room.
- Class "B". For this quality, no more than four knots per one and a half meters of slats, up to two resin pockets and the same number of blind cracks are allowed. This material should not be used in residential areas.
- Class "C". This type of lining is of the lowest quality and is used for cladding sheds, but not for residential premises. In this class you can find quite a lot of defective slats.
Class "Extra". This is a lining without knots or other defects. This is an ideal lining option that is best suited for finishing the walls of residential premises.
When choosing the type of material, the type of wood is also taken into account. Its performance characteristics depend on this indicator.
For example:
- Linden has good healing qualities, which allows it to be used for finishing rooms such as a bathhouse (see Lining for a bathhouse made of linden with an aromatherapy effect) or a sauna.
- Oak is the best option for exterior cladding of a building; it has a wide range of colors: from light yellow to red-brown. However, its main feature is its high strength and dimensional stability.
- Larch has a fairly high resistance to decay and has a very pronounced texture. However, due to the complexity of processing, its cost increases greatly.
- Cedar, which has noble tones, is also not afraid of rotting.
- Merbau is an option with an exotic texture. Advantages of the material:
- moisture resistance;
- temperature fluctuations;
- ultraviolet radiation.
When purchasing lining for interior work, you should take into account that the surfaces are not exposed to the negative effects of precipitation or ultraviolet rays, which allows the use of rocks of lower strength and better appearance.
- Maple has a wide range of colors and a fairly noble texture. It has high strength and can be easily sanded. The material is almost without flaws.
- Ash is used for interior decoration. The small vessels contained on its surface form a unique ornament when cut.
- Walnut is quite hard, but easy to process. The color scheme of the material and structure depend on the region of growth. Does not deform during use.
- Cherry has an easily recognizable noble shade. Its wood darkens over time.
Nuances to consider
When purchasing wooden panels, attention should be paid to the following points:
- Storage conditions (how to store lining correctly?).
- The quality of the wood, the panels themselves, grooves, ridges, decorative sides.
- Humidity, drying method.
- Recommended mounting method.
- The shelf life, which is stamped on the panel packaging label.
- Availability of information describing the qualities, features, and technical characteristics of the cladding.
- Acceptable paints and varnishes or other protective materials in accordance with the type of wood, profile shape, and other characteristics of the material.
Attention
Even with the most accurate calculations of the amount of material, you need to purchase at least 10-15% of the stock. This is done to replace damaged, cracked, or damaged panels during transportation, due to the impossibility of accurately calculating the area to be covered due to the tongue-and-groove method of fastening.
How to sheathe it yourself?
In order to properly begin attaching natural types of panels, they first need to acclimatize to the room. To do this, the lining is brought inside and left alone for at least two days. You cannot start installation right away, as there is a high probability of warping of the cladding elements. Deformation of the structure will occur if the walls are finished at sub-zero temperatures and high humidity.
Installation of the lining should be done only after the sheathing is fully installed. If the lining is planned to be installed horizontally, the first element must be mounted at the bottom, with the tenon facing up. When the planks are positioned vertically, installation begins from the corner farthest from the entrance to the room.
The first board must be absolutely level. It is correct to take into account both the horizontal and vertical position of the level. Even with a slight deviation of the first panel, subsequent deviations will be quite noticeable. Subsequent lining strips must first be installed in the groove of the previous ones, and then fixed using available means.
Despite the apparent difficulties, it is possible to sheathe walls with clapboard together with insulation and install the frame in a fairly short time. Attaching decorative parts will require special care. Corners and baseboards must be installed with special fasteners or staplers. The wooden lining is additionally impregnated with stain and varnished. Other types of lining do not require additional processing.
The work looks a little different when using aluminum panels. Conventional technology involves installing aluminum profiles from a set of simple modules. Installation is possible using small keys, which are usually used to assemble modern parts of furniture upholstered with plywood.
Despite the elementary nature, the developers strive for maximum variety and original design. The modules can be laid in combination with brickwork. In this case, installation of modules is possible both horizontally and vertically. The cladding is done with loose panels, or they can be nailed in continuous rows. Aluminum panels can be fixed to any height. It is very convenient to sheathe with such a ready-made designer. This technology is accessible even to beginners.
Features of modern baths
However, we were talking exclusively about Russian baths that have survived to this day, but not about modern buildings. Today, when building baths, builders solve the problem of reducing the consumption of thermal energy, as well as reducing the heating time to 30-60 minutes.
For these purposes, the mass of the finishing layer of wood in the bathhouse premises is reduced. Typically, the bathhouse is lined with clapboard about 1 centimeter thick, and thermal insulation material with a foil layer is attached under it.
The advantage of this design is fast heating and minimal fuel consumption, but at the same time the rooms cool down faster, fuel needs to be added regularly, and therefore the differences with a real Russian bath are significant.
The walls of such a bath do not accumulate steam, and therefore expensive stoves or steam generator units should be used to create it. During bath procedures, steam must be supplied regularly, which requires the constant presence of a bathhouse attendant or one of the visitors next to the unit.
Facade
In order to finish the facade in a horizontal direction, it is recommended to carry out work from the bottom up. The first plank is mounted with the tenon down and attached to the sheathing. The second panel is installed so that its tongue fits into the groove of the first, after which it should also be secured to the sheathing. All subsequent panels are mounted in a similar manner.
Fixing the lining onto the sheathing can be done using self-tapping screws, nails, construction staplers, as well as specialized fasteners. It wouldn’t hurt if the fasteners passed through the groove strip when installing the board, then it would be invisible. When installing each panel, it is necessary to strictly control the accuracy of its location - it must stand parallel to other boards. Distortions and displacements are unacceptable
It is also important that the boards are located strictly in the same plane, that is, they should not be higher or lower relative to each other
For door and window openings, wall joints, specialized skirting boards, profile corners and strips are used. The second option is to install the lining strips perpendicular to the base of the facade. The boards are installed and fixed in a vertical position. For wall joints, two planks are used, which are placed at the desired angle. Door and window openings are designed in a similar way (one plank covers the slope, the second bases the platband).
In some cases, it is necessary to use a double frame for eurolining. For this, the bars are nailed in two layers, the top one being made perpendicular to the bottom one. Reinforcement of the frame is required on large facades, where the own weight of the cladding is large and the load on the supporting structure is increased.
It is better to varnish and paint the lining after completion of installation, and treatment with protective agents both inside and outside should be carried out before installation.
When covering the facade, lining can be used in conjunction with other materials. This will give the exterior of the house a more expressive look. You can also use lining of various colors.
What can be trimmed with clapboard?
There is no classic single finishing method. Due to the versatility of wooden boards, they are used both for decorating walls or ceilings, and for decorative purposes.
Ceiling
If the usual painted or suspended ceiling seems boring to you, try panels! Natural red tones will make a lining room more comfortable, dark ones will create an accent and “ground” the ceiling a little, light ones will add air.
This ceiling is used in the living room, kitchen, and hallway. But in the bathroom it is better to abandon this decision - high humidity will significantly reduce the service life of wooden panels.
Lining on the walls
Some people believe that decorating walls with wood is only suitable for private houses and cottages. On the one hand, the closer to nature, the more natural the wooden lining will look. Moreover, natural styles are often used in the design of dachas and country houses - country, chalet, Provence. In them the tree looks harmonious.
On the other hand, no one forbids adding country charm to the apartment. For urban conditions, painted lining is best suited. With its help you will create a unique, cozy interior.
In the photo there is a yellow lining in the bedroom behind the headboard
Window slopes
Plastic slopes reduce the cost of finishing and are not suitable for all interiors, so inside apartments and houses they often resort to finishing windows with lamellas.
The panels are secured in two ways: on the lathing (the same option is used for walls and ceilings), or with polyurethane foam.
Wardrobe made of lining
In apartments, the interior with lining on the walls can most often be seen on the balcony
This same room is a storage room for many people, so it is important to organize storage space here. In order not to ruin the overall appearance, the cabinet is also made of planks
This is a simple, inexpensive and functional solution.
Another place for such a structure is the attic. You don't have to order special furniture for sloping ceilings - create a frame made of wood and use it as a built-in wardrobe.
The photo shows a lining cabinet with louvered doors.
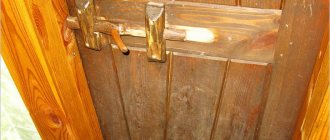
Doors
Does your front door not fit into your interior or is it already outdated? Don’t rush to order a new one: paint it on the outside and cover it with clapboard on the inside. Thanks to the wood, the entrance area will become more comfortable, and by painting it the same color as the walls you can achieve a dissolving effect. Wood also acts as a soundproofing material, so the apartment will be much quieter.
Boards are laid not only horizontally or vertically - there are many ways to lay them out. An original panel on the door can play the role of decor.
As an independent decor
Cladding boards can act not only as a finishing material, but also as a decorative element.
- One way to use it is to create a dramatic accent wall. You can lay out a fancy pattern, paint the panels in bright colors, or do both.
- The second way is to create a panel. Save money on art for your home: make it yourself. All you need to do is think through the layout of the boards and connect them together.
- Method No. 3 - false beams. This decor is used if it is necessary to make the interior more rough and rustic.
In the photo there is lining on an accent wall with a decorative fireplace