Types of horizontal bars
A horizontal bar in a yard or home is a sports facility where you can perform various exercises. It looks like a large letter "P" and consists of two vertical posts and a horizontal one on top. Horizontal bars are made taller than a person’s height, otherwise you can’t exercise on them. They can be independent or combined with other equipment: wall bars, uneven bars, or a press bench. The second option allows you to make a more functional design on which you can practice professionally.
Horizontal bars are divided into:
- Sliding . These are durable and reliable structures, they are made by analogy with retractable pipes. They are attached to the wall or doorway using bolts.
- Spacers . Fixation occurs due to springs; when installing, it is important to strictly follow the instructions, otherwise the projectile may fold during exercise. Horizontal bars of this type are removable and can be easily moved to another place.
It is not recommended to make a spacer horizontal bar with your own hands. This requires great professionalism and experience, otherwise there is a risk of injury.
Horizontal bar on the wall Source satu.kz
Location
Before you figure out how to make a horizontal bar at your dacha, you should choose the most suitable one. The structure can be installed outdoors and inside the house. When installing a horizontal bar on the street, you should first place all the buildings, flower beds and vegetable garden on the site, and then place the structure where it will definitely not disturb anyone.
It cannot be placed:
- On the slopes. This is unsafe; during exercise, the horizontal bar may tilt or fall.
- In the lowlands. In spring and autumn, water will stagnate in them, which will complicate classes.
- In places with high groundwater levels. After the snow melts, the horizontal bar may become askew.
- In the sun. A metal horizontal bar will get very hot on hot days.
- Too close to walls or beds. There should be at least 50-60 cm of free space around the structure.
- If the apparatus is placed for children, it must be placed away from the water so that children cannot fall if they swing. It is best to place the apparatus in a visible place so that children can exercise under supervision.
An easier installation option is to hang the crossbar between two trees. In this case, it is enough to select strong trees located close to each other and screw the beam tightly.
The simplest option Source yandex.net
See also: Catalog of companies that specialize in the design and installation of metal structures (canopies, greenhouses, etc.)
For training at home, there are several types of homemade horizontal bars on the wall. They differ in type of structure and location:
- In a doorway or in a narrow corridor . The simplest option. A strong crossbar is attached in the indicated places. This is the cheapest and most compact option, but it has serious drawbacks: most often they are designed for weights up to 130-150 kg and are not suitable for performing some exercises.
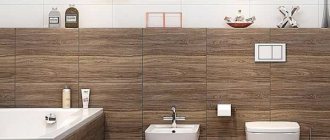
- On the wall . This is a more functional model that can do more exercises. This design is considered more reliable; most often it is combined with additional crossbars and handles.
- On the ceiling . This option is suitable for houses with thin walls and fairly high ceilings. The design of the projectile is similar to a wall-mounted one.
- In the corner . The shell is hung in the corner between two walls. This saves space and
- On the floor . This is a full-fledged professional sports equipment; additional structures are often installed on it, for example, holders for a barbell, bench or parallel bars. This option is more expensive, but allows you to fully engage in sports at home.
Simple wall design Source sportsteel.ru
When choosing the size of the horizontal bar for outdoor pull-ups, location and design, you should pay attention to the exercises you plan to do (whether there is enough free space, whether the design is suitable).
Material
A home horizontal bar is usually made of metal pipes. It is necessary to choose fairly thick pipes, at least 2.5 mm thick, otherwise they will not support the weight.
Pipes are round and square (rectangular) in cross-section. There are several important differences between them:
- Round ones are more convenient to grip, the edges do not cut into the palm;
- Square pipes are easier to weld; welding round pipes requires more skill;
- Square pipes are stronger and have greater rigidity; they can withstand greater loads;
- If the pipe is crushed, the square ones sharply refract, and the round ones begin to bend slowly.
- Due to their larger area, square supports are better pressed against the wall (this is important for wall structures).
Most often, home horizontal bars are made from both types of pipes: rectangular ones for the frame and stand, and round ones for the crossbar.
Metal and wood Source pinimg.com
Pipes for the horizontal bar use the most common ones, made of ferrous metal. If the horizontal bar is hanging at home, all you need to do is clean the pipes, prime them and weld them. If you intend to use it outdoors, you will need to clean it, treat it with an anti-rust compound, prime it and cover it with several layers of paint.
You can also use stainless steel: it is lightweight, does not rust and can withstand high loads. The main disadvantages of the material are the high price, and the pipes are often too smooth and inconvenient to grip.
You cannot use food grade stainless steel as it is too thin. Wood is usually not suitable either: it is difficult to calculate whether it will withstand the load.
Pros and cons of homemade structures
There is only one advantage: you can make a design yourself that is ideal for the free space in the apartment.
Of the obvious disadvantages:
- A homemade horizontal bar is unlikely to cost less than a purchased one. You will have to spend around 1000 rubles on the material alone - not to mention the costs of welding and cutting metal (if you don’t do it yourself). A simple wall horizontal bar will cost around 1500-2000 if you buy a new one in the store. That is, this method cannot be called economical.
- Expenses by time. Depending on the model, you will have to spend at least 2-3 hours on manufacturing and fastening (not counting calculations and going to the store for materials).
- The difficulty of metal processing at home. If you don’t have a free garage, basement or workshop, you’ll have to work with metal in your apartment. It is noisy, dirty, and can stain (at least with metal filings) the interior.
To summarize: a homemade horizontal bar is worth making if you like to make something, or want to get something unusual that is not in the store.
Complexity
As you might have guessed, creating a horizontal bar at home is difficult. Plus, if you don’t have a workshop, a garage, or at least a basement, you’ll have to work with metal right in your apartment. And this will be quite noisy, dirty and, again, possibly costly (if, for example, you stain the interior).
Thus, a homemade horizontal bar is the lot of jacks of all trades or people who no longer know what to do with themselves in self-isolation. In all other cases, we advise you to buy ready-made sports equipment.
Time
As we all know very well, time is as valuable a resource as money. But if you decide to start making a horizontal bar, be prepared to spend more than one hour on it. First of all, you will have to order all the necessary materials, then calculate the dimensions of the structure, start processing the metal, welding it, and so on. For unprepared people, even a week may not be enough.
About loads
Already when pulling up, a short-term mechanical load on the horizontal bar can reach 2.5 times the weight of the student, i.e. up to 200 or more kgf. When performing relatively simple exercises such as inversions or muscle-ups, this value doubles.
Gymnastic bars, on which you can spin the sun, are designed for instantaneous loads of 1200-1700 kgf, and, nevertheless, cases when the bar came off the horizontal bar in competitions are known. Therefore, a home horizontal bar for slow exercises without a swing should hold at least 200-250 kg, and a street bar should hold at least three to four times more.
How to make a horizontal bar yourself
Before making a horizontal bar, you need to make a drawing and calculate the dimensions. The latter will depend on the design and height of the person who will be doing it. For example, for the simplest U-shaped outdoor horizontal bar, it is enough to measure the height and width of the crossbar. The children's horizontal bar should be low so that the child can reach it.
Typically, height is calculated using the formula: Height * 1.28.
Example of fasteners Source strojdvor.ru
Thus, the size of the horizontal bar for an adult with a height of 1.7-1.8 meters is suitable for a horizontal bar with a height of 2.2-2.3 meters. If both children and adults will be exercising on the apparatus, it is recommended to make a small step at the bottom. It is usually located at a height of 40 cm. It is also important to remember that if the projectile is located under a canopy, ceiling or branches, the distance from the crossbar to the obstacle must be at least 35 cm, otherwise there is a risk of hitting your head.
It is worth remembering that a metal structure will be “recessed” into the ground by about 60-70 cm, a wooden structure by 100-120 cm. This length must be added to the height of the vertical posts.
The width of the horizontal crossbar for children should be up to 1 m, for an adult – 1.3-1.5 m. The diameter of the crossbar should be 2.5 cm for a child and 3.5 for an adult. If the student is larger than the average person, it is worth taking this into account and adding a few centimeters.
If you plan to make a more complex structure with additional elements, you should use the dimensions of ready-made horizontal bars. This will help avoid mistakes.
An example of using a tree Source grounde.ru
Suspension height
State fathom
The last point before starting work on the manufacture of the horizontal bar is that you need to find its mounting (installation) dimensions in the room. The figure above shows how to find the basic design size of a 3-in-1 horizontal bar; Below we will see how the basic dimensions of a street horizontal bar are determined based on other types of fathoms. And another fathom - the official one - will help you find a suitable place for a home horizontal bar on the wall.
What a government fathom is is clear from Fig. on right; The raised arm should be fully extended. It is the individual breech fathom of the tallest person in the family that is the optimal height for the crossbar.
They check it by measuring the height of the head from the shoulders to the top of the head in an increase of 5-7 cm: the distance of the crossbar from the ceiling should be no less than this value. Suddenly the height of the room does not allow it, you need to lower the horizontal bar: it is better to pull yourself up, tucking your legs, than to straighten the ceiling with your crown.
Video description
You can see how to weld an outdoor horizontal bar in the video:
Installation of a homemade horizontal bar will take place in several steps:
- First, the structure itself is welded. This must be done before installation, since welding at height is unsafe. Welding must be done carefully, without skipping.
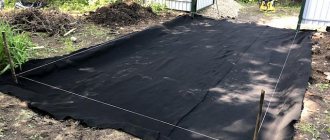
- Then holes are dug in the ground in the right places. A layer of sand 10-15 cm thick is poured onto the bottom and compacted.
- The horizontal bar is installed in place, check the evenness of the installation using a plumb line or level.
- Fill the holes with a concrete solution, secure the structure with wooden supports so that it does not fall, and leave until completely dry.
- At the end, sand is poured near the pillars and between them to level and secure the horizontal bar.
If the vertical posts are made of wood, then they are first installed and cemented, and then the vertical crossbar is secured.
In the house
A wall-mounted horizontal bar may look like a crossbar attached between two side bases, but more often they try to complicate it, for example, make it longer and bend it on the sides at a slight angle, adding handles at the bottom.
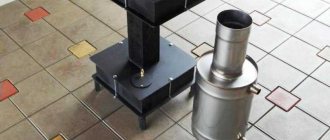
Preparation - making brackets, sawing the neck
I made 2 options - quick-detachable or stationary. Because I have never removed the bar from the quick-release, but the second time I decided to make it stationary.
I'll show you the result right away:
So, we take 15-gauge plywood (you can buy it at Leroy or find scraps in the trash). 1) Cut out 2 pieces of 150×150 with a jigsaw. 2) If there is a perk, then drill a hole in the center with a diameter slightly larger than the neck. If there are no perks, then you can do it like I did. We just drill a bunch of small holes in a circle and compare it all with a chisel. You should get a more or less even hole along the diameter of the neck. 3) Drill 4 holes for screws. We chamfer the heads. 4) We sand everything with sandpaper. My wife also painted the brackets silver.
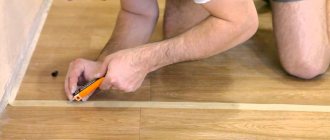
If you want the neck to simply be removed, you can make an L-shaped cut at the top (the letter L upside down) on one of the brackets. You can just do it vertically, but in this case the bar may slip out if the nuts come loose due to sudden movements (although this is unlikely). The hardest part is to measure the opening between the walls in the corridor and saw off the neck along one side with a hacksaw. I made the bar a couple of millimeters smaller so that the bar would fit into the opening. I sawed for about half an hour, because... the blade is dull and the fingerboard is solid and steel :)))
Installation
My ceilings are 2.65 m and the width of the opening is 1.63 m. I stepped back 45 cm from the ceiling, so my head fits there when I pull myself up and my legs almost don’t touch the floor with a height of 1.8 m. You can do 40.
Video description
You can see how to assemble a horizontal bar at home in the video below:
Before you make a horizontal bar at home, you should understand its design. In general, the projectile consists of the following parts:
- 2 vertical pipes attached to the wall. This is the base responsible for connecting to the wall;
- 2 pipes running perpendicular to the wall and vertical pipes. They are fixed at only one end, the other hangs in the air;
- A horizontal crossbar that stretches between the second pipes. Its ends may be slightly bent;
- Additional details (optional).
In other words, you need 2 bases that look like a right angle (for greater strength, a short pipe is welded between them), and the crossbar itself.
The simplest design consists of 2 T-shaped sides, which are attached to the wall with the short side. A crossbar is installed between them. But this option is more suitable for children; it is not able to withstand heavy loads.
All parts must be welded to each other. Then the projectile is mounted to the wall using bolts and screws. By slightly changing the design, it can be hung on a shelf.
It is important to remember that welds may begin to fail when the permissible load increases or operating conditions change (for example, when the projectile is moved into a damp room).
Homemade design Source pinimg.com
Decorating Tips
Experts in this field give useful advice to beginners:
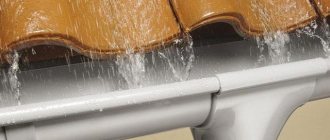
- Since the horizontal bar has been in use for more than one year, it is better to make it from metal. Moreover, the metal must be regularly treated with anti-corrosion compounds. Especially carefully it is necessary to treat the underground elements of the supports before concreting them;
- The horizontal crossbar must be well sanded. It is also recommended to wax it periodically so as not to scratch your hands and cause less calluses during training. Better yet, buy special straps, hooks and other devices for training on the horizontal bar at a sports store;
- paint the finished structure. Firstly, this will extend its service life, and secondly, it will help the horizontal bar fit harmoniously into the surrounding landscape design. Children's exercise equipment can be painted in bright colors that attract the attention of children;
- the area around the horizontal bar should be covered with gravel, sand or concrete. It must be well-groomed and not overgrown with grass. To soften jumping or falling off the horizontal bar, you should put a mat under it. You can either sew it yourself or buy it ready-made at a sports store.
Advice: when choosing paint for a horizontal bar, attention should be paid to material with a hammer effect. This paint not only applies in one layer, but also reduces slipping during training.
In conclusion, it is worth noting that installing a horizontal bar in a personal plot will help all family members lead a healthy lifestyle. Various exercises are performed on it, aimed at strengthening almost all muscle groups, correcting posture, and strengthening the spine. In addition, outdoor activities also have a positive effect on health. Regular exercises on the horizontal bar will help you develop relief and strength. The horizontal bar is the first step to a healthy life, vigor, lightness and self-confidence.
Briefly about the main thing
The horizontal bar is one of the simplest and most useful sports equipment. It is easy to assemble it yourself from scrap materials and install it in the house or on the street.
Before starting assembly, it is important to decide on the location, material, dimensions and design itself. The dimensions depend on who will be exercising (for children you need to make the horizontal bar lower), the design depends on the desire of the owner.
You can assemble the projectile yourself, the main thing is to choose the right material (it must withstand loads) and carefully weld all the parts. If the welding is not perfect, the horizontal bar may fall apart.
The simplest outdoor version of a horizontal bar is a crossbar between trees or a U-shaped structure made of metal pipes. The homemade projectile will look a little more complicated, but it is not difficult to assemble.
Ratings 0
Wooden wall bars
If there is no metal and access to welding equipment, then the most rational and affordable option for a Swedish ladder is to make it from wood.
Wooden wall bars.
Semik FORUMHOUSE user
I made a Swedish staircase out of wood a long time ago for my daughters. To do this, you needed “fifty” boards, shovel handles and an electric drill with feather drills. More time was spent processing the workpieces. I sanded the boards well, burned them with a blowtorch and varnished them. It took 10 minutes to assemble the structure.
The burnt board acquires a beautiful texture. Its service life increases, and also, during firing, the pile burns out, and there is no need to sand the workpiece with fine-grained skin.
When making a children's sports complex from wood, it is necessary to carefully process the workpieces, sand the wood, remove chamfers, etc., so that the baby does not get hurt or get splinters.
An interesting version of the Swedish wall from Yuri Nosov (nickname on the Uvik portal).
Uvik
Children love outdoor games, climbing, and playing pranks. The Swedish ladder will direct this energy in the right direction. To make it, I needed a board with a section of 10x2 cm, about 4000 mm long. Broom handles 4 pcs., length 1200 mm. Saw, drill, grinder. “Liquid nails” for wood and 2 hours of free time on the weekend.
- First, the user cut the board into two parts.
- Then I marked the holes for the crossbars.
The holes were drilled with a feather drill.
Life hack from Yuri Nosov - if you combine two boards with clamps, you will only have to mark the blanks once, and the holes will be exactly opposite each other.
In order for the edges of the hole to be smooth, it is necessary to place a piece of board under the drilling site.
The result was two boards with holes for the crossbars.
Ready-made cuttings from shovels or rakes are most often used in the manufacture of Swedish ladders.
- The boards were polished with a sander, and the corners were chamfered.
- Then we cut the required number of crossbars and, using liquid nails, secured them in the holes of the vertical posts.
The user also made a horizontal bar for the wall bars, taking four pieces of board 250 mm long and drilling holes in two of them for the crossbar. The joints of the boards were coated with glue. At the end of the work, the Swedish ladder was varnished and secured to the corners on the wall.
The budget for the homemade Swedish ladder was 1000 rubles.
Having gained experience, the user made different versions of Swedish stairs.
And children's sports corners.
Edmon74 followed in the footsteps of Uvik and made a wall bars in his apartment for a four-year-old child.
Parameters of the Swedish ladder:
- height of supports – 2 m + inserts;
- board section – 140x25 mm;
- The center distance between steps is 200 mm.
It is planned to equip the wall bars with gymnastic rings and a horizontal bar.
Get straight to the point
Drawings of a homemade horizontal bar with the ability to perform basic exercises for the press, well known in RuNet, are shown in Fig. The secret of its popularity is the availability of materials, well-thought-out design and sizes (see more about them below), corresponding to the average anthropometry of home exercise enthusiasts in the Russian Federation. This projectile is suspended from the wall on hook brackets similar to those on the trail. Fig., but for a square pipe. To preserve the finish of the wall, it is advisable to cover the surfaces in contact with it with rubber 3-5 mm thick. Welding seams are marked in red.
Homemade horizontal bar parallel bars-press
Horizontal bar on the trail. rice. could well be a prototype of the previous one, but made of a round seamless pipe of chromium-nickel steel, something like 79НХС. Food grade stainless steel is not suitable, it is fragile! The special material made it possible to reduce the struts and sections of the parts, which made this horizontal bar more aesthetically pleasing and lighter (14 kg versus 18). But its manufacture requires solid welding experience
Please note that the bending radius of the brackets on the inside is 0.2 mm less than the diameter of the pipe: this, if used carefully, guarantees against play for 3-5 years
Drawings of a horizontal bar press made of a round pipe
Preparatory work
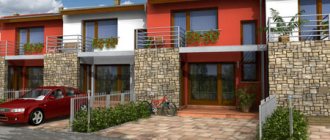
Before determining the location for installing structures, you need to select the appropriate type of horizontal bar. Two combined crossbars are the best option. Moreover, the height of one of them is less than the other. The site for the structure should not be located in an open space near the entrance door to the house. It is best to place sports equipment against the side wall of the building or in the shade of trees. In this case, the site should be as level as possible, which will facilitate construction.
Compact horizontal bar is easy to use
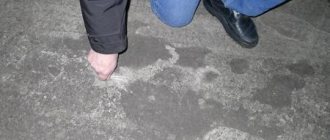
Fastening the horizontal bar to a wall made of slotted bricks using a chemical anchor
Hanging a horizontal bar on a wall made of slotted bricks using dowels is quite problematic. The reason for the failure is the voids in the material in which the fasteners are not properly fixed.
To fasten the horizontal bar in a slotted brick, you can try using a special dowel, in which the lamellas open 360 degrees.
If this does not help, then the best option is a chemical anchor.
The technology for attaching a horizontal bar in slotted brick (warm ceramics) is somewhat different from the method of attaching a sports exercise machine to “chemistry” in a concrete wall.
We proceed according to the following scheme:
- Holes in the brick wall are drilled from a diameter of 10 mm to a diameter of 14 mm.
To reliably fix the pin in the slotted brick, you need a special sleeve with a diameter of 14 mm and a length of 90 mm, which will form a hole in the voids of the material. You can buy a ready-made plastic sleeve.
Or make it from a stainless steel mesh metal sleeve, 1 m long.
In this case, the required length of the hole drilled in the wall is cut off from the sleeve. One end is flattened with pliers, and the sleeve is ready.
- Buy a stud with a diameter of 10 mm and cut off the fastening element from it at the rate of: 200 mm (depth of the already drilled hole) + thickness of the bracket + washer + nut + 4 mm (reserve).
The length of a homemade hairpin in the case of using a plastic sleeve (9 cm long) is about 11 cm.
- Insert all the sleeves into the holes in the wall.
- Without breaks, within 5 minutes, fill all the cartridges with the chemical composition.
- Insert all the pins by turning them clockwise.
- While the composition has not set, put on the brackets from the horizontal bar to accurately center all the studs.
The chemical anchor sets in 5-7 minutes. After 30 minutes, you can hang the horizontal bar on the studs and, placing washers, tighten the nuts. When the composition sets, the chemistry heats up. This is a normal process.
After the mixture hardens, a strong connection is obtained that can withstand a load of up to 500 kg per attachment point. In fact, it is possible to pull out a stud attached to a chemical anchor from a wall only by destroying the material.
Important: for indoor use in residential premises, you must use a chemical anchor that does not contain harmful styrene!
Recommendations from professionals
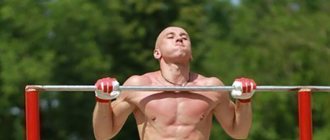
Professionals distinguish horizontal bars from other gymnastic equipment for their simplicity and effectiveness.
We perform a wide range of movements every day, including standing, walking, pushing, pulling, twisting, twisting and more. By improving your functional strength through dynamic compound exercises such as pull-ups, you will strengthen the connections between your nervous and muscular systems.
- Improved posture. When you strengthen your back and core muscles, your posture improves. As your position improves, you become longer and leaner.
- Reduced back pain. Many people sit on the drive to work, sit in front of the computer all day, and then sit at home. You can even sit on the couch when you're at home. All this cumulative sitting increases the physiological stress on the back. By strengthening your back muscles and core with tightening, you reduce your chances of future back pain and injury.
- Beautiful physiology. Want to look great in this T-shirt? Pull-ups help straighten your back and force your biceps to work harder. All this makes your waist smaller. For guys, this can also help create a "V" shape.
When it comes to extreme sports like mountaineering, wrestling and horse racing, a strong grip will be your best friend throughout these tough, albeit quite enjoyable activities. It's no surprise that one of the best ways to significantly improve your grip is to do pull-ups. Since this strength exercise allows you to lift your entire body weight while hanging from a pull-up bar, much of the stress will be focused on your palms and fingers!
So, once you've taken the time out of your daily life to do a couple of pull-up bar exercises, you'll be able to excel in more extreme and challenging sports!