The water pressure in the tap began to decrease
Finally, in the middle of the week, you realize that the water pressure has weakened so much that you can’t live like this any longer, and on the weekend you promise yourself that you’ll sort it out. But when you come home in the evening after work, you discover the dissatisfied look of the whole family on you, saying that you can’t wash yourself today at all, and that it looks like you won’t have to wait for the weekend, but you need to do something right here and now. Who hasn't encountered a similar situation?
And of course, someone starts talking about how a pipe burst somewhere far away, or there was an accident at a thermal power plant, or the pipes are being replaced, and that this is probably the case, and nothing can be done about it. Having “calmed down” yourself and everyone at home with this explanation, you can calmly lie down on the sofa and watch your favorite show.
We dreamed :).
Now let's get down to business! Of course, this cannot be ruled out either. And first you need to call your neighbors and ask how they are doing. It’s also a good idea to ask the chairman of the housing cooperative what could be the reason? In 10% of cases it will probably be as you dreamed. You will actually go watch your favorite show. But, unfortunately, the remaining 90% will say that the problem is in your apartment, and not somewhere far away...
When can you complain?
Decree of the Government of the Russian Federation No. 354 “On the provision of utility services to owners and users of premises in apartment buildings and residential buildings” emphasizes that the consumer has the right to receive utility services of appropriate quality and in the required volumes. If this principle is violated, the citizen must inform the responsible organizations.
Complaints to the authorities (Rospotrebnadzor, Prosecutor's Office, Department of the City Administration for Housing and Communal Services, etc.) are sent in the event of inaction by the housing management company when the applicant applies.
Getting to know the water supply system
So, let's start checking. We go into the bathroom and turn on the tap:
The cold water flows in a thin stream, and the hot water gushes with might and main. Now we begin to remember the background. The cold water did not disappear immediately. Her progress has been getting worse over and over again lately. And this may indicate the most likely reason - your water filters are clogged!
In this case, we need to go to our water supply system in the apartment and look at it carefully:
Of course, everyone has their own wiring done differently. Some people have their pipes hidden and cannot be reached, which is not good. But the first thing you need to do is determine the cold and hot water circuits in your system.
Let's take a closer look at the cold water circuit. The arrow on the pressure gauge, showing zero, immediately catches your eye. Indeed, there is no cold water pressure in the system, and therefore water from the tap barely flows.
Now let's find where the filters are located:
In the picture you see two filters that have the correct names:
- self-cleaning filter with pressure gauge;
- direct coarse filter.
Variations are of course possible here. For example, someone will definitely have an oblique coarse filter rather than a straight one, but this does not change the essence of the matter. These are the filters that you will need to deal with.
How to solve the problem
When the pressure in the hot water supply system weakens in a residential area, you can use several methods to eliminate this malfunction.
Replacing hot water pipes
The appropriate method is determined depending on the reason for the weakening of the jet:
- If problems arise with the operation of the system, you need to replace faulty elements or clean them when it is not possible to purchase new ones.
- If the pressure weakens due to a clogged aerator, you will also have to clean it using the blowing method or a regular needle.
- If it is necessary to replace pipes, you will have to involve qualified specialists. The owner will only be required to purchase all materials and pay for the work. You need to understand that the riser must be replaced completely, since due to the formation of joints, the pressure will again begin to weaken significantly over time.
- This problem can be solved thanks to a pump that increases the pressure in the system. It will be necessary to install such a device on the riser only in a situation where complaints to the housing office have not led to real results. A riser pump is considered expensive, so you will have to chip in money with your neighbors to purchase it.
If problems arise with the circuit, the sequence of connecting devices to the plumbing system changes.
Shut off the riser and drain the remaining water
First you need to turn off the cold water. To do this, close the ball valve on the cold water riser. How to do this is described in detail in the article: Turning off risers in an apartment is easy. And here I will give just a picture:
Cold water is turned off. Now you need to drain the remaining water in the pipes. There is a drain valve located directly below the self-cleaning filter. Some people have a hose leading out of it that goes straight into the drain pipe, while others have just a faucet:
If there is a hose, then simply open the tap and drain the remaining water. If there is no hose, then you need to find a bucket or basin and place it under the tap, then open the tap and drain the remaining water.
Changing the coarse filter
Now you can work on filters.
First, we will look at the condition of the coarse filter:
One nut needs to be unscrewed. For this procedure we will need Swedish women. Before doing this, take care of a container where you will need to drain the remaining water from the filter. You need to take a container such that it can be placed directly under the filter (Ideally, a cut-off plastic bottle, which you will see below, is suitable).
So, take the Swedes and unscrew the nut:
Turn it counterclockwise as shown in the picture. Swedes won't have to work for long. Next, you need to carefully unscrew the nut by hand, placing a container to drain the water:
Then the water will continue to drain for some time and you need to wait. It is even recommended to secure the container for draining, as it may take several minutes.
But finally, the water has stopped flowing and you can examine the filter from the inside:
We see with you not a very good picture. First of all, the inside is completely rusty. Secondly, the filter contains a replaceable mesh. It needs to be removed:
What to do next? In a good way, it is better to replace the mesh (buy a new one). The rust inside the filter needs to be washed off. If there is a lot of rust, then it is worth replacing the filter itself. You may ask, how to clean if the water is turned off? Everything is correct, you need to stock up on cold water in advance and dilute it with hot water, which is not turned off for you. In general, you can handle it.
And this is what the new mesh for the coarse filter looks like:
install it in the filter and screw it back onto the pipe.
Changing a self-cleaning filter with a pressure gauge
Now is the time to work on a self-cleaning filter with a pressure gauge. In the figure you can see where you need to unscrew the filter. But this cannot be done right away, because a drain hose is attached to the bottom of the filter, and first you need to remove the clamp and release the hose:
It is for these purposes that we need a screwdriver. So, unscrew the clamp:
Remove the hose. The water has already been drained, but there may still be small residues:
Next, take an adjustable wrench and unscrew the filter:
Just as in the case of the coarse filter, for this filter you first unscrew it with a wrench and then by hand. Prepare a container for draining the water. The same plastic bottle will come in handy:
It is advisable to fix the bottle so that the water drains itself, and you do not have to hold the bottle with your hands.
When the water stops flowing, you need to look at the filter itself.
Before us is a depressing picture:
The filter mesh is completely clogged. How to deal with this? I recommend installing a new grid:
The filter itself is also dirty and it would be a good idea to clean off the rust. If there is too much of it, then I recommend replacing the filter itself and installing a new mesh there.
We install the filter in place and check the water:
As you can see, everything is in order! Try it, take another look at the cold water pressure gauge. Now it will definitely not show you zero. You breathed a sigh of relief because now the water pressure in your water supply system is back to normal!
Note that for hot water the actions will be similar.
Recommendations for the future
Here are some useful tips from my own experience:
- In order to avoid a situation where the filters become completely clogged, it is necessary to flush cold and hot water for 3 minutes at least once every 3 weeks. The descent is carried out by opening the taps located directly under the self-cleaning filters. That is why it is useful to have not just taps, but hoses screwed to them with clamps that go directly into the drain pipe.
- You need to spend a little time to: unscrew your hot and cold water filters, temporarily turn off the water, go to a professional plumbing store, show your filter meshes to the seller and buy them home in advance. They are not so cheap, but this must be done, because in a critical situation you will simply replace the grids. Otherwise, you will have to first turn off the water, then disassemble the entire system, and then run around the shops in search of the required mesh. It is not a fact that you will find them right away, but the family will be left without water, and your water supply system itself will be in a semi-disassembled state (tested on yourself).
- Never turn on the water without installed filter screens, even temporarily for 1 day! This very day may turn out to be ill-fated. If dirt gets into the pipe, a size slightly larger than the permissible size, then, for example, it will clog your meters, and then you will really have a lot of fuss.
- Imported faucets also sometimes fail. For example, the insides of the mixer become unusable, which it is better not to disassemble yourself (unless you are a professional in this matter). That is, when the faucet is removed, the water gushes out in a powerful stream, and when the faucet is installed, the pressure is much stronger for hot water than for cold water, or vice versa. Here you also need to look and analyze. Sometimes a simple faucet replacement, about which I have a separate article, also brings results.
That's all. Today we learned what to do if the water pressure in your apartment suddenly starts to drop.
Types and features of single-lever mixers
There are 2 types of bottom lever valves:
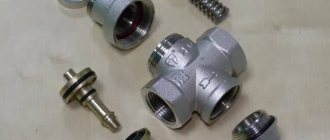
- Ball mixer . The main element of this design is a small metal ball located in the valve body. The ball has three holes intended for cold, hot and mixed water, which comes out into the tap hole. That is why the container inside the steel ball is called a mixing chamber. The ball is in close contact with rubber seals (seats). The design is activated by an adjustment rod. The pressure of the water flow changes in accordance with changes in the movement of the ball. The larger the area of the contacting holes, the weaker the water flow, and vice versa. This type of mixer very rarely fails due to its well-thought-out design.
- Cartridge mixer. In this type of mixer, instead of a ball, there is a cartridge, the basis of which is 2 ceramic plates. The lower part of the cartridge (disc) has 3 holes for water , and the upper part performs the mixing function. The point of this design is that when the position of the joystick changes, one of the holes in the lower plate is aligned with the mixing chamber of the upper part of the disk. The lever moves smoothly due to a special silicone lubricant. To prevent unexpected damage due to solid parts getting into the cartridge holes, manufacturers recommend installing special filters.
Lessons on bathroom and toilet renovation
Lesson 1. Planning a bathroom and toilet renovation with your own hands Lesson 2. Where to start a bathroom renovation. Start of dismantling work Lesson 3. How to remove old paint from walls in a bathroom and toilet Lesson 4. How to remove a concrete threshold in a bathroom and toilet Lesson 5. How to prepare a ceiling in a bathroom for painting or a suspended ceiling Lesson 6. Is it necessary to replace water supply risers Lesson 7. How to shut off the water supply risers in an apartment Lesson 8. Which pipes are best for water supply in an apartment Lesson 9. Do-it-yourself plumbing Lesson 10. How to hang a heated towel rail in the bathroom Lesson 11. Which water meter is best for an apartment Lesson 12. Do-it-yourself electrical wiring in the bathroom Lesson 13. Leveling the walls and floor in the bathroom Lesson 14. Wallpaper for the bathroom, kitchen, toilet Lesson 15. Which tile to choose for the bathroom Lesson 16. Notched trowel - a miracle of human invention Lesson 17. Materials and tools for laying tiles Lesson 18. How to lay tiles on the floor with your own hands Lesson 19. How to cut tiles and what to use for tiling Lesson 20. How to drill tiles and what to use when tiling Lesson 21. How to lay tiles on a wall Lesson 22. Which bath to choose for your home Lesson 23. How to install a cast iron bathtub Lesson 24 How to install an acrylic bathtub Lesson 25. Laying tiles on the wall in the bathroom with your own hands Lesson 26. How to lay tiles on the outer corner of the bathroom Lesson 27. Sparks from an angle grinder can kill your tiles Lesson 28. How to replace tiles on the floor or wall Lesson 29 How to choose a faucet Lesson 30. How to change the faucet with your own hands Lesson 31. How to install a ventilation grill in the bathroom Lesson 32. How to choose a door for the bathroom Lesson 33. Grille for the bathtub Lesson 34. How to install a toilet with your own hands Lesson 35. What to do , if the water pressure in the apartment has weakened Lesson 36. What to do if the sink is clogged Lesson 37. How to clean the sink or bathtub with new products from Domochist
Advantages and disadvantages of joystick mixers
Single lever faucets have become popular due to their convenience and ease of use. With the help of such mixers, water is quickly regulated to the desired temperature by moving the lever to the right or left. To increase or decrease the water pressure, the joystick is adjusted from top to bottom. In addition, single lever valves have a long service life. This is due to the fact that in the design of such faucets there are no rubbing elements made of metal, as well as rubber gaskets between the moving parts of the faucet.
The disadvantages of a ball valve are considered to be rapid wear of rubber seals . Therefore, to avoid breakdowns and clogging of the mixer, it is recommended to replace these parts every 2 years. Failure of a single-lever faucet can occur if abrasive elements (for example, sand) enter it along with water. This is why it is so important to install special filters to prevent clogging.
Some cheap models of cartridge faucets have difficulty setting a comfortable temperature, which ranges from 35 to 41 degrees. This is due to the fact that inexpensive analogues of such mixers have a small angle for adjusting the water temperature. This design does not allow for precise adjustment, which is not inferior in accuracy to faucets with a ceramic faucet. But disk models from well-known brand manufacturers have a wide adjustment angle of up to 15 degrees, which allows you to quickly and easily obtain the required water temperature. This functionality is achieved due to the special design and high-quality material of the parts.
