On hot summer days, many of us go to the country or to a country house.
At the same time, not everyone there has a full-fledged split system. You can, of course, get out of the situation by installing a mobile option. But even here there are problems with connecting and removing warm air.
What to do? Suffer from sweltering heat? Not at all, there are at least five ways to assemble homemade devices that can partially replace a professional air conditioner.
You can make them at home, without special knowledge of thermophysics and special skills of a craftsman. Let's look at all these methods in more detail, ranging from ineffective ones to those that will significantly reduce the temperature by several degrees and comfortably spend the weekend at the dacha.
The simplest device for home
The simplest cooling device, which does not require almost any material, financial, time, or intellectual costs, will be a design made from a fan and a wet towel. A towel is thrown over the mechanism, air passes through, evaporating the water. The evaporation process cools the towel, so the air flowing through will become slightly cooler. This method can be slightly improved by lowering the end of the towel into a container of water.
It will not be possible to cool the room this way. But for individual use it will be effective.
How to refuel a household air conditioner yourself? Action plan >>>
Using cardboard box
The basis of this cooling system is a regular fan and ice. In this case, everything used during the installation process can be easily returned to its original position without any damage.
In the process of manufacturing a home split system, you will need the following parts:
- Box made of thick cardboard. Its dimensions should easily accommodate a large pan;
- Aluminum pan;
- Table fan;
- Scotch;
- Needle and thick thread;
- Sharp knife;
- Ruler;
- Simple pencil;
- Pieces of ice.
- At the first stage, a structure is built from the prepared box that will correspond to the size of the pan. To do this, cut the box with a knife, cut out its bottom and lid (they should be equal to the diameter of the pan);
- The box can be reassembled; to do this, it is assembled in the cut places and treated with glue in several layers;
- From the remaining part of the cardboard you need to cut out a square box lid;
- A circle should be marked in its center; its diameter should be 3 cm larger than the span of the impeller of the table fan;
- The cut circle needs to be set aside; the rest of the sheet will need to be covered with the prepared structure;
- The entire box must be carefully sealed with tape or glue so that the structure does not collapse during operation;
- You will also have to seal small holes if there were any on the side walls of the box (for example, for fingers);
- On one side of the box, cut a rectangular hole 10 cm long and 4 cm wide. It is from this rectangle that cool air will flow into the room;
- Now you will need to cut two identical strips from the remaining cardboard, their length should be 3 mm less than the cutout on the box, and their width should be 5-6 mm larger;
- Connect two rectangles together using a large needle and stiff, dense threads (all corners of the cardboards should be connected with threads, but so that they can be separated by 4 cm from each other);
- Insert the connected cardboards into the cut-out side opening of the structure. Each of them should fit snugly into the top or bottom of the cut hole;
- Using the same large needle and thick threads, sew the cardboards located opposite each other to the structure itself. In this case, there is no need to tighten the threads; they are secured with knots;
- Lay a thick piece of cloth on the floor and place a pan on it;
- Remove the front mesh from the fan and place it on the pan;
- Place large pieces of ice on the grid. You can freeze it in medium-sized plastic cups. To operate a home air conditioner you will need 5-6 pieces;
- Cover the ice structure with the prepared box;
- Insert a fan into the cut-out space located on the lid of the structure so that its impellers point toward the floor (at the pan with the mesh and ice);
- Turn on the fan and start any cooling mode on it.
This design can cool a living space for up to 2-3 hours. After this, the ice will melt and the pan will fill with water. Owners will need to ensure timely replacement of water. Otherwise, the fan may fall into the structure and get into the water. This will cause a short circuit.
Fan + plastic container. Option 1
The most common option for constructing an air conditioner from improvised means is a combination of a ventilation mechanism and plastic bottles with cold water or ice. You will need:
- ventilation mechanism;
- plastic or other containers;
- ice/chilled water.
Action plan:
- The container is filled with cold water and frozen.
- Cooled, mounted to the fan grille or placed in front of it. It is imperative to leave gaps of 1-2 cm for circulation and cooling of the air flow.
- Consider a way to collect condensation that will definitely appear.
The water needs to be changed periodically. You can make two sets at once, cooling them alternately.
Varieties
There are several types of cold batteries: silicone, gel, water-salt. Having understood their differences, you will be able to understand which is more effective and choose the best option for yourself:
- Silicone. This type of cold accumulator maintains a low temperature for the longest time - from 0 to +5 degrees throughout the week. It looks like a rectangular film package. Inside it is a special silicone mixture that freezes quickly and melts slowly.
- Gel. This type of cold storage battery is the most common. It looks like a dense, sealed, rectangular bag. It contains a gel-like substance inside that keeps the inside of the bag cool. It can also be used as a heat accumulator. It supports a wide temperature range and operates for up to 16 hours. If the filler leaks, you don’t have to worry - simply wipe the surface with a napkin or rinse with water. The gel will not spoil the products, it is completely safe and does not harm the body.
- Salt cold accumulator. Appearance: rectangular plastic box. It contains a water-salt solution inside, which can be added if necessary (but not all manufacturers provide this possibility). The battery maintains low temperatures, down to approximately -10°, throughout the day.
The most efficient battery is silicone. It keeps the temperature for about a week. You can cross the Sahara Desert with it and the ice cream will remain cold. There is a downside: the manufacturer does not guarantee that silicone is safe. If it gets on food without packaging, it can cause poisoning.
Silicone cold accumulator
Silicone cold accumulator
Gel cold accumulator
Salt cold accumulator
Salt cold accumulator PM0941
Fan + plastic container. Option 2
- cooler;
- plastic containers (three two-liter and three half-liter);
- foam tape.
Manufacturing:
- For two-liter containers you need to cut off the bottom and drill holes inside. In one case - from below, in the other - from the side.
- Wrap the cooler with foam tape (for fixation and vibration absorption).
- Place the mechanism between the cut parts so that at the bottom there is the bottom of the bottle with side holes.
- Remove the bottom from two container lids.
- Inside two half-liter bottles, make holes on the side with a diameter equal to the neck.
- Insert the neck of a large container inside the side hole of a small one, secure it inside with a cut-off lid (you can use a long knife or other tool).
- Fix the second, small one with the first in a similar way. Now the small bottles can rotate perpendicular to their bases.
- Attach a third half-liter container with ice to the plastic box with the cooler.
- Cover the whole thing with a two-liter bottle with two small ones attached.
Improvised homemade air conditioner made from plastic bottles is ready for use. The air flow is regulated by rotating half-liter containers in two directions. It will be useful for a small room, for individual use.
Repair of household air conditioners. Can it be avoided? >>>
Installation of the outdoor unit
If the air conditioner is installed in a private house, then it is not difficult to place the outdoor unit. But its installation on the building of an apartment building raises many questions.
The air conditioner is mounted in such a way that it can be reached from the balcony. After all, the unit will have to be serviced periodically.
Installation of the outdoor unit
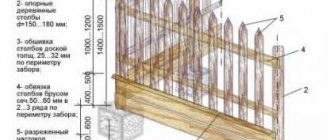
It is best to mount the block on the north or east side of the window (balcony). It is advisable to install the system at the bottom of your outdoor area. Then, if necessary, it will be easier to reach the system by opening the window.
Using a tool such as a level, the mounting locations for the brackets are marked. Holes are drilled in the wall to install anchor bolts.
To conduct interblock communication, a through hole is drilled. A sufficient diameter is 8 cm. If the wall is brick, it is advisable to make a hole between the bricks at the place where they are laid. Then the hole will come out neater and less effort will be spent.
Next, the system is connected, as well as the resulting gap is sealed. Before proceeding to the next stage of installation of the structure, you should make sure that the outdoor unit is secured sufficiently reliably.
Fan + copper pipe
You will need:
- fan mechanism;
- copper tube/rubber hose;
- water pipes.
Installation diagram:
- Attach a copper pipe/rubber hose to the protective fan grille and secure it. It is necessary to leave gaps between the turns of the tube or hose for free circulation and cooling of air. There should be no strong bends.
- Connect one end of the copper tube/rubber hose to the faucet. Place the second one in the sink. In this position the structure can be fixed.
- Open the water under low pressure.
- Turn on the fan mechanism.
- Adjust the direction of the air flow.
Such a unit is capable of cooling a medium-sized room. Can be costly due to the large amount of water supplied.
How profitable is using a heat pump?
Theoretically, any person has a large choice of energy sources. In addition to natural gas, electricity, coal, it is also wind, sun, temperature difference between land and air, land and water.
In practice, the choice is limited, because it all depends on the cost of the equipment and its maintenance, as well as the stability of operation and the payback period of the installations.
Each energy source has both advantages and serious disadvantages that limit its use.
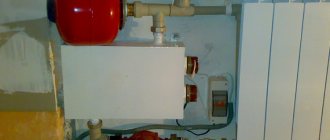
Installing a heating system with a heat pump is beneficial from the point of view of ease of use. During operation of the equipment there is no noise, no foreign odors, no installation of chimneys or other auxiliary structures is required.
The system is energy dependent, but the heat pump requires a minimal amount of electricity to operate.
A heat pump is a good alternative to conventional heating systems. To reduce the initial cost of equipment, you can assemble it yourself
Thermal installations themselves are extremely economical and require little maintenance, but their initial cost is very high.
Not every home or cottage owner can afford to purchase such expensive equipment. If you assemble it yourself and use parts from an old refrigerator, you can save a lot.
Industrial heat pumps are expensive. It is believed that their installation pays off in an average of 5-7 years of operation, but this period depends on the initial price of the structure and can be much longerHomemade installations cost literally pennies, and their use allows you to save significantly.
The only caveat: the productivity of homemade products is low, and they cannot be a full replacement for traditional heating systems. Therefore, they are often used as additional or alternative heating options.
Container + cooler
Necessary materials:
- plastic container with a volume of 1.5-2 l;
- minifan from a computer power supply;
- corrugated plastic siphon;
- glue gun;
- assembly knife.
How to make a homemade air conditioner, assembly of the structure:
- Inside the container lid, cut a hole slightly smaller than the mini-fan;
- Glue it to the lid so that the air flow is directed into the container (using hot glue).
- Cut a hole for the siphon pipe.
- Cut 25-30 cm from the corrugated sanitary siphon.
- Secure the resulting section inside the container lid using a hot gun.
- Place ice inside the container.
- Close the lid tightly.
- Connect the mini fan to the network.
The direction of the cooled air can be adjusted using a siphon. If possible, it is better to use a large piece of ice. The air flow entering the container will be able to circulate in it and cool more. In the case of small pieces of ice, there will be no such air circulation.
The direction of the cooled flow can be adjusted using a siphon. It's better to use a large piece of ice. The air flow entering the container will be able to circulate and cool more. With small pieces of ice there will be no such circulation.
Bucket conditioner
The above design can be improved and simplified. Instead of a container, use a plastic bucket with a lid, and insulate its walls.
To do this, place pre-cut pieces of foam plastic in even rows inside the bucket.
The bottom is also insulated with foam plastic.
All this will allow the ice to retain its original condition for more time and your air conditioner will last much longer than the previous model.
In the upper part of the bucket, cut out the outlet holes and glue the pipe sections there. The cold will come through them.
The exhaust fan cuts into the lid and sits tightly on the glue.
Frozen bottles or ice in plastic bags are again placed inside.
The lid closes and voltage is supplied to the fan. This air conditioner will work properly for a much longer time than the first model in a plastic box.
Radiator + auto fan
Source materials:
- car radiator;
- 12 V auto fan;
- frame for fan mechanism;
- retaining housing;
- fastenings;
- rubber tubes;
- set of clamps;
- insulating tape;
- sealant;
- 12 V power supply.
Device instructions:
- First close the outlet for the radiator temperature sensor with a tight plug.
- Fix the radiator horizontally to the retaining panel.
- Fix the car fan so that the air flow is directed from the radiator into the room.
- Using clamps, install rubber hoses onto the radiator pipes.
- Connect the cold water supply hose to the tap.
- Place the drain hose in the sink or bathtub.
- Place a drainage container under the structure.
- Eliminate air pockets inside the radiator.
- Connect to the mains.
The device reduces the temperature by supplying cold water. The cooling time of the room depends on the speed of the autofan and the liquid supply speed. The power is low, it will cool a small room.
Operating principle of a household split system
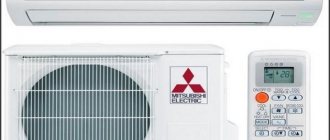
An air conditioner is a complex household appliance that operates on the principle of transferring heat from one place to another: in the summer - from the apartment to the street, in the winter - from the environment to the house. To move heat, an interesting substance is used - freon, which can boil and turn into gas at negative temperatures.
For reference. Freon circulating in the circuits of refrigeration machines is called a refrigerant or working fluid. The key point is its evaporation and condensation, during which thermal energy is respectively absorbed and released in large quantities.
Traditional units consist of 2 blocks - external and internal.
The home split system works according to a cyclic algorithm:
- First, the refrigerant in a liquid state enters the heat exchanger of the internal air conditioner module (evaporator), which is blown by a centrifugal fan. This is where freon evaporates, causing the flow of room air to cool sharply.
- The gas then flows through a copper tube into a compressor, which raises its pressure to a certain value. The task is to force the working fluid to condense outside, where the air temperature is even higher than indoors.
- After the compressor, gaseous freon passes through the radiator of the external unit (condenser). A large axial fan forces air flow through its fins, and the refrigerant turns into a liquid phase again, releasing the room heat outside.
- At the last stage, the pressure of the liquid working fluid is reduced by passing through the expansion (throttle) valve. Now the freon is again ready to absorb heat and moves into the indoor unit, the cycle repeats again.
Diagram of the factory air conditioner
Note. During operation, a lot of condensate appears on both heat exchangers and must be discharged to the street or to the sewer. In order for the split system to switch to heating the house, freon is started in the opposite direction, and the radiators are functionally swapped.
An electronic control unit (ECU), which receives signals from various sensors, is responsible for maintaining the room air temperature and refrigerant pressure in the system. A car air conditioner operates on the same principle: the evaporator is built into the interior ventilation system, and the condenser is installed near the standard radiator of the cooling system.
Now you understand that making an evaporative air conditioner yourself at home is not as easy as it might seem. But for a car this is even more difficult to implement; here you need to be a master refrigerator. As an example, we suggest watching a video where such a specialist installed a household split system in his VAZ 2104 car:
Next, let's look at the air conditioner designs invented by craftsmen and highlight the most efficient devices that can be recommended for production.
Old refrigerator + fan
Necessary:
- old refrigerator;
- plastic pipe;
- two fan devices;
- jigsaw;
- polyurethane foam.
Manufacturing process:
- Cut a hole inside the refrigerator freezer door for the first mini fan.
- Secure it so that it forces air into the chamber.
- Drill another hole in the same place.
- Insert a plastic pipe inside the resulting hole to exhaust cooled air outside.
- Seal the cracks with foam.
- For better heat removal, you can install a second cooler, the air flow from which will be directed to the condenser.
- Connect the structure to the network.
An improvised air conditioner from an old refrigeration unit can be a good alternative to a climate control system. The principle of its operation is based on the supply of heat from the evaporator to the condenser by freon (like many air conditioners).
Advantages and disadvantages
Pros:
- The air conditioner uses air from outside
- installation of the indoor unit is hidden
- can serve several rooms simultaneously
- system assembly is universal
- economical product: its connection to the ventilation system reduces equipment costs
Minuses:
- very noisy
- such an air conditioner from the point of view of installation and design is an extremely complex unit
The functioning of the split system is aimed at maintaining optimal thermal conditions in the room, as well as eliminating harmful microparticles contained in the air. There are several basic techniques for designing a cooling unit, the content of which will be discussed below.
Additional Cooling Methods
If you don’t know how to cool a room without air conditioning and a fan, then it’s worth considering several effective methods. Any home-made units will be more effective if the room is additionally protected from heat and maintains optimal humidity.
Any electrical appliances and equipment operating in the house generate thermal energy, which means they contribute to additional heating of the air. Even working lamps will slightly increase the air temperature in the room. That is why it is better to turn off all unnecessary electrical appliances and lighting sources in the summer heat.
Sun protection
The temperature in a room increases most strongly as a result of exposure to sunlight.
To protect against it, use the following methods:
- Cover the windows with thick curtains. This option is not the most effective, because curtains made of thick dark fabric still heat up and transfer thermal energy into the room.
- You can close the windows with roller blinds or blinds. But even the densest materials will also be heated by the sun's rays.
- The most effective solution for protection from ultraviolet radiation is solar control film for windows. It does not transmit ultraviolet rays, so the room will be cool.
Air humidification
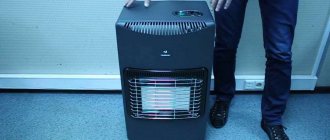
A person can tolerate heat much easier with optimal humidity. Dry air in rooms worsens a person’s well-being at any time of the year, but is especially harmful in the summer heat. Humidifiers are used to normalize indoor humidity.
There are units on sale that operate on different principles: using hot steam, ultrasonic or membrane type. The first variety is more suitable for use in winter, because it further increases the temperature in the room.
https://youtube.com/watch?v=3g1XQEesl_s
Ultrasonic humidifiers are the most popular. They are inexpensive, but some models require cartridge replacement. The most effective and expensive are membrane-type devices, but they do not require changing cartridges. It is enough to wash the membranes regularly.
To control the humidity level, in addition to a humidifier, you will need a hygrometer. Optimal air humidity is 60%. Excessive humidity creates favorable conditions for the development of mold microorganisms, so you need to monitor the indicators and, if necessary, turn off the device for a while.