In most cases, utility networks are installed in bathrooms. They need to be serviced periodically and readings from various meters are taken. In addition, access to water shut-off valves is necessary when performing repair work or connecting new plumbing equipment. Such hatches are located on the wall of the room, but there is another place for installing inspection hatches - under the bathtub on a decorative screen. These hatches are designed for repairing and cleaning the bathtub siphon; the method of placement differs from those installed on the wall.
Bathroom hatch
Inspection hatch
Materials
Plumbing cabinet doors can be classified based on the material used to make them.
The range available on the market includes louvered doors made of wood. They are sold everywhere and are in great demand. In order to avoid mistakes associated with purchasing products of this type, the main thing is to choose the correct size. There are some nuances to the operation of wooden products - before installation they must be treated with stain and varnish. Applying these compounds will help protect the wood from moisture present in the room. Doors made of wood are often additionally decorated with various patterns, perforations, and carvings.
- You can cut a chipboard door yourself and install it on the cabinet using hinges. This design option is the simplest and fastest, as well as economical.
- Tile doors, which are mounted on a special frame, are another way to create a closet in the toilet. Thus, in the bathroom, the walls of which were also covered with this material, there will be doors for tiles, identical to the appearance of the walls.
- Mirror doors can be made by attaching a mirror to a sheet of plywood of the required size. Such mirror inserts in the room allow you to slightly visually expand the area of the room.
- There are cutting-edge materials that can be used as doors. One of these options is the use of roller shutters. Metal products, plastic products and others are produced. With the help of roller shutters you can easily choose the right color for any bathroom interior. There are slatted shutters that are controlled using a remote control.
- Blinds are more affordable. They are presented in a wide variety of colors; you can order almost any size of such products.
- Doors can be made of plastic. The material is easy to maintain and does not require special surface treatment, as it has a good level of moisture resistance.
- Small textile curtains are a practical solution for arranging a sanitary closet. No less popular are polyethylene products, which can greatly decorate the interior of a room.
- Glass products framed with aluminum profiles are a convenient option for doors, since the material is not afraid of moisture. At the same time, glass provides good sound insulation.
Floor
It is better to install such a cabinet in a combined bathroom, where the toilet is not squeezed into a tight space between two walls; but this design is quite suitable for a separate toilet. The main requirement is communications hidden in the wall.
To make a cabinet you need the following tools and materials:
- natural wood, MDF or laminated chipboard panels;
- electric jigsaw;
- wood glue;
- manual frezer;
- electric drill;
- furniture fittings (handles, hinges, shelf holders);
- metal ruler and pencil, square;
- regular or plexiglass for windows (to save time and money, you can do without it by making the doors solid wood);
- primer and paint;
- Grinder;
- an iron corner or other device that allows you to attach the cabinet to the wall.
Step-by-step instruction
The situation is similar with glass - it is much easier and more efficient to entrust its cutting to professionals. Having ready-made parts, you can immediately begin assembly.
If ordinary boards are used, the work will proceed as follows:
- Measure the height and width of the toilet with a cistern and determine the desired cabinet parameters.
- Draw a sketch of the product on paper, marking the dimensions of various elements on it.
- Transfer the outlines of the parts onto the board using a simple pencil. Pairs draw in a single copy and, after cutting out the first, use it as a pattern. This method helps to obtain two or more identical blanks.
- A milling cutter is used to cut out a relief on the part connecting the façade and side walls to the roof. To make your task easier, you can buy factory-made shaped furniture strips, which come in various shapes and sizes.
- A grinding machine is used to process the cuts and the rest of the surface if there are irregularities and splinters on it.
- A primer is applied to the front and back of the parts, allowed to dry and covered with paint. It is advisable to choose acrylic enamel in a spray can - this way there will be no smudges or smears on the surface, and the coating itself will be moisture resistant.
- Assemble the cabinet body. All connections are glued and, if possible, tightened with self-tapping screws:
- holes are drilled in the side walls at the same level and shelf holders are inserted into them;
- glaze the doors and install handles at the same stage;
- they hang the doors on the almost finished structure;
- Between the side walls from below, a drawer (crossbar) is fixed.
How to choose a plumbing hatch
IKEA cabinet
Invisible hatches for tiles
When choosing a hatch for a renovated toilet based on external characteristics, you should decide how important it is to make it invisible. If there are no increased design requirements, then it is quite possible to get by with a plastic or metal plumbing product at an affordable price of 300-500 rubles
However, these materials have disadvantages:
- the plastic is not strong enough and stands out against the background of the wall;
- if the metal hatch is not intended for tiling, then it will stand out against the background of the wall, even after painting.
“Invisible” cameras with a complex opening mechanism are conquering the market, but they are also more expensive. If you want to make a hatch part of the interior, you will have to spend several thousand rubles. The cheapest high-quality design of a standard size will cost at least 3,000 rubles. Invisible plastic analogues will cost a little less.
The appearance of the final result will depend on the amount the buyer expects: expensive product options can be made to order from original materials.
Here are some more tips for choosing a plumbing door for an updated toilet:
- for painted walls, it is recommended to choose hatches made of metal, since paint adheres to them better than plastic;
- if the box where the plumbing fixtures are installed is tiled, then it is more logical to purchase a hatch with sliding hinges that matches the design;
- if the plumbing hatch is located in a narrow toilet above the toilet, then it is better to install a model with a vertical door opening;
- if the hatch will be installed on the ceiling, you should choose structures with low weight, for example, plastic ones;
- for installation on the floor, choose durable metal models with a metal thickness of at least 4 mm;
- if the door interferes with servicing devices installed in a niche, then it is recommended to choose a version with a removable door.
A custom hatch will cost 2-3 times more than a similar one. When ordering, the dimensions, side for hanging hinges, finishing, and material of manufacture are discussed separately.
Drawing
Let's draw a future closet on a piece of paper.
In the figure we indicate the hatch door. The bottom of the hatch should not be lower than the height of the barrel so that it can be opened. If the barrel is planned with a vertical drain mechanism, with a lever, you need to take into account the height of the drain handle. Note: the dimensions of the hatch door are standard and can be viewed on any seller’s website.
Together with the cabinet drawing, we will draw a frame diagram. The frame of the sanitary cabinet between the walls of the toilet is not complicated. Vertical racks near the walls and in the places where the hatch is installed. Horizontal racks on the ceiling and floor, as well as reinforcing racks along the bottom and top of the hatch installation. Around the installed hatch, a kind of frame should be formed from profiles for drywall, and the profiles themselves must be reinforced with a wooden beam in order to be able to secure the hatch door.
Materials
How to choose and install louvered doors for a closet: painting, maintenance, repair
The classification of products for decorating cabinets in the toilet is also carried out, taking into account the type of raw materials used for the manufacture of functional structural elements. Today, consumers have several options to choose from
Wooden
Wood is a widely used material for the manufacture of sashes of various modifications. In order for the product to have a long service life, it is worth taking into account the specifics of the room where the wooden sashes will be installed, namely high humidity, in light of which the products will require pre-treatment with protective compounds that will prevent deformation of natural raw materials from contact with a humid environment.
Chipboard
Budget material used for the manufacture of sashes. Such raw materials are quite suitable for making your own doors to a sanitary cabinet. Chipboard doors are easy to install and are secured using standard hinges.
Tile
This material is in demand for structures with invisible doors. This option is in demand when you want to hide the cabinet from view, but at the same time make the most of the existing niche.
Mirror models
A popular and attractive option for cabinet doors, which will be relevant for combined or separate bathrooms. A special feature of this model is the ability to visually expand the area of the room and emphasize the design of the walls in this area. You can implement a similar idea of designing a functional design by purchasing a finished product or by independently attaching the mirror to an additional fixing material, which can be plywood.
Plastic products
This category of products includes modern versions of blind doors, roller shutters, and classic swing doors are also made from polymers. The raw material is in demand due to its wide color palette, resistance to dampness and contact with water, in addition, the material is easy to care for.
Textile
Textile door options will be no less attractive and functional. The fabric can have a special impregnation, thanks to which it will remain resistant to moisture and will also keep its shape. Thanks to this design, you can make an interesting and bright accent in the room, in harmony with the overall style.
Glass
A beautiful and functional variety that allows you to make your closet beautiful and practical. The variety of textures, as well as the possibility of applying various patterns, makes glass doors quite popular among consumers. In addition to its visual appeal, this material is notable for its long service life, which will be important for rooms with high levels of humidity.
Laying tiles
On the back side of the hatch you need to hang a load that weighs as much as the ceramic lining of the front side. What does it mean?
If the tile hatch measures 40x60, then 2 tiles measuring 20x30 will be required for cladding. This means that 2 such tiles are hung on the back side. Such manipulations will help prevent the door from sagging after installation.
When laying ceramics, consider the following:
- Tile adhesive should not get into the seam; it can get into the invisible hatch mechanism. The glue sets quickly and will not be easy to remove. Therefore, do not apply glue to the edges of the tiles, but make small indentations from the edges.
- The tiles must protrude beyond the hatch frame by at least 5 mm. On the side where the opening mechanism is located, the tile protrudes at least 5 mm, but not more than 50 mm.
- On other sides, the tile can protrude by more than 50 mm, but more than half of the tile must be coated with glue and glued to the base.
- It is necessary to calculate the installation in advance so that there is no trimming in place of the hatch. This may require mixing the position of the revision slightly or making a thin trim in the corner.
- The ceramic lining of the hatch is laid in the same plane as the rest of the wall cladding.
Before you start laying the tiles, do not forget to prime the plasterboard base and the frame of the technical hatch. The primer will improve adhesion.
Tips and tricks for use and care
Review of locks for metal cabinets, what models are available
Professional plumbers give several recommendations for the further operation of inspection hatches:
- The hinges of the plumbing hatch must be periodically lubricated with appropriate means, for example, lithol.
- Over time, the door may sag slightly under load. To make adjustments, use a hex wrench to correct the position of the hinges, and, consequently, the door.
Plastic and metal hatches are gradually losing popularity, giving way to invisible hatches that meet modern design requirements. These products have a presentable appearance, but have complex installation.
Installation
The installation of the audit proceeds according to the following plan:
- After determining the placement height, the pipe diameter is cut with a hacksaw or grinder.
- Using sandpaper, chamfer the outer part of the pipe, and also remove burrs formed after trimming.
- The sewer inspection is washed and placed in the lower pipe.
- The next part of the riser is inserted into the upper branch of the inspection tee. The process continues in the same way until installation is complete.
Plastic doors for sanitary cabinets
Plastic doors for a toilet cabinet are the easiest to install and, importantly, will fit seamlessly into any interior. Another important advantage of plastic products is moisture resistance and resistance to other types of influence.
Plastic doors come in a wide variety of designs, which allows you to choose a model for any style solution
A wide color palette provides plastic products with enviable popularity
Such doors are easy to clean; a simple damp cloth is enough, and in case of heavy contamination, you can use various cleaning agents without fear of harming the material.
After 3-5 days, the seams are cut. How to do it?
- Use a paint knife or a regular blade. Before starting work, change the blade for the knife so that you can work with a sharp tool.
- The seam is cut at an angle of 45 degrees. Place the blade against the end of the tile and cut the entire depth of the seam.
- You need to cut the seam in one go. Repeated attempts will lead to hangnails and an unsightly result.
- Then try opening and closing the invisible revision. See if anything is interfering with normal functioning.
- If you do not like the result, clean the seams from the sealant and repeat the procedure again.
Plumbing hatches for tiles from Hammer for renovations in bathrooms and toilets - video demonstration of work
Bottom line: Installing an invisible toilet hatch under the tiles is the right decision, keeping up with the times. In fact, there is nothing complicated; installation of the revision according to the instructions given in the article will be successful and uncomplicated.
Plumbing doors
In apartment buildings, all communication systems run along the wall of the bathroom, supplying clean water and removing liquid waste, which does not paint the sanitary room at all. It is also worth noting the small dimensions of the toilet, which should be taken into account when trying to disguise communications. The optimal solution was sanitary cabinets or doors.
The design of the product allows you to stylishly disguise communication systems, while maintaining easy access to them.
A sanitary cabinet can imitate a wall lined with tiles or stone, look like a full-fledged piece of furniture, or disguise itself as horizontal blinds. An interesting stylistic solution would be the door to the toilet in the same color and format as the door of the sanitary cabinet behind the toilet. This set of doors is produced by some manufacturers, and the product can also be made to order in organizations that provide similar services.
The small size of the bathroom does not allow the installation of full-fledged sliding door structures, so most often the communication is sheathed with moisture-resistant slabs, in which a small niche is left for the doors. The small size makes it possible to install hinged doors that provide access to equipment, for example, a boiler or water heater. But most often, one or two doors are installed, fixed on special fasteners on the inside of the niche, which, if necessary, can be easily removed and inserted back.
Roller shutters of suitable size are made to order, made of lightweight, yet durable, moisture- and wash-resistant materials.
Let's consider the second option - for painting
Brands such as Praktika and LukeLand produce hatches for the bathroom that can be painted and walls covered with wallpaper. Such hatches are installed on top of walls or in ceilings.
It is recommended to carry out work in a material made of plasterboard, but if desired, the hatch can also be built into a concrete wall.
- The Knauf company produces such a hatch, which is installed for painting; it is chosen for its best qualities, despite the high price.
- The products include non-standard models. Such as laboratory hatches that do not need to be painted.
- Compared to other companies that produce conventional designs, this brand is worth taking a closer look at.
Differences between plumbing and interior doors
The main difference between sanitary ware and interior tiles is their smaller size. Back in Soviet times, during the construction of multi-storey buildings with small-sized apartments, standard sizes of door leaves in hygienic rooms were introduced: 1.9 m high and 0.55-0.6 m wide.
The second important difference is the material of manufacture, which should be light and moisture resistant. The lightness of the material is necessary due to the thinness of partition walls in sanitary premises, and resistance to moisture allows the product to maintain its shape and aesthetic appearance throughout its service life.
Types of door configurations for sanitary cabinets
There are a lot of options for what doors can be. You can consider various materials for manufacturing: drywall, plywood, wood, chipboard, tile, mirror and so on. Each of these options has both its advantages and disadvantages.
Hinged doors made of natural wood coated with clear varnish
Double door wardrobe with laminated chipboard doors
According to the type of configuration, you can also choose from a variety of options: standard doors with a traditional opening method, shutters of the blind type, compartment doors, invisible doors or batten doors. It is the last two options that are used most often due to their convenience.
In the photo there are compartment doors made across the entire wall of the toilet
The photo shows a narrow hinged door made of frosted glass
Invisible door
Typically this option is used for painting or tiles. These designs have many advantages, because their design is as well thought out as possible. They close well (tightly), and at the same time allow easy access to meters and other communications.
Such a door is practically invisible and does not attract attention in the interior, because its outlines merge with the tile seams. They have many options for decoration: it can be marble, mirrors, artificial or natural stone. A special mechanism allows you to open the hatch using a pressing motion. The installation must be carried out at the same time as the installation of the cabinet walls, after which it, together with the walls of the room, is lined.
It is better to entrust the installation of such a structure to professionals, since the installation process has many nuances.
Doors with lathing
This option is quite simple and convenient, and it will not cost much at all. Doors with lathing are suitable for any plumbing cabinet. The main thing is to take measurements in advance and purchase the appropriate furniture. Typically, the material for making such doors is wood or PVC. They are easy to install, but you need to prepare the frame block, fastening the hinges and the lock in advance. If the doors are made of wood, take care to cover them with varnish or stain. Plastic specimens do not require additional processing.
Doors with bars provide ventilation to the cabinet and help create a neat interior
The structure of the lathing allows for good ventilation inside the cabinet, but significantly reduces sound insulation.
The photo shows lattice doors covering the boiler for heating water.
Standards
Sewer inspection is a mandatory pipeline element for installation, the need for which is established by the requirements of building codes and regulations. Installation of the audit according to regulatory documents is carried out by:
- in multi-storey buildings higher than 5 floors, where inspection units are placed at intervals of 3 floors;
- on the lower and upper levels of a low-rise building;
- in a horizontal sewer system with a pipe diameter of 50 mm, inspections are placed at intervals of 15 meters;
- on horizontal sections of the pipeline connecting more than three plumbing fixtures and not having another element to control blockages;
- in sewer systems with domestic wastewater, the length of the pipe section between inspection and cleaning should not exceed 12 meters;
- at a distance of no more than 10 meters for sewerage with industrial wastewater or storm water.
Monitoring compliance with the number of inspection holes is carried out at the project stage by entering it into the working drawing of the pipeline.
If the sewer pipe is deep, inspection wells must be installed Source eurolos.ru
Components of a sanitary cabinet
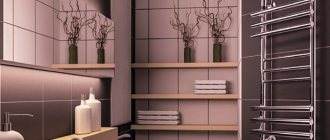
Being an indispensable component of the room, the toilet needs proper arrangement. In order to improve ergonomics, it is equipped with a small wall structure - a plumbing cabinet. It is intended for the following purposes:
- Masking of communications. The opportunity to hide pipes in a compact piece of furniture looks tempting, especially if the room is not large. In addition, this solution allows you to increase the aesthetic appeal of the room and get rid of the problem of exposed communications.
- The emergence of an additional niche for placing bathroom care products and household chemicals. The design can be divided into several zones using shelves, which will make it more spacious and functional.
- Free access to important meters and plumbing components.
- Easy to troubleshoot.
When arranging a plumbing closet for a toilet, you need to make sure that it can accommodate the following elements:
- The cleaning filter is a dirt trap. The design is designed to increase the service life of mixers by deeply purifying water from many impurities and solid particles. The absence of a mud trap will lead to rapid wear of important components of plumbing equipment.
- Water meters. Designed to save money, because... they determine the true cost of water costs and prevent homeowners from having to overpay the tariff.
- Check valves. The task of the nodes is to provide balanced counter functionality. If a pressure difference occurs, this increases the likelihood of water overflow and does not allow you to manually change the values of the water meter. Due to this feature, the installation of sensors is provided for in the standards of management companies.
- Collectors. Designed for uniform distribution of water.
- Water pressure reducers. The devices absorb pressure surges and restore normal operating conditions.
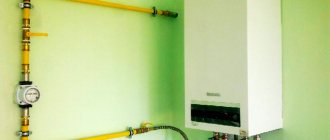
If the plumbing cabinet has the required dimensions, you can install equipment for heating water in it. It can be either cumulative or flow-through.
Types of doors for bathroom cabinets
The main function of a plumbing cabinet is to conceal fixtures and equipment. However, when arranging the structure, it is necessary to ensure free access to the toilet and the main components of communication systems. For this reason, toilet doors must open and close freely.
To cope with this task, you need to choose the right type of door. In particular, you can choose from the following options:
- Hinged doors. This option can be called the standard opening method.
- Invisible doors.
- Framed doors.
- Louvre doors in the toilet.
- Sliding doors.
The installation of each type of plumbing toilet door must be carried out in accordance with its characteristics in order to prevent the formation of bevels and other defects. Otherwise, the appearance of the entire structure may be spoiled.
Folding devices
Such designs are good for places where it is difficult to open or slide the door. When pressing on the sash, it opens at an angle of 45°, secured to a chain with carabiners. Usually this is enough to check communications or rewrite water meter readings. When it is necessary to allow full access (for repair actions), the carabiners are disconnected and the hatch is completely removed.
Advantages of folding hidden hatches:
- possibility of use in hard-to-reach places;
- The doors can be easily removed and provide free access.
The only drawback is the inconvenience of installing the door, and after each disconnection it may be necessary to correct its position.
What is a plumbing hatch
Plumbing hatch in the bathroom
The inspection hatch is a product consisting of a frame, hinges and a door, which is secured with a lock.
The advantages of such elements:
- compliance with technical requirements and standards for ensuring access to water supply communications: threaded connections, meters, taps;
- neat and presentable appearance;
- allow you to hide unaesthetic elements of plumbing: filters, pipes, water heater, meters.
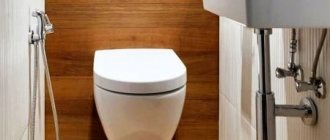
The inspection hatch in the bathroom can be installed as:
- a window providing access to the bathtub;
- plumbing door behind the toilet in the toilet;
- the door of a separate cabinet, equipped in a plasterboard box.
After installation of the product, it resembles a cabinet with plumbing fixtures located behind the door.
Installation procedure
First you need to prepare all the necessary parts. The dimensions must exactly match the indicated dimensions in the drawing. If a home craftsman has difficulty cutting the material correctly, you can ask the craftsmen of the company where it was purchased. Almost every company that sells chipboard provides such assistance.
To make a toilet cabinet, you cannot do without the following tools:
- Electric jigsaw and wood saw,
- Roulettes,
- Level,
- pencil,
- Screwdriver,
- Electric drill or hammer drill.
Having prepared all the necessary parts, you can begin installing the cabinet in the toilet.
- Installation begins with attaching the bars that are intended for the frame. Using self-tapping screws, pre-marked holes are drilled, then dowels are inserted into them. Preliminary markings are made according to the level, since a skew of the frame may occur, which, in turn, will entail a skew of the door. When marking the wall, keep in mind that the toilet tank should not be included in the plumbing closet area.
- The next stage of installation will be to mark out the spaces for the shelves. We select one wall and mark out places for shelves in random order, the main thing here is that the shelves are located conveniently. The second wall is marked by level; you need to ensure that the shelves are installed strictly horizontally. After this, in the places marked with a pencil, we attach the aluminum profile that is needed to install the shelves. We fasten using self-tapping screws and dowels.
Types of ventilation in sanitary doors
Forced ventilation in the wall facing the street can minimize the risk of mold on bathroom/toilet surfaces and musty, heavy air. Ventilation holes in the sanitary door, which can have different sizes and shapes, also allow for the flow of fresh air. In some products, holes are drilled in the lower part and decorated with plastic or other coating; in others, these holes are covered with a grill.
The grille can be rectangular in shape, slightly smaller in width and arbitrary height, or it can be presented in the form of round plastic windows, which can be removed and washed if desired.
Design Features
The plumbing cabinet is installed on the wall directly behind the toilet. Its main task is to provide the room with aesthetic appeal and protect elements of communication systems from various mechanical damage. Also inside the cabinet you can place several shelves on which hygiene products and household chemicals are stored.
When arranging a sanitary cabinet, you should pay attention to the internal configuration, since its capacity depends on this. However, other components of this design also cannot be ignored.
In particular, we are talking about sanitary cabinet doors. The specific design of these elements, appearance and material of manufacture are of great importance. The degree of protection of devices and instruments located inside the cabinet, the appearance of the finished structure and the efficiency of its use depend on this
It is very important not only to hide measuring instruments, taps and pipes, but also to ensure their accessible location in the interior space.
Where to start ↑
Decide on the location of the plumbing. In a typical bathroom you won’t be able to speed up much, the space won’t allow it. But larger rooms have a choice. General recommendations:
It is recommended to place the toilet first from the sewer riser. It is desirable that the toilet outlet flows through the fitting directly into the riser or has a minimum number of turns. It would be correct if drains from plumbing fixtures located further from the toilet spill through it.
Also place the shower, whose typical height of the drain from the floor is small, closer to the riser so that there is no problem with the slope. The drain is located quite low. But the washbasin, kitchen sink, and washing machine can be placed further away. Most washbasins, bathtubs, and toilets are connected to pipelines in a similar way: the axes of sewer outlets and supply water pipes are located at the same height. But there are atypical solutions. It is advisable to select all the equipment in advance, take communication connection diagrams from the seller, and strictly follow them
We recommend paying special attention to the toilet diagram: the drain can be directed in different ways, and at different angles. 90% of domestic devices are equipped with an inclined horizontal outlet, but there are other options. If you are going to install a large corner bathtub that does not have legs, but a supporting frame, take the frame diagram: it is not always possible to “untie” the bathtub drain according to the usual diagram.
If you are going to install a large corner bathtub that does not have legs, but a supporting frame, take the frame diagram: it is not always possible to “untie” the bathtub drain according to the usual diagram.
Having arranged the plumbing, you should outline the location of the pipelines: start with communications.
Dimensions and door design for sanitary cabinet
As a rule, the dimensions of the door in the toilet behind the toilet correspond to the dimensions of the cabinet structure. It should be taken into account that these dimensions are individually selected for each room.
Doors must provide easy access to plumbing services
When choosing and purchasing doors or materials for their manufacture, do not forget about the basic installation requirements.
- Small doors (secret) are installed if access to the meter and communications is necessary. It is better to make them with additional windows.
- If we are talking about installing specimens at the full height of the wall, then installation can be done when the pipes are on the surface and positioned vertically.
- For medium-sized options (for example, 55*190 cm), you can consider placing shelves for storing household items.
- When calculating the depth of the box, keep in mind that it should be sufficient to carry out repair work using various tools, because it is often necessary to replace some components.
The placement of doors depends on the location of pipes, meters and other plumbing fixtures
As for design and decoration, there are many options for decorating the facade of such a cabinet. Let's look at the most popular of them:
- Mirror doors. They visually increase the space, and this is a big plus. However, any touch leaves fingerprints on the surface, so cleaning will need to be done more often.
- Roller shutters with a metallic shade. They will look especially advantageous in a modern-style interior. If the interior is made in bright colors, then it is better to give preference to bright colors in the design of the structure.
- Special stickers, photo printing, etc. are suitable for decoration.
- Also, as an additional design, you can use spotlights on the doors, inlays on wooden materials, and tiling.
Plywood shelves
The most common material for shelves is, of course, plywood. Thanks to its low cost, strength and durability, plywood has held a leading position in this area for decades. In addition, anyone can make a shelf in the toilet behind the toilet with their own hands from plywood. And if you not only want to rationally use space, but also decorate the interior, then this material is the best option for you.
First, you need to decide on the type of shelf; they can be either classic with straight parts or with curly cutouts. If you have a jigsaw, then it is best to choose the curly options. They require a little more effort, but they do a much better job of decorating any room.
First you need to decide on the appearance and size of the shelf that you want to make in the toilet with your own hands, since the size and shape of the parts depends on this. It is best to first find or draw a drawing of the shelf. This will make your work much easier and, in addition, you can easily calculate the amount of material you need.
The next stage is marking the parts on a single sheet of plywood. If your design has several parts of the same size, then it is best to make patterns from cardboard and draw with their help. After the parts are cut out, their ends need to be sanded well. After this, you can fold the finished product and begin decorating it.
Flat surfaces can simply be covered with stain and varnish, this is quite enough. But you will have to work a little with the ends so that the shelf has a beautiful appearance. It is best to use edge tape, which is simply glued to the ends. The tape can be matched to the color of the tint or, conversely, it can be used to shade the ends. When everything is ready, you can hang the shelf on the wall.
Doors to the toilet for a plumbing cabinet - the 2 most common options
Louvered doors for sanitary cabinets
The biggest advantage of louvered toilet doors is that they are made of moisture-resistant plastic and PVC. It is the appearance that often raises doubts: it will not fit into every interior and not everyone will like it, however, for some design solutions it will be a very good choice.
If we consider this option from a practicality point of view, we must take into account that when opened, the blind system goes up. Access, of course, does not block, but the part of the door that gathers at the top goes into the mechanism, which takes up a significant space in the upper part of the opening. The lower part, made of this material, will require a large number of modifications.
Louvered doors can have an open top frame or a closed one built inside a niche
Well, there is one more significant drawback - the ability to install only in a completely finished opening. If the repairs in the toilet have not yet been completed, the walls have not been leveled, tiles have not been laid or wallpaper has not been pasted, then you should not install louvered doors in the toilet. otherwise, during installation there will be gaps that will need to be corrected.
A special case
Often, the apartment owner takes on the job for purely aesthetic reasons: the only goal is to close the water supply and sewer risers, which significantly spoil the appearance of the toilet.
What can be recommended in this case?
Instead of drywall, it is better to use wall panels made of thick plastic. We emphasize: mechanical strength is important here. An accidental blow will easily pierce thin, inexpensive panels of domestic production; but Italian ones that are one and a half times more expensive can only be damaged with a hammer.
- The panels are attached to the galvanized profile frame with clamps. The structure must be collapsible: sooner or later access to the risers will be required. A starting L-shaped profile is launched along the perimeter of the wall.
- Access to the valves and filters is provided by a plastic plumbing hatch or, as it is sometimes called, a plumbing door to the toilet behind the toilet. The hatch is installed in the cutout of the panels using silicone pipe sealant.
- To ensure that the risers are ventilated and do not rust due to the formation of condensation, a pair of narrow and long ventilation grilles are mounted in the upper and lower parts of the wall.
Materials for the manufacture of sanitary doors
When manufacturing door blocks for sanitary premises, manufacturers focus on moisture-resistant materials and coatings:
Glass is resistant to water and steam, easy to clean, and retains its original appearance for many years. The safety and strength of the material is ensured by hardening or the triplex system. If there is a possibility of a fight, the tempered glass is showered with small crumbs that are not capable of harming a person. Triplex is made of several thin layers of glass glued together with a special film polymer, so in the event of a fight, all the fragments remain glued to the film. Glass design involves various effects (matte, mirror reflection, tinting, corrugation, etc.) and fittings or inserts made of durable and lightweight aluminum.
Solid PVC plastic is inert to moisture and temperatures; due to its polymer composition, it is not suitable for the emergence and development of mold and fungal spores. The main advantage is the ability to make the product according to individual sizes, in any stylistic decision and shade.
Chipboard panels impregnated with a special composition with moisture-repellent properties. The panels are usually finished with natural veneer or eco-veneer. The only drawback of doors is their heaviness, which is why manufacturers usually produce doors whose inner part consists of many empty cells, reminiscent of a honeycomb, which is sheathed on both sides with chipboards of small thickness, and then comes the thinnest layer of coating.
Solid wood. Products made from natural solid wood are characterized by a high level of strength and reliability, and have a luxurious appearance. The wood blank for the door must be thoroughly dried in production, soaked in several layers of antiseptic and moisture-repellent compounds, and then tinted in the required color. Wooden doors are quite heavy, so they are not suitable for installation in rooms with thin walls. There is also a possibility of buying a counterfeit product, the material for which has not been completely dried and treated with compounds, which will ultimately lead to the appearance of mold, bacteria and bugs inside the wood.