Over the many years of use, the floor boards have been painted more than once. Old paint cracks, causing chips. In this article we will focus on the topic: how to paint old and new wooden floors.
What are the advantages of acrylic paints?
Different colors of acrylic paint
Acrylic floor paint, which has the most positive customer reviews, allows you to maintain its attractive appearance for many years. In addition, she:
- not afraid of ultraviolet rays;
- devoid of a sharp unpleasant odor;
- retains properties at low and high temperatures;
- moisture-proof and fire-resistant;
- easy to apply and dries quickly.
Another advantage of this material is that it is easy to care for wood flooring painted with it. There are no special cleaning technologies or recommendations for choosing detergents. Floors can be cleaned from dust and dirt with a damp cloth or using a vacuum cleaner. Therefore, to the question whether it is possible to paint the floor with acrylic paint, the answer is completely unequivocal - “Yes!”
Video: How to remove paint from walls
Lifespan of paint on a house
A wooden house painted on the outside, even with the highest quality paint, will need repainting after a certain time. For high-quality facade acrylic paints, the actual service life is approximately 10-15 years and can reach 20 years, subject to preventive inspections and measures. For glaze (translucent) antiseptics and facade oils, the service life is approximately 6-8 years and can reach 10 years. This service life on the outside of the house is ensured by Finnish Teknos facade paints and these are not advertising promises, but a result proven by many years of experience in the practical use of Finnish Teknos paints.
Every year our company sells about 400,000 liters of facade acrylic paints for wood, glazing antiseptics, oils and wood waxes, which are used to paint several thousand wooden houses every construction season. We have good feedback from our customers, both individuals and construction companies, who speak very positively about the quality and durability of Finnish Teknos materials for painting a wooden house.
Unfortunately, along with a large number of positive reviews, we receive several “complaints” (paint complaints) per year, in which buyers are not satisfied with the quality of painting of the facade of their house, peeling and peeling of paint on the external walls of a wooden house. Despite such a minimal number of complaints, we consider it necessary to explain in detail the reasons for the occurrence of such defects and how to avoid them.
The importance of following paint instructions
For a long time, there was an opinion that it was enough to buy high-quality paint and the issue of painting a house would be resolved for many years, since anyone can handle painting a wooden house. Currently, most buyers come to understand that for long-lasting painting of a wooden house, in addition to purchasing high-quality materials, it is equally important to pay due attention to the painting process: follow all the manufacturer’s recommendations for preparing the surface and applying paint and appropriate primers. Otherwise, even the most expensive paint will not provide a good result.
When communicating with customers, our company’s employees always pay attention to the need, before painting a wooden house, to study the information on the label on paint cans and more detailed information in the Technical Specification (TDS) for the purchased material, which can be found on our company’s website and on the website of the Finnish manufacturer Teknos.
Based on the experience of using Teknos materials for painting wooden houses and for factory painting of facade boards, information received at annual meetings in Finland at the Teknos factory of our employees with Finnish specialists, we consider it necessary to share additional most important information on the correct painting of a wooden house so that our customers avoid cases when high-quality paint after 1-2 years begins to peel off and has damage to the film.
Stages of painting a house for a long life of the coating
A high-quality prepared wooden surface is the key to ensuring high adhesion (adhesion) of the paint to the wood, which will not allow the façade paint to peel off after a short period of time.
PAINT IS AS QUALITY AS THE SURFACE IS PREPARED FOR PAINTING - a phrase well known among professional painters.
Below are important steps to follow when preparing outdoor wood surfaces before painting:
- The surface of the wood must be cleaned of dust and dirt.
Unfortunately, this simple advice is often neglected and painting begins without cleaning the surface of the walls of a house that has stood for several months or more. The surface of the walls may look relatively clean, without visible dirt, however, to understand how clean the surface of the street walls is, you can run over them before painting with a light rag and the result will be obvious. After just 1-2 months, a significant amount of street dust accumulates on the walls of houses. Painting a house when there is a layer of dust between the wood and the paint cannot provide a high-quality and durable result. Recommendations on how to clean the walls of a house before painting are indicated on the labels of the cans and in the Technical Specifications for Teknos products.
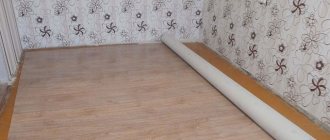
Preparing to paint an old wooden floor
First of all, you need to divide the wooden flooring into two
- Plank floor.
- Parquet.
Plank floor
Before starting work, inspect the wooden covering, replace rotten boards, pay attention to chips and cracks
Before painting, a thorough inspection of the condition of the old flooring is carried out:
- They identify various defects: chipped paint, cracks and damage to old painted floors.
- Identify areas with loose boards that have become unusable.
- Prepare an approximate defect list. It is used to determine the required amount of materials to repair the floor in a wooden house or other dwelling.
- Prepare the tools necessary to carry out repair work.
To carry out restoration work you will need: a hammer, a level, nails, a scraper. You will also need a construction knife, a plane, a set of chisels and a wood saw.
Repair work consists of several stages:
- loose floorboards are dismantled;
- check the condition of the joists in the areas where the boards were removed. Wooden parts are repaired;
- install new boards;
- All cracks and chips are carefully puttied. Sludges of old paint are removed.
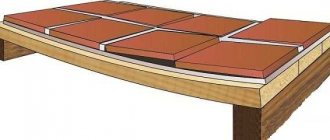
Parquet
Old parquet is usually scraped and varnished
Old parquet flooring used to be made from natural wood, especially oak. Painting a wooden parquet floor is unlikely to be a pleasure for anyone. This is done when absolutely necessary.
It is better to repair the old parquet, cover it with colorless varnish or another composition, without covering the textured pattern of the wood. The parquet rivets are laid, forming various patterns. The most common form of parquet is laid planks in a herringbone pattern.
Repair work to restore parquet flooring
Parquet repair work must be carried out in the following order:
- Conduct an inspection of the condition of the parquet flooring. Draw up a defective statement.
- Severely damaged boards are replaced with new rivets.
- Loose planks are drilled with a thin drill in several places.
- The drilled holes are filled with “liquid nails” type glue.
- All cracks and holes are filled with special putty.
- The entire surface is scraped using a machine and manual scraping.
The order of preparatory work before painting
The quality of the paintwork depends on how carefully the preparatory work is carried out. This is especially true in cases where there is an old coating.
The floor should not be simply repainted over the previous one if there are cracks and chips on the surface. Everything is cleaned, the cracks are sealed with putty, dirt is removed, and only then can the main work begin.
If the base is not just varnished, but painted, then it is pre -treated with a primer that matches the type of the base material.
Pay attention to: Painting a wooden staircase: choosing a coloring agent, painting different types of wood, decor ideas
Before varnishing, carefully sand the surface. It should be taken into account that if a water-based varnish is used, the first layer lifts the microfibers of the wood, and the base becomes rough. Therefore, it is recommended to wait until the layer has dried, and then sand it again, and only then can it be coated with 2-3 layers of varnish.
Compatibility of paints and varnishes
If the floor is not painted for the first time, then its compatibility with other types of paints will be the main factor when choosing a new material. Thus, acrylic compositions can be used on most types of coatings, alkyd can be used on oil-based coating compositions, polyurethane can only be applied to the same type of paint. Manufacturers write information on the packaging if there are particularities of coating application. Therefore, studying this information will be rational.
If the floor is not painted for the first time, then its compatibility with other types of paints will be the main factor when choosing a new material.
Types of floor oils
All oils that can be used to treat floors are divided into three large groups:
- By type of base. Oil formulations are made on a natural or artificial basis. The first group includes linseed, tung, soybean, and tall oil. The products of the second group contain chemical derivatives - polyurethane additives. It is recommended to use only natural products that are environmentally friendly indoors.
- By type of additives included. Wax, usually hard, is often added to natural oils. Such compositions are considered the most effective for treating floors. The coating becomes more durable and acquires high water-repellent properties. Turpentine is also used as an additive, which improves the absorbency of the oil. However, turpentine has a persistent odor, so such compositions are not recommended for use indoors. Pine resin is mixed into products intended for external treatment, which increases the resistance of the composition to natural factors.
- By color. Oils are transparent and tinting. Expensive wood species are preferred to be coated with transparent compounds that do not hide the beauty of the natural pattern. Cheaper breeds acquire a more noble appearance with the help of tinting. If it is necessary to change the color of the oil, a pigment of the desired shade is added to it. You need to be especially careful with white dyes; when applying such a composition, you need to immediately polish it with a pad. Otherwise, the surface will look like it has been simply painted with white paint.
When choosing impregnation, you must also take into account the following indicators:
- wood type;
- purpose of the premises;
- temperature and humidity;
- interior features.
Do I need to use a primer before painting?
Professionals recommend priming the surface. The process helps reduce paint consumption. A layer is created that will penetrate into the wood structure, filling the pores. The degree of adhesion of materials also increases. The choice of primer solution is made according to the type of paint purchased. There are compositions suitable for any type on sale.
The process helps reduce paint consumption.
Preparing a wooden floor for painting
The preparatory stage must be carried out according to all the rules so that the coating lays evenly and beautifully, and also lasts the period stated by the manufacturer.
The preparatory stage must be carried out according to all the rules so that the coating lays evenly and beautifully.
Preparing the old floor
The previously painted floor begins to be prepared by cleaning off the previous layer, and the baseboards are dismantled. The surface is usually sanded to remove all unnecessary elements. Putty solution is used to close the gaps between the boards or wooden slats. The preparation is completed by grinding and priming the surface.
The surface is usually sanded to remove all unnecessary elements.
Preparing the new floor
Before painting new boards, it is not necessary to adjust the material to each other, but apply antiseptic agents and a primer solution. Each layer of mortar must be allowed to dry before the next one. It is better to prime the base in two layers.
Each layer of mortar must be allowed to dry before the next one.
DIY wood floor painting
How to properly paint a wooden floor so that it looks beautiful and lasts a long time, you must follow the steps described below:
- They start by painting the edges, then paint the rest of the surface; a roller is better suited for this purpose.
- When the drying process of the layer is completed, install the baseboards and paint them in two layers.
- Then they proceed to painting the floor covering with a second layer of paint.
- The work is completed after drying the last layer by washing the floor with soapy water to remove the stickiness.
They start by painting the edges, then paint the rest of the surface; a roller is better suited for this purpose.
What kind of paint can be applied to oil paint?
If you need to paint in a short time and there is no way to waste time on removing the old finish, then there is an option when the paint layer can be applied to another one. You should check the integrity of the coating and whether it adheres firmly to the base.
The assessment is made visually; you should also run your hand over the surface; swelling can be detected using this method. If there are large defects, you cannot think about applying a new layer. Such a surface will repel new material quickly.
The oil composition has a glossy structure; it is the creation of an even film that helps protect the surface from moisture, for this reason it is often used for wood. But a smooth surface is not suitable for obtaining a good degree of adhesion. Therefore, the use of re-staining is difficult.
It would be correct to remove the paint; for this purpose, you can find special removers on sale; they soften the layer, after which you can remove the paint with a spatula. The process is not fast, but you get a good basis for repairs
If the base is in good condition, and you still decide to paint, then oil or alkyd enamel is more suitable for an oil base. You can also resort to acrylic; you will need to carry out the preparatory stage, applying a primer.
Compositions based on water are not a suitable option; in order to complete the polymerization, it is necessary to saturate the surface with water, and an oil coating will not allow it to pass to the base, so drying will not take place at the proper level, and reliable adhesion will not be obtained.
The oil composition has a glossy structure; it is the formation of an even film that helps protect the surface from moisture.
The main types of materials for painting floors
Painting wooden floors can be done using different means. But here two effects can be distinguished - changing the color, or preserving the natural pattern by applying varnish.
The first option creates a new color on the surface, usually multi-layer painting is used to obtain better protective properties. The second helps to preserve the naturalness of a wooden house, so that there is a barrier from harmful factors, but the beauty of the wood remains.
Painting wooden floors can be done using different means.
Paint or varnish, which is better for wood?
Before making a final decision on how best to paint the floor in a particular situation, you should understand the features of these products. So paints help to create any shade on the surface; the variety of colors is enormous, so choosing the right one for the interior of the apartment will not be difficult. This is also an opportunity to diversify the coating with patterns and use several colors. This is an option for how to paint floors in an original way.
Paints help create any shade on the surface.
Floor treatment compounds
The means described above are in demand, but other options can also be used that will help renew the coating and get an unusual and stylish layer. The following means can be distinguished:
- Oil based mastic. It is distinguished by the creation of a barrier layer from moisture and also covers surface imperfections. At the same time, the color becomes saturated and the natural patterns of the wood are emphasized;
- Wax does a good job of protecting against moisture, but to obtain the desired effect you need to polish the surface, and the service life is short, so you will have to refresh the wax coating often;
- Polymer, based on polyurethane and rubber components. The layer is dense and durable.
Wax does a good job of protecting against moisture, but to get the desired effect you need to polish the surface.
Compatibility of paints and varnishes
If painting floors at home is not the first time, then you should know what paint and varnish materials can be used together:
- The acrylic type is universal in this regard; it can be applied over any paintwork materials, without fear of peeling and other consequences;
- Alkyd-based ones are not compatible with other compositions; they can only be painted on the alkyd layer, or a primer solution, drying oil or oil products are first applied. Alkyd compounds must not be applied to substances containing acetone;
- Polyurethane-based ones are only suitable for working on top of a similar product; all other options must be completely removed from the surface.
Acrylic paints can be applied over any paintwork materials, without fear of peeling and other consequences.
Which varnish to choose
The choice is made from types with water as a base or with a synthetic type. Painting the floor with water-based varnish is easy, and the product will not emit a strong odor, but use is limited to rooms with heating, otherwise low-temperature exposure will lead to clouding of the layer and the appearance of cracks. For dachas that are not used in winter and the heating is not turned on, it is better to choose the second type, taking into account that the cost of funds is higher.
Painting the floor with water-based varnish is easy.
Which paint to choose
To make it easier to choose among the variety of paints on the market, you should take into account the requirements for the floor covering. The following requirements for paintwork materials are identified:
- Safety for human health;
- The desired effect is matte or glossy;
- Moisture resistance;
- Wear-resistant property;
- Drying time;
- Resistance to UV rays;
- Is cleaning with detergents allowed?
You should not save unnecessarily; usually you want to get a durable coating.
Tools for painting wood floors
Before the floor is painted, the tools required for the entire process are prepared. The list includes the following tools:
- Protective elements for the master – respirator, rubber gloves;
- Brushes and roller;
- Cuvette;
- A container for paint, if the color will be diluted or used;
- Painting tape to mark the boundaries of painting, to cover surfaces that will not be painted.
Before the floor is painted, the tools required for the entire process are prepared.
Is it possible to paint with oil paint over oil paint?
Is it possible to paint with oil paint over oil paint? Many property owners who decide to refresh the color of the walls ask this question. This option is optimal if you need to skip the stage of removing the old coating. To get better adhesion, it is advisable to sand the base, removing the glossy layer.
To get better adhesion, it is advisable to sand the base, removing the glossy layer.
Types of paint and varnish coatings for floors
All paint and varnish products are divided into types, including floor paint. Attribution to the breed may indicate what characteristics the resulting coating has. Next we will look at the main types of these products.
Polyurethane paint
Polyurethane enamel is becoming increasingly popular due to its creation of a pressed silk effect after drying. We can highlight the positive characteristics of the paint:
- Color fastness;
- Odorless;
- Quick drying;
- High wear resistance;
- It can also be used for exterior work, it is sometimes used to paint paving slabs, and it is also suitable for concrete and wooden floors.
To choose a paint for a specific surface, you need to look at the instructions on the product packaging.
Polyurethane enamel is becoming increasingly popular due to its creation of a pressed silk effect after drying.
Oil paints
Oil-based paint and varnish material is environmentally friendly. But the popularity of the application is decreasing due to the fact that after painting with this type of paint it takes a long time for the surface to dry.
However, the material has a number of positive properties:
- Does not emit a pungent odor;
- The coating density is high, you can limit yourself to applying one layer;
- The coating will make the floor hydrophobic;
- Coating strength, abrasion resistance;
- Long duration;
- Suitable for concrete and wood floors;
- Acceptable price.
They are available in white, or colors are used to create other shades. A good choice over painting indoor wood floors if you can wait for the paint to dry.
Oil-based paint and varnish material is environmentally friendly.
Alkyd paints
The composition uses alkyd resins as the main component; petroleum products and pigmenting substances are also added.
Professionals:
- Good adhesion to the surface;
- Wear resistance;
- Make a fairly dense layer;
- Varied palette;
- Low price.
The downside is a pungent odor that lasts for a long time. Therefore, the application is only advisable outside the building.
Alkyd resins are used as the main component.
Rubber paints
The rubber type of paint and varnish material creates a soft coating that is pleasant to the touch; after drying, no toxic substances are released and no odors are released. The composition is distinguished by the use of harmless components, the main ones being water and acrylic. Elastic and dense, wear-resistant. Wood protects against moisture. Requires careful surface preparation, otherwise the coating may peel off.
When choosing paint, there are a number of points to note:
- You will need tools with different parameters of length, shape width;
- Choose the most proven paint and varnish materials;
- The variety is selected depending on the type of tree.
The rubbery appearance of the paint material creates a surface that is soft and pleasant to the touch.
Acrylic mixtures
These products have good hiding power and are suitable for concrete and wood floors. They can be used to cover the old painted layer of the floor.
Advantages:
- No odor or toxins;
- Rubber;
- Water resistance;
- Dries quickly;
- Coating resistance;
- Wide range of colors. Gray, brown, black colors are suitable for the floor;
- Doesn't break;
The disadvantage of acrylic paint is its high cost. But its advantages justify the money spent.
These products have good hiding power and are suitable for concrete and wood floors.
Choosing paint for a wooden floor
How to paint a wooden floor? When visiting hardware stores, people are sometimes overwhelmed by the wide range of dyes available.
Each type of paint has its own advantages and disadvantages, which we tried to reflect in this table:
| № | Dye name | Advantages | Flaws |
| 1 | Oily | Wear resistance | Takes a long time to dry |
| 2 | Acrylic | Water resistance | Low wear resistance |
| 3 | Nitro enamels | Fast drying | Toxicity |
| 4 | Lucky | Aesthetics | — « — |
Oil paint
Oil paint today is used mainly to renew old painted floors. Oil paint is diluted with natural drying oil. The painted surface is not afraid of moisture and resists mechanical stress. The dye is absolutely non-toxic.
Acrylic paint
Acrylic-based dye is advantageous in that ordinary water is used as a solvent.
However, in rooms with intense mechanical loads (active walking), the painted surface wears out quickly.
Nitro enamels
Nitro enamels are attractive because they dry almost instantly. However, when burned, they release substances hazardous to human health. For more information on how to paint, watch this video:
Lucky
Varnish coating extends the life of wood.
Varnishes are mainly used to coat parquet flooring.
Parquet coated with varnish takes on a beautiful appearance.
The varnish emphasizes the structure of the wood and is resistant to high indoor humidity.
This floor is easy to use. Easily withstands wet cleaning.
When performing paint and varnish work, it is necessary to use personal protective equipment for the respiratory and visual organs. Vapors from varnish can ignite from any spark.
Surface drying
After the last coat of paint has been applied, you need to wait some time for it to dry. The optimal temperature for drying is considered to be +20-22°C, so it is recommended to paint a wooden floor in the warm season. Even if the paint is completely dry, it is advisable to avoid any mechanical stress on the floor surface at first. Only after 3-4 days from the moment of painting is it possible to fully use the floor.
Drying a wooden floor
There are several factors that affect drying speed, such as the level of humidity in the room, the quality of the paint purchased and its chemical composition. All this must be taken into account to give the paint enough time to dry. This is the only way the finished coating will achieve maximum wear resistance.
How long does it take for a wooden floor to dry?
What to do with new parts
Parts of the car without initial painting - both factory and certified analogues - are processed in several stages:
- Preparation. The new part is coated in black.
- Primer.
- Grinding.
- Painting.
Wet sanding
If the spare part is already installed on the car, then all other parts nearby are protected from splashes.
Peculiarities
The paints themselves for wooden surfaces differ in several features:
- Drying time. High-quality products dry fairly quickly without releasing any strong odors. But there are solutions that harden only after several days, which is not always practical in a modern home.
- Environmentally friendly. Almost all paints consist of harmful components that evaporate into the air during the drying period. Only water-based formulations have optimal performance.
- Moisture resistance. Paints have different structures that can transmit or repel moisture.
Is it possible to paint with oil paint on nitro enamel?
The oil type of wall painting material has an oily structure that is poorly compatible with nitro enamels. If you apply them on top of each other, the following problems may appear:
- Formation based on cracks and bubbles;
- Changing the shade of the product, which ultimately will not allow you to get the desired design of the room;
- The paint life will be short.
The oil type of wall painting material has an oily structure that is poorly compatible with nitro enamels.
Laminate
As you can see in the photo, laminate flooring has an excellent appearance, and you can choose its design to match the style of your dacha. Laminate is a demanding material, so think carefully before using it in your country house.
The main disadvantage of laminate is that it does not withstand moisture at all, which is inherent in most dachas. If you still decide to use it, then buy moisture-resistant samples, because this will reduce the risk of deformation of the material (read: “Which laminate to choose for a summer house and how to lay it”).
Speaking of advantages, it is worth noting the longevity of the material: laminate will retain its original appearance for up to 10 years, unless you spoil it yourself. This flooring also stands out for its environmental friendliness, because no chemicals are used in its production. The slats make it difficult for fungus to form and do not need to be treated with antiseptics, but its substrate (plywood or chipboard) should be further treated.
How to paint a wooden porch
Painting a porch using technology is not much different from painting the floor inside a house. The main thing is to choose the right paint composition. Usually acrylic or oil compositions are used, but always for outdoor work. When purchasing, you need to carefully look at the label and read the instructions.
Another option, if the steps are not very old, is to cover them with stain. It holds well and protects the wood from abrasion. In addition, stain enhances the beauty of wood patterns. Of course, before painting the steps need to be prepared - fill the cracks and sand the surface.
If everything is done correctly, the house will look updated and shine with new colors.
We also recommend reading:
How to paint walls with water-based paint over oil-based paint
The water-based composition is also produced using water. To obtain the necessary fixation of the layer, it must be saturated into the base. But the oil composition will not give water such an opportunity, it will simply push it away from itself.
For this reason, part of the layer will adhere well, in those places where the gloss has come off, and part will simply not adhere. To avoid such consequences, apply a layer of drying oil; it will create a good base for adhesion. Or a primer solution is used.
To obtain the necessary fixation of the layer, it must be saturated into the base.
Tools
With large surfaces it is faster and more economical to work with a roller, but a regular paint brush will also be needed. You won't be able to paint near walls and in corners with a roller. Therefore, it is better to go through hard-to-reach places with a brush and then use a roller.
If your walls are not painted or wallpapered, then you don’t have to worry too much and get to work. But if you need to protect the walls, you will need to purchase masking tape and cover them, and remove it after completing the work.
To impregnate the roller with paint, it won’t hurt to buy a paint bath. Of course, you can get by with, for example, a cut-off water bottle, but a bathtub is more practical and convenient.
For work you will need: tape, roller, brush, paint tray (tray)
Stage three: prepare the wall before leveling
In order for the putty to adhere well, you need to remove all loose particles, dust, oil stains, etc. from the wall surface. This can be done with a sponge soaked in soapy water. All cracks or holes must be widened using a hammer and chisel until they stop crumbling, and filled with putty.
After this, you should apply a primer - it will help make the wall equally porous over the entire surface to be treated, so that the leveling mixture will adhere better. Choose a special concrete-contact primer - it contains small particles (most often quartz sand) that make the surface rough, and its liquid base penetrates deep into the paint, increasing adhesion.
You can do without concrete contact, but then you will have to achieve the roughness of the wall in another way: you can process it with a drill with a special attachment, coarse sandpaper, or make notches in the paint with a sharp object. After this, go over again with a damp sponge to remove dust.
In what cases is it recommended to lay cold floors on the second floor?
To answer this question convincingly, we need to recall a few elementary rules of heating engineering.
- Heated air rises and accumulates under the ceiling. This is the warmest zone in the room, the air temperature here is about 5–8°C higher than at the level of 1.5 m from the floor and 9–11°C higher than on the floor. From the point of view of heating engineering, space heating by heating the floor is considered the most effective; to ensure the most comfortable temperature at a height of 1.5 m, a minimum amount of thermal energy is required. This is an axiom; there is no need to prove its correctness.
- Warm air from the ceiling of the room on the first floor automatically heats the floor of the second floor. The heat is not lost anywhere, but warms up additional rooms. Of course, if they are residential and not cold attic spaces. The question arises: why build insulated structures and, at your own expense, worsen the comfort of living, lose additional funds to heat the second floor, and remove heat from the first floor using ventilation?
Most professional builders strongly do not recommend installing insulated floors on the second floor if its premises are used as residential premises. You need to know that in addition to unnecessary losses of money and thermal energy, another problem may arise. If the technology is violated, the heat-insulating material increases its humidity, and all wooden elements are used in very difficult conditions. Heat plus moisture is an excellent environment for the development of fungi and rot on load-bearing wooden elements, and no modern impregnation can protect them for a long time. Over time, you have to deal with very unpleasant premature repairs. We hope that this information will help you make the best decisions in each specific case.
Wooden floor insulation scheme
Unusual painting of a wooden floor in a country house
Often the floors in the country house are not presentable. Because of this, it is customary to paint them rather than varnish them. But not everyone likes the usual painting in some shade of brown. What to do in such a situation? We offer you a schedule according to the template:
- Draw the template to scale on paper. Then determine the dimensions and colors of the design. To keep the boundaries of your straight lines neat, use masking tape.
- Paint the wood floor with a base paint color.
- After the base has dried, apply the base color of the stencil.
- Then paint in the details of the image.
Floor painting paint
For this job you will need:
- Dye.
- Templates.
- Ruler.
If you go over the pattern with a brush with light/dark paint, the surface will appear more voluminous.
Sequencing
In this way, you can divide the space into functional zones. In addition, such an idea may be practical in a narrow corridor. A painted surface, for example, in the form of a path, looks very original. In addition, the painting may well be light. You won’t have to clean the mat painted on the floor, which can also be attributed to the advantages of the coating. All you need is a bucket and a mop, and the “rug” will sparkle like new again. Agree, it's convenient.
If you are a supporter of varnished floors, then we suggest that you apply a light, light ornament to the varnished surface. In addition, using paint you can create an imitation of expensive wood inlay.
Pros and cons of varnish
The varnish is transparent and will show all the imperfections of the wood. It lays beautifully only on a perfectly smooth surface - only in this case will the floor shine beautifully. However, all the advantages will be visible too - a beautiful board design, smooth transitions.
Pigmented compounds give the coating a pleasant shade; with careful selection, even ordinary pine can look like noble types of wood.
The weak point of the varnish is temperature changes. That is why in unheated rooms it is recommended to use exterior or yacht varnish. It is quite easy to apply, dries well and highlights the golden shades of natural wood. Its layer is elastic and does not crack when heavy objects fall (unlike furniture), and also withstands sub-zero temperatures well.
Technological issues
How much oil do you need
The consumption of the product depends on the tree species, the type and consistency of the oil, and the method of application.
Oily and resinous types of wood absorb oil less than dry wood, so in the first case you will need much less oil than in the second. The consumption of natural oil is less than that of synthetics. It takes more liquid oil than thick oil, since the liquid composition is absorbed much better. Impregnation with hard wax is quite expensive. The hot method of applying oil also increases material consumption.
On average, you need to focus on the following indicators: when treating in one layer, one liter of oil should be enough to cover 20 m2 of area, if the product is applied in two layers, it should be enough to cover 12 m2.
How long does it take for oil to dry?
It takes 4 to 12 hours for one layer of oil to dry. The surface can be used with caution within 24 hours, and full use is possible no earlier than a week after application.
More precise times are indicated in the instructions for the specific product. Also, drying time depends on the type of wood and room humidity. When applying the composition hotly, the oil dries twice as quickly as when applied coldly.
Useful tips
If you are laying down new boards, choose hardwood. The soft ones will quickly wear out and peculiar bedsores will form on such a floor. Hard varieties are more expensive, but they can be called stronger and more durable. If you want to give the wood a special texture, use a stain before applying oil.
When choosing what color to paint the floor on the veranda, pay attention to the color of the stairs and railings near the house. If you have already put together the entire image of the veranda in your head, you can choose a shade to match the color of the furniture
We advise you to choose calm and not flashy colors that will help you relax and enjoy nature.
To prevent the boards from deteriorating due to temperature changes, cover them with thick polyethylene when winter comes. And to avoid slipping and injuries during rain, lay rubber mats with holes.
Put special silicone caps on the legs of furniture that you place on the veranda or glue felt pads. This measure will prevent scratches.
Types of varnishes for interior decoration
All varnishes are divided into two large groups according to the type of solvent: water-based compositions and products made using organic solvents.
Organosoluble varnishes are quite toxic; when dry, they emit a pungent odor; when using them from inside the house, precautions must be taken. But on the other hand, they form a more durable and wear-resistant coating.
When choosing a varnish for the interior decoration of a wooden house, it is necessary to compare both indicators, and also take into account the purpose of the room. When making a choice in favor of environmental friendliness, you need to take into account that the coating will have to be updated quite often. If we are talking about a children's room, then only water-soluble products can be used in it, but for the floor in the country house, an organic-based varnish is quite suitable
If we are talking about a children's room, then only water-soluble products can be used in it, but for the floor in the country house, an organic-based varnish is quite suitable.
Types of varnishes by type of binder component
- Acrylic lacquer. It is produced only on a water basis, therefore it is environmentally friendly and safe. It fits well on the surface, forming an elastic coating, and has an affordable price. However, it is not durable enough and requires regular updating.
- Polyurethane varnish. According to experts, it is one of the best products for interior decoration. Despite the fact that the varnish is made on the basis of water, it has sufficient strength, wear resistance and elasticity, and also has a high level of environmental friendliness. They can safely cover wooden walls and floors of any room in the house.
- Urethane varnish. In terms of strength and elasticity, urethane compositions are practically not inferior to polyurethane varnishes. They are recommended for use on floors in areas with little traffic. Urethane varnish is water-resistant, making it suitable for wet areas.
- Oil varnish. They are produced on the basis of natural or synthetic resins and also contain natural oils. The varnish is well absorbed by the wood and forms a durable ocher-colored layer on the surface. Usually used as a primary coating and extremely rarely as a topcoat.
- Alkyd varnish. This varnish dries very quickly and has good abrasion resistance. However, it does not have sufficient elasticity, which is reflected in low strength characteristics.
Why is it worth covering a wooden floor with oil and not varnish?
Varnish and oil are the products that are most suitable for treating wooden floors. Each of them has both pros and cons. Varnish provides quick and easy maintenance and is usually used to coat cheaper types of wood. For expensive and elite breeds, it is best to use oil.
Varnish penetrates only into the surface layers of wood; the film formed on the surface, although it protects the wood, is not as strong as oil. Oil compositions, on the contrary, are maximally absorbed into the wood, penetrating into its deepest layers, thereby the degree of protection is an order of magnitude higher than with varnishing. Other advantages of oil coating compared to varnish:
- The oil gives the floor and other surfaces of the log house antistatic properties.
- A varnished floor slides, an oiled floor is non-slip and warm.
- The oil coating hides scratches and abrasions; the varnish shows all the damage much more clearly.
- The oil has good waterproofing properties, which is especially important when treating floors in a log bathhouse and other rooms with unstable humidity levels. The varnish coating requires additional waterproofing treatment.
- Wood treated with oil breathes; the varnished film prevents air exchange processes.
- The maintainability of an oiled floor is much higher than that of a varnished one. The oil coating can be renewed on a specific damaged area; to change the varnish, it is necessary to completely remove the coating using a sanding machine.
What are the disadvantages of oil coating:
- Oiled floors require more careful and regular maintenance. The coating needs to be updated at least once every two to three years.
- During the initial period of operation, a floor under oil gets dirty much faster than under varnish.
- Furniture with metal legs should not be used. Metal, reacting with oil, leaves dark stains on the floor.
Step-by-step instructions for coloring
After choosing the right paint for your application and completing the required preliminary surface preparation, choose the tool for the job. You can work using traditional brushes or rollers, or make your task easier by choosing a full-fledged sprayer to achieve your goal. Additionally, prepare adhesive tape, a container for preparing paint and personal protective equipment.
Brushes and rollers for painting floors
When choosing a tool for applying paint, be guided, first of all, by the characteristics of the composition used. One coat of paint applied using a modern sprayer will have quality characteristics that are not inferior to a three-layer paint coating applied with a brush or roller.
The sprayer allows you to save time on work and the finishing material itself. However, the sprayer cannot be used everywhere. For example, to paint corners and various hard-to-reach areas, you will have to use a simple brush.
Paint sprayer
To apply enamels and acrylic-based paints, wide rollers with short piles are used. Velor or conventional facade tools allow you to achieve quick and uniform application of the paint used. For greater ease of use, the roller can be attached to a fairly long handle.
The corners are painted using narrow brushes. All work comes down to uniform application of the paint and varnish composition. If necessary, the floor is pre-primed. It is recommended to start painting from the wall opposite to the exit from the room. Otherwise, you risk creating a “trap” for yourself and unnecessary work.
Start painting the floor from the far corner of the room to avoid getting caught.
In the case of a concrete floor, you can start painting at least 5-7 days after the completion of its pouring.
The paint should be applied with strokes in different directions, and then rub the composition over the floor surface. The layers should not be very dry. It is better to apply 2-3 thin layers than one thick one. This will make the coating dry faster and overall look better. A new layer can be applied only after the previous one has dried. This usually takes about 24 hours.
Painting
Use seam brushes to paint the floor.
Painting a wooden floor requires the fulfillment of certain conditions:
- They begin to paint the floor after the primer has completely dried.
- It is necessary to prepare the following tools: folding brushes, short-pile rollers, a tray for drawing and squeezing paint.
- It is advisable to purchase paint from well-known manufacturers.
- Paint is selected taking into account the structure and type of wood.
- In rooms with intense mechanical load, paint with a high wear resistance is chosen.
- In rooms with high humidity, it is preferable to use acrylic or oil paints.
Wood floor painting technology
How to paint the floor so that the surface of the wooden covering is even and smooth? It is necessary to stock up on an additional set of replacement rollers. The roller should not be foam rubber or have too long a pile. Short bristles distribute the paint evenly over the wooden surface. At the same time, the roller does not absorb excess paint and does not form sagging on the floor. For more information on how to paint a floor, watch this video:
The scheme for how to paint a floor is quite simple. Painting begins from the opposite side to the entrance to the room.
Putting a plastic bag over the tray will help keep the dispensing container clean. The roller is dipped into the paint, and then the excess dye is squeezed out onto the sloping surface of the tray.
When painting large areas, the dried roller is replaced in a holder with a new cylinder within a few days. The old roller is immersed in a container with solvent.
To avoid additional inconvenience when painting the floor, first paint hard-to-reach areas of the flooring with a seam brush. Then begin painting the main area of the wooden floor.
Surface preparation
Before painting, it is necessary to prepare the surface. Very often there are gaps and cracks between the boards. To remove them, you can use a special putty purchased at a specialty store, or prepare it yourself.
Seal the cracks in the wooden floor with putty
Preparing the putty
Small sawdust (pre-sifted through a sieve), wood glue, cement and water are taken, everything is mixed in a ratio of 5:2:5:14, respectively. Dry wood glue must first be diluted with water and left for several hours until it completely swells and absorbs water.
The resulting mixture must be heated in a water bath until it boils, after which it should be used immediately. A distinctive feature of the composition is that it must be applied hot. Before application, the floor surface, especially cracks and gaps, should be cleaned of dirt and dust.
Floor preparation
Sanding the surface of a wooden floor
After treating the cracks and completely drying the composition, the floor surface is sanded. After treatment, the base should be thoroughly cleaned of any remaining dust and dirt. When grinding, it is necessary to remove all sagging and irregularities; there should be no scratches left on the surface. The highest quality results can be obtained using special equipment - scrapers.
It is also worth considering that the preparatory work depends on the preliminary condition of the floor. If the paint is applied to a new base - clean wooden boards, then the above operations will be sufficient. If the composition is applied to an old paint coating, then the preparation will be slightly different. If there is no damage to the painted wooden floor, it is enough to clean the areas with peeling paint and clean the rest of the surface from dirt, dust and grease. In this case, you should definitely select a new paint that is compatible with the old coating. Otherwise, the new finish will begin to spread, wrinkle, and bubbles may form.
If the old paint is very peeling, it must be completely removed. There are several ways you can do this.
- mechanical using hand or electric tools. Power tools will allow you to get the job done quickly and efficiently. Hand tools are best used in small, narrow areas;
- thermal. In this case, the old coating is softened with hot air and then removed using a regular metal spatula. With this method, safety precautions should be observed to prevent the possibility of overheating the wooden surface;
- chemical. In this case, special chemical compounds are applied to the surface - solvents, acids, alkalis. After a short time, the paint either spreads and is washed off with water, or the coating softens and is easily removed with a metal spatula.
Painted surfaces
As mentioned, usually the old paint is removed before the new coating is applied. For this operation, mechanical treatment is used (sandblasting, brushes, grinding) or chemical removal using universal removers.
Useful: old enamels of types MA, PF and NTs can be removed with a spatula, after preheating them with a hair dryer.
The paint heated with a hairdryer can be easily removed with a spatula.
However, in some cases, stripping the old coating is problematic or undesirable.
Here are some typical examples:
- Latex and silicone water-based gypsum emulsions can only be cleaned mechanically, which is likely to lead to damage to the base and the need for repeated puttying.
- Loose plaster painted with oil paint, after its removal, will also be decorated with deep scratches and gouges.
- Finally, with a large amount of painting done at home, removing the old coating will simply take an prohibitively long time. Imagine one person using a hair dryer to remove paint from a wooden floor covering an area of a couple of hundred square meters: we are clearly talking about more than one week of work...
Solutions
There are two of them.
- The same type of paint as the old one can be applied without prior stripping. PF enamel will fit perfectly over old alkyd enamel, NC can be painted over nitro paint, and so on.
A caveat: the old coating must be durable and not show signs of destruction or peeling.
- For other cases, there are universal primers that have equally high adhesion to different types of paints and varnishes. Mostly they are aqueous dispersions of acrylic resins. After priming, the surface can be repainted.
Technology
Let's look at a more complicated case - applying a new coating over a universal primer.
- All flaking areas of old paint are removed mechanically - with a spatula, sander or wire brush. Irregularities are carefully sanded. In the case of a glossy surface, it is better, as already mentioned, to sand it completely.
Peeling areas require mandatory cleaning.
- Visible depressions and irregularities are puttied - again, followed by sanding.
- The primer is applied in one or two layers with intermediate drying.
Attention: primers for old paint should not be diluted before use. The instructions are due to the fact that excess liquid primer will collect drops on the painted surface or drain from it.
- After the primer has dried, it’s time to paint. The procedure is standard: a brush, roller or spray is used; in each subsequent layer the direction of tool movement changes to perpendicular.
The main types of materials for painting floors
When deciding how to properly paint a wooden floor, you have to choose from two types of finishing materials:
- Colored compositions. The products are applied in several layers, after drying, forming a dense and hard crust. Part of the substance is absorbed into the wood, strengthening and protecting it from external influences. Paints for wooden floors are oil-based, alkyd-based and acrylic-based. Modern technologies have made it possible to create durable rubber, perchlorovinyl and polyurethane compounds.
- Transparent compounds. This category includes varnishes that leave the surface of the wood visible, while simultaneously emphasizing the beauty and texture of the material. Painting a wooden floor with varnish in combination with similarly finished walls and ceilings allows you to decorate a room in an antique or country style, which is popular with residents of big cities.
Paint or varnish - which is better for wood?
When deciding on the choice of floor finishing product, you need to take into account all the advantages and disadvantages of each type of material.
Color compositions have a rich palette; they can be mixed to obtain the desired shade. If desired, ornaments, patterns and paintings are created. The products are resistant to moisture, temperature changes, organic and chemical compounds. If you paint the wooden floor on an open balcony with polyurethane paint, you can expect that such a coating will last for decades.
Floor treatment compounds
Varnishes and paints are not the only means that can be used to decorate flooring in a beautiful, practical and original way.
The following substances can be used for this purpose:
- Oil mastic. It has a deep penetrating effect, protects wood from dampness, masks cracks and scratches. After applying mastic, the wood texture looks interesting and rich.
- Wax composition. The natural substance forms a thick film on the surface, creating a pleasant shine and protecting the base from moisture. The disadvantage is the need to periodically update the layer and rub it until gloss appears.
- Polymer products. Manufactured from polyurethane and rubber. They form a dense coating that is resistant to external factors and has a long service life.
Compatibility of paints and varnishes
When choosing a material for finishing deck and natural boards, you need to take into account the following nuances:
- Acrylic floor paints apply to any type of material, regardless of its chemical composition and water-repellent properties. The compositions do not lead to any reactions upon contact with the base.
- Alkyd compositions can be applied to a surface coated with a similar composition, as well as bases treated with a special primer, drying oil and oil solutions. Do not mix alkyd products with acetone group solvents.
- Polyurethane substances can only be mixed with each other, and should be applied to a base that has been cleared of previously used compounds, since they dissolve under the influence of polyurethane.
The combination possibilities and the procedure for preparing the base are indicated on the product packaging.
Which varnish to choose
Water-based and synthetic-based liquid products are available for sale.
Water-based varnish contains plasticizers that create a protective film. The product is easily applied to the surface, the work is not accompanied by a sharp and unpleasant odor. Water products are used in heated rooms; negative temperatures cause clouding and cracking of the coating.
Which paint to choose
When deciding which paint is best to paint natural wood, you need to focus on the following criteria:
- environmental safety, absence of harmful additives;
- the color of the floor, which should match the interior of the room;
- surface texture (matte or glossy);
- waterproof;
- wear resistance;
- drying time;
- UV resistance;
- Can be cleaned with household detergents.
You should not choose the material with the lowest price. Floor painting is carried out based on subsequent repairs after 10 years or more. Inexpensive formulations do not have a complete list of performance characteristics.
Is it possible to paint with oil paint on enamel?
Oil base and enamels are similar in their components, which helps to use them together. If necessary, the formulations can be mixed together. It is also allowed to paint them on top of each other.
But the condition for the reliability of the base remains unchanged for any composition. The surface should be cleaned of all types of contaminants and thoroughly degreased. The new product should be applied in several layers. The importance of drying each one is undeniable, so don’t rush, otherwise the paint will be ruined and won’t last long.
The new product should be applied in several layers.
The article provided a detailed answer to the question: is it possible to apply paint to old paint? The technology of work includes the mandatory removal of old materials, but sometimes it is not possible to carry out this stage. Then the condition of the surface is assessed and compatible products are selected.