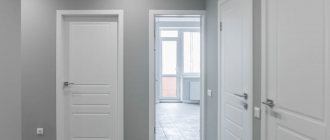
A wall stop for an entrance or interior door is one of the fittings whose function is to control the opening angle of the door leaf. It prevents damage to the canvas on a wall surface or furniture set. Manufacturers offer different options for door stops, differing in design, shape and design. There are models designed for mounting to walls or floors. You can install this fittings yourself without calling a specialist.
Consequences of improperly installed doors
Unstable fastening of the door frame, excessively tightened hinges, poor-quality mounting foam, illiterate sequence of repair work, incorrect ratio of the weight of the interior door and the strength of the opening, coupled with installation errors, can lead to unpleasant consequences, such as:
- deformation and distortion of the door frame;
- fast wear of hinges;
- difficulties with operation;
- the appearance of damage to the canvas;
- violation of sound and heat insulation;
- creaking when closing and opening doors;
- difficulties with locking mechanisms.
In order for interior doors to last without breaking, serve for a long time and not cause inconvenience to the owners, it is necessary to periodically carry out preventive inspections for them. If you inspect the doors in a timely manner, you can detect minor defects that arose both during operation and due to improper installation, and remove them in a short time yourself.
Master's choice
Door installation begins with choosing a specialist. It is important not to make a mistake, because the final result of the work depends only on his professionalism. Is it possible to find an experienced specialist through an advertisement in a newspaper? Maybe, but, usually, a good master is constantly busy with work and does not need additional advertising of his own services. One of the most common mistakes is that the client chooses a craftsman based on his ability to talk extensively about the various intricacies of carpentry. Sweet speech will not change skill. Often amateurishness is hidden behind laudable odes to oneself, but the most ideal thing about a master is his work.
TOP 7 installation mistakes
In addition to the installation technique, it is important to think through many little things in advance that can result in unpleasant surprises:
- To install a door correctly, you need to approach the issue professionally. Tools required: level, milling cutters, high-quality polyurethane foam. And to be on the safe side, it is important to have a set of markers and putty on hand that matches the color of the door.
- Before installation, be sure to check the walls using a level. If the walls are crooked, the door will not fit correctly.
- When installing a double door, it is important to pay attention to the texture pattern. This is a common mistake: one sash is installed incorrectly, and the pattern turns out to be directed in the opposite direction.
- If the platband does not cover the gap between the wall and the frame, a gap remains above the canvas. The defect can be eliminated by setting a threshold.
- Doors must be installed at the same level.
Installation technique
Installing a door stop is quite simple. We won’t talk about gluing options, you can handle this yourself. As for fixing with screws, the instructions are something like this:
Support installation technique.
- We install the door with a gap between the handle and the wall of about 20 mm and mark the position on the floor;
- According to the mark on the floor, we set the stop at the desired angle;
- We drill a hole for the dowel for the self-tapping screw and insert the dowel itself;
- We screw the stop with a self-tapping screw to the floor.
Wall-mounted and over-door opening limiters are mounted in approximately the same way, so there is no point in retelling these simple instructions.
Incorrect finishing algorithm
The most common mistake is the incorrect sequence of work during repairs. For example, apartment owners purchase new doors, install them, and only after that start decorating the walls. But new wallpaper is not the biggest problem. The difficulties begin further when the craftsmen arrive to level the floors and fill the screed. In the best case, the door will not close; in the worst, they simply cannot install it.
How to eliminate the consequences of improper repairs can only be decided on the spot. But it’s very easy to avoid them - you just need to follow the correct sequence of finishing work.
Advice! Repairs should begin with dismantling work, then connect electricians, pour screed on the floor, level the walls, plaster corners and slopes, hang wallpaper, install suspended ceilings if desired, lay laminate, parquet or other flooring. Only when the renovation is actually completed can interior doors be installed.
Making a door stop with your own hands
If you wish, you can make a door stop yourself. The construction of a soft restrictive device is based on the manufacture of a small pupa (tilde) and a filler. To increase the weight of a homemade interior door stop, you will need sand or small pebbles.
The door stop is located on the handle on the opening side of the door leaf. The locking device must have a loop. Everyone determines the color and design of the tilde at their own discretion. Ready-made patterns can be found on the Internet or in magazines.
To make the device you will need the following consumables:
- Pin;
- Textile;
- Threads matching the color of the fabric;
- Soft filler, for example, synthetic winterizer.
First of all, you need to focus on the volume of the tilde. It should be enough to soften the impact of the blade when opening. Each individual element is cut out in 2 copies. The cut blanks are stitched together, leaving a small section unsewn to fill the volume with filler. Next, you need to unscrew the components of the future interior door stop, fill them with padding polyester or other soft material, and completely sew them up. The homemade door travel stop is ready, all that remains is to install it on the door structure.
Gaps big and small
Another cause of problems with doors is gaps that are too large or too small. Because of them, the door becomes impossible to close; it begins to touch the frame. Too large gaps lead to poor thermal and sound insulation in the room. Incorrect installation of the door leaf or frame causes gaps to appear.
There may be several reasons for a gap to appear:
- Warp door frame .
Usually occurs due to uneven distribution of load on one of the fasteners of the longitudinal post screwed to the wall opening. For example, an overtightened lower or upper fastener of a hinge beam can deform the box, which will result in the formation of gaps. You can detect the distortion using a building level, and adjusting the fastening of the door frame to the wall opening will help fix the problem (you will have to tighten the fasteners somewhere, and slightly loosen them in another place). In addition, using a level you can determine the presence of convex or concave areas on the surface of the beam. - Inaccurately cut and joined door frame beams . This defect will deprive the inner corners of the box of the ideal dimensions of 90 degrees. Even a couple of extra mm of one of the beams will provide a significant gap. In this case, only dismantling the box, followed by adjustment and correct installation will help.
- Unaccounted for room microclimate . If the ability to shrink or expand wooden structures is not taken into account when measuring, temperature differences and humidity will lead to deformation. You can try to solve the problem. For example, if the door does not close due to the fact that it has swollen under the influence of moisture, it is enough to dry it well. Or, on the contrary, the door has dried out due to the high temperature in the room - in this case, you just need to remove the heating source. If all else fails, the door will have to be dismantled and replaced with a new one.
Types of limiting and retaining structures for doors
The stool pushed under the door and the homemade wooden wedge are slowly becoming history. Nowadays the industry produces a wide variety of stops, which can sometimes be difficult to understand.
Classification of limiters
In fact, a door stop is one of the types of small fittings. Doors are divided into entrance and interior; the weight and dimensions of the door leaves can vary greatly, respectively, and the door stops used are different.
In addition, door stops can perform different, sometimes opposing, functions. It’s one thing when you need a stop so that the canvas doesn’t hit the wall, and quite another thing when you need to protect children’s fingers from a door that closes at the wrong time.
But how can you make the right choice if the average person often has a rather vague idea of what kind of mechanism he needs? First, let's go over some basic terms.
Original door stop design.
- Stops - designed to limit the angle of rotation of the door, and sometimes to fix the leaf at the end point when it comes into contact with the stop;
- Chips - are needed to soften or prevent the door leaf from hitting a wall or some other object, for example, furniture;
- Stoppers - these structures must rigidly fix the canvas at a certain point. The most striking representative of stoppers is the well-known chain;
- Overlays - prevent the door from completely slamming, leaving a small gap between the jamb and the door leaf;
- Latches are essentially a type of lock; the latch secures the door in a closed position. There is still no consensus among experts whether latches should be considered locks or stops;
- A door closer is usually a limiter for opening the front door. The direct purpose of the door closer is to ensure smooth closing of the doors, but there are models that allow you to fix the door leaf open at a certain point.
Many modern door closers can be adjusted locally.
Despite the variety of terms and countless models, all these designs are divided into 3 fundamental areas:
- Stoppers installed on the floor;
- Wall-mounted limiters;
- Stoppers installed on the door itself.
Floor models
A floor stopper for a door is perhaps the most reliable option, because the floor is static, it will not go anywhere, plus the price for most floor models, as a rule, does not “go beyond” 200 rubles.
The color of the permanently fixed stop-post should be in harmony with the overall design.
Metal stop posts are stationary stops that are rigidly attached to the floor. The height of such a stop ranges from 3 to 7 cm, the average diameter of the cylinder is 20 - 30 mm. In order not to “mutilate” the door, there is a groove on the post with a rubber or polyurethane seal.
If installed correctly, the column itself will not be in any danger, but the seals will have to be changed periodically. It is better not to install bollards in the residential area of an apartment or private house, as it is easy to trip over them, but the bollard is perfect as a limiter for opening the front door.
When choosing such a column, it is better to give preference to shiny and contrasting models. At least they can be seen from afar and there is less chance that a person will trip.
Semicircular door opening stop.
The semicircular door stopper looks like a quarter of a dissected ball with a shock-absorbing gasket. There is no fundamental difference in the operation of posts and semicircular stops, but when installing the latter, you need to take into account the installation angle so that the door leaf comes into contact with the rubber gasket and does not hit the metal.
A magnetic door stop allows you to hold the door in the open position.
A door stop equipped with a magnet is a more functional design. A small magnet is built into the head of the stationary stop, and a mating metal plate is attached to the door, as a result the door leaf is fixed when it comes into contact with the stop.
Magnetic structures, of course, are not very suitable for entrance doors, because the strength of the magnet is not enough to hold the leaf in gusts of wind, but indoors such stops work flawlessly.
Cork stops are only suitable for the corresponding design.
Cork, rubber and polyurethane stops are varieties of the same posts, the only difference is in the material. But before installing such an original stop, you need to think carefully, because a soft stop is not a guarantee that you won’t “beat off” your fingers on it, plus the cork is practically invisible on the carpet.
Limiter with locking mechanism.
The ability to lock the head of the stop in a latch installed on the door jamb is quite a useful feature. Such devices have proven themselves especially good on the entrance doors of offices, administrative buildings and shops, in general, anywhere where a simple latch could pop out due to negligence or a gust of wind.
A spring stop is a good solution for temporarily fixing a door leaf.
The design solution is ingeniously simple: synthetic anti-slip “hedgehogs” are fixed on both sides of the flexible steel plate; you only need to slightly bend the plate and slide it under the doors.
This device is well suited for temporarily securing doors, for example, if you need to bring in furniture. With this stop, even if the door moves due to an accidental push, the expensive laminate or parquet will remain intact.
A wedge-shaped retainer is the simplest solution to the problem.
Wedge-shaped, or as they are also called, mobile latches are now made from various synthetic materials, but in essence these are the same wooden wedges that our grandfathers inserted under doors, only the external surroundings have changed. Although synthetics must be given their due, such a door stop does not slide on the floor.
Signal limiters.
The signal limiter may become the last bastion in the path of robbers. Cheaper models simply make a loud sound when the door leaf comes into contact with them, while “advanced” stops silently send a radio signal to some receiving device, for example, to a mobile phone or security remote control.
Wall models
Installing a door stop on the wall is an excellent solution for rooms where, for one reason or another, it is not desirable to attach the device to the floor, for example, expensive floor coverings such as marble or natural parquet.
Classic wall door stop.
The cost of wall-mounted devices starts from 150 rubles, although this is not much, but still more than that of floor limiters.
The market leader here is the standard stop with a platform and rubber shock absorber mounted on top of a metal rod. It is distinguished from the floor-mounted version made of cork by the presence of a wider support platform and a rod with a length of 5 to 15 cm.
When choosing, you need to consider what material your wall is made of. For monolithic brick or concrete walls there is no difference, but for drywall you need to buy a device with a wide mounting platform (minimum 100x100 mm), otherwise the gypsum board will simply break from a pinpoint impact.
The simplest wall stop with screw fixation.
The wall-mounted version of the magnetic device may differ from its floor-standing “brother” only in the length of the rod, otherwise they are identical.
Universal magnetic limiter.
It is often not possible to secure the stopper to the floor, and rubber shock absorbers with a rod leave unpleasant marks on the door leaf. In this case, a soft pad on the wall under the handle will help you.
Soft synthetic material will smoothly absorb the shock, to install the stop you do not need to drill into the wall, just glue the device onto double-sided tape, and most importantly, there are a lot of design options here and choosing a model to suit your interior will not be difficult.
Soft model with handle support
The line of wall fixtures also includes stops with a reliable lock. As shown in the photo below, the mechanism itself is mounted on the wall with self-tapping screws, and the hook with the platform is screwed from the bottom end to the door leaf.
The principle of operation is simple: a rounded door hook, approaching the stopper, lifts the moving part and, thanks to the spring, the latch catches. The only inconvenience is that to release the doors you will have to push the latch manually.
Wall-mounted version of the stop with a lock.
Door fittings
The beauty is that if we are talking about wooden or plastic doors, then to attach such a stop you only need a screwdriver, and in some cases you can get by with just glue. Plus the walls and floor will remain intact.
In folding metal stops, the base plate is screwed to the door leaf with self-tapping screws, but during installation you need to be careful about setting the angle of inclination of the stop relative to the floor; an acute angle can cause the mechanism to break. The optimal inclination is around 45º.
In addition, when choosing, it is better to give preference to mechanisms that have a folding spring; they are much more reliable.
Folding metal door stopper.
The tape stop can be safely called a symbol of simplicity. There are platforms for self-tapping screws attached on both sides of the durable tape; you just need to screw these platforms to the doors and jamb.
True, the appearance of this limiter leaves much to be desired, plus such tapes fray or break quite quickly.
If you still decide to buy a tape stop, then it is better to choose elastic stretchable models; their price is not much higher, but such stops are more convenient to use.
The tape stop is considered one of the simplest and most affordable options.
The retractable door stop is a rod with a kind of brake pad. It is installed in a vertical position and you can decide for yourself exactly where to fix the structure.
A relative disadvantage can be considered the “manual” control; more precisely, you can lower the rod with your foot, but to raise it, you will have to bend down and bend the side plate manually, although now there are models with a spring.
The retractable door stop is a fairly compact and convenient device.
The sliding model is designed to rigidly fix the door leaf at certain points; there can be several points, it all depends on the number of cutouts in the solid base groove.
This device cannot be called completely over-the-door, since the base part with the groove is attached to the door jamb, and only the movable rod is fixed to the door leaf. Although this is not essential, on some models the fastening units can be swapped.
The undoubted advantage of such a stop is its installation at the top of the doors, where it does not interfere with anyone. On the other hand, to release the rod from the fixing groove you will have to reach it, which is not always convenient.
One of the popular sliding stop models.
Soft linings prevent the door from slamming. These devices are especially convenient in children's rooms; with such pads, your child's fingers are much less likely to get caught in the doors. There is no need to talk about installation at all, the rubber band is simply put on the door.
The soft pad is designed to protect the doors from accidental slamming.
Incorrect fastening of door hinges
One of the main reasons that interior doors no longer close is improper fastening of the door hinges. If they are too recessed on the counter or door, or, conversely, are not fully recessed, the door stops closing normally. Subsequently, the decorative lining of the door will suffer, cracks, chips and scratches will appear on it. To solve this problem, you should remove the incorrectly installed hinges and correct the defect.
If the door starts to open too tightly, the problem may be sagging hinges. You can try to fix the problem by placing cardboard under the hinges, or replacing them with new ones. Also, if the hinges sag, they need to be lubricated.
Advice! It is not recommended to use sealant on self-adhesive paper. The door seal must be made of durable and high-quality rubber. It is installed in the groove.
Spontaneous closing or opening of doors
A box that is “stacked” forward or backward will certainly cause many problems during operation. The spontaneous or controlled movement of the canvas depends on the accuracy of its location in the vertical plane.
An elongated building level will help to identify the defect, with the help of which the verticality, first of all, of the loop beam is checked. In addition, you will need to make sure that the door hinges are aligned on it. It is possible to eliminate spontaneous opening or closing of doors only by adjusting the verticality of the door frame.
Incorrect installation of the door frame
To properly install the door block, you need to use a plumb line and level. Using wooden wedges, the box is wedged, the side with the hinges is secured, checking for verticality and opening. After this, polyurethane foam is poured, installing spacers so that the foam does not deform the box.
The main indicator that the door frame is installed incorrectly is the doors opening or closing spontaneously.
If the door opens on its own, then the reason should be looked for at the very top of the door frame. Typically, this is where the top of the post tilts to the right from vertical. Doors that close spontaneously indicate that the lower part of the box has deviated to the right of the vertical. Problems associated with installing a door frame are very difficult to resolve.
There is only one solution to this defect - dismantling the door along with the frame. After this, you need to correctly align it vertically, measuring with a level, and reinstall the door leaf.
There is one more way out of this problem - to get by with little expense, you can try to install platbands according to the European standard: joints at 90 degrees, and not at the usual 45.
Conclusion
As you can see, mistakes can be made at every step when installing interior doors yourself. As a result, the door will look unkempt; it will open spontaneously or touch the floor. And with all this, the work will take a lot of time, effort and nerves, and if the installation was ordered by shabatniks, then also money. And you will still have to pay professional craftsmen for the rework, and maybe even buy damaged moldings.
Is there any point in wasting time and driving yourself into additional expenses if everything can be created perfectly and perfectly right away? Masters are always at your service. In addition, the prices for interior doors will pleasantly surprise you. Call!
Incorrect hanging of the canvas
Improper door hanging leads to premature wear of locks, hinges, and misalignment in the block. Gaps resulting from this error disrupt the connection between the door frame and the opening. The mounting foam holding the box in the opening begins to crumble.
Professional carpenters and installers always make the edge angle of the blade on the hinge side less than 90°. This is especially important if the doors are made of solid wood. When hanging doors made of chipboard and other factory materials, you need to ensure that the hinges do not “press” when closing. The door leaf, hung correctly, should not touch the frame when closing, even from the hinge side. The only point of contact is the seal.
It is very easy to check whether the door is installed correctly: just take a sheet of paper and insert it between the frame and the leaf - if the paper passes smoothly along the entire length of the door, then the installation was successful. If not, you need to rehang the canvas, having first found out the causes of the defect.
Important! The more the door leaf weighs, the more hinges need to be installed. It is important that all the hinges are in their grooves. There should be no play or gaps.
Stages of installing an iron door
Before all this, it is necessary to properly freeze the door frame, select the entrance system to match the characteristics taken, or make it to order, which is vital if the frame has unusual dimensions.
Stages of work:
- Preparation of tools and auxiliary materials.
- Removing an old door.
- Smoothing walls, eliminating existing irregularities.
- Installing a new level door. Checking the evenness of the position on all planes.
- Fastening the structure. The fixation method is selected taking into account the individuality of the door.
- Another level check with adjustment of the position of the canvas if existing deficiencies are identified.
- Filling the gaps between the walls and the frame with special foam or building material.
- Design of slopes on the inside of the doorway.
Cheap polyurethane foam
Even after purchasing an expensive door and high-quality hinges, the owner cannot be sure that an unscrupulous craftsman will not ruin the door using cheap polyurethane foam. Polyurethane foam replaces screws and self-tapping screws. It is used for good adhesion of doorway elements. And yet this is the invisible material on which people often save, mistakenly hoping that nothing depends on it.
In fact, due to low-quality foam, the door frame may become skewed. To avoid this problem, it is recommended to use polyurethane foam only from trusted manufacturers, and do not forget about spacers during installation.
Installation of floor limiter
Devices for limiting door movement mounted on the floor base can be soft or hard. When it comes into contact with a soft product, the canvas is pushed back in the opposite direction without any damage.
Manufacturers offer self-adhesive floor stops for wooden interior or plastic balcony doors.
When installing a hard stop, the door should open smoothly, since if there are strong impacts against a hard stop, the door material will be deformed.
Tools required for installation work:
- Simple pencil;
- Screwdriver (screwdriver);
- Hammer;
- Screws and dowels (most often they are included in the delivery of accessories).
The sequence of installing the door stop on the floor:
- Selecting the installation location of the limiting device. To do this, you need to open the canvas and fix it a few centimeters from the wall plane. In this case, the door handle should also not come into contact with the wall. If the door block is located in the opening of a passage room through which people often walk, it is recommended to mount the stopper as close to the wall as possible;
- The floor stop must be fixed closer to the edge or approximately in the middle of the interior door. If the device is placed close to the jamb of the door block, then when the door leaf hits, a high load will be transferred to the hinges, and accordingly they will quickly fail. It is important that the limiter does not interfere with your feet, since hitting it can break your finger;
- After selecting the location of the fitting element, markings are applied to the floor base with a simple pencil. The doors are closed;
- Using a hammer drill, drill 2 holes: for the pin and dowel;
- A dowel is inserted into one of the holes made and a limiter is installed. It is necessary to ensure that the pin fits into the second hole;
- A screw is screwed into the dowel through the stop;
- Open the door to check that the limiting device is properly secured.
It is not recommended to install a door opening limiter on the floor if the room has a laminated flooring. The emphasis will tie the laminate to the flooring, and with temperature changes and changes in humidity, swelling of the material or divergence of the connecting seams may occur.
Poor quality materials and errors in measurements
To avoid numerous problems with the operation of interior doors, you should take the choice of door leaf seriously, taking into account the characteristics of both the door itself and the opening. It is necessary to measure the dimensions, find out the weight, composition and density of the door. For example, if the installation takes place in a room with brick walls, then you will first need to strengthen the doorway.
Factory trims and boxes from inexpensive MDF are made according to standard measurements. Such platbands use cheap and simple materials, which is why they cannot withstand a heavy door.
Video description
Door stopper from Aliexpress.
Stoppers
These devices are used in residential premises, as well as in industrial buildings and public institutions. These mechanisms are inexpensive and small in size. The use of clamps has a number of positive aspects, namely:
- safe presence of children in the room when there is a need to leave them unattended for a short time;
- free movement of pets from room to room without the risk of injury from being hit by the door;
- locking the door in case of oversized items entering;
- safety of the wall and nearby furniture from accidental damage due to careless opening of doors;
- Safely closing the door leaf in situations with uncontrollable drafts or strong winds. The risk of mechanical damage to the door is minimized.
Depending on the task, the hinge latch can prevent the door from closing, and fix the leaf in a position of 90° relative to the doorway Source Kidsafe.kz
Setting up locks and handles
Adjustment of locks and handles is required in two cases.
- The lock is not seated tightly in the socket.
- The lock escutcheon touches the narthex.
The first problem can be eliminated by tightening the screws or installing a gasket in the space between the lock and the socket.
The second problem can be easily solved by deepening the groove under the latch or lock.
Care and operation
To reduce the risk of the problems described above, experts recommend:
- Frequently adjust and maintain fittings - lubricate hinges, handles and locking mechanisms.
- Pay attention to rooms with high humidity - bathroom, kitchen and toilet. The risk of drying out and swelling is much higher there. It is necessary to renew the coating of products more often, pre-treating them with an antiseptic composition.
- Monitor the position of the door leaf and periodically adjust it to reduce the risk of the door sagging and reduce the load on the fittings.
- Avoid saving on components. High-quality parts and fittings will help increase the service life of the door structure.
- Adjust room ventilation by installing forced fans or special air dehumidifiers.
- Avoid strong impacts on doors and components to avoid damaging the product.
- When caring for doors, use only special products, strictly following the manufacturers' instructions.
- Do not allow the surface of the structure to come into contact with chemically active substances - gasoline, acid, acetone, alcohol and alkali.
Plastic doors
PVC doors are part of a modern apartment. They are installed on loggias and balconies, as the material is resistant to temperature changes and high humidity. Thanks to their tight closure, they prevent cold air and noise from the street from entering the apartment.
However, over time, problems arise; the most common is that the canvas does not fit tightly to the frame.
Causes of malfunction
- The seal has expired or the gasket is damaged. Gaps appear through which cold air enters the apartment.
- The frame is not level. The design is skewed and does not close tightly
- The fittings are broken. The bolts do not secure the sash.
- The awnings become loose during operation and the canvas sags.
How to fix
Remove old rubber. Clean the area from any remaining sealant, then degrease. Glue on new sealing rubber.
Broken fittings are replaced with new ones. From the supplier's company, purchase the desired model of the mechanism.
If the sash is loose, tighten the fastenings. To do this, remove the protective caps from the canopies and tighten the bolts with a hexagon.
Operating procedure
- Determine the location of the problem. These can be hinges, a box, a canvas or a lock (latch). If the problem is related to the opening of the sash, then it is better to check the verticality of the elements with a plumb line. The tightness of the interior fabric is easily determined using a sheet of paper, which must be placed between the sash and the frame at the moment of closing.
- Prepare the faulty area for repair. In some cases, this requires opening access to the hinges by removing the canvas. Often the box is skewed relative to the wall. In this situation, it is necessary to dismantle it and then reinstall it.
- Eliminate the problem using the necessary tools and equipment.
Moving a door from the right side to the left
When rehanging a door, you can reduce the amount of work if you rearrange the door so that its inside faces out, and vice versa. In this case, replacing left hinges with right ones or vice versa will be completely justified. However, by doing this, you may run into two problems.
- First, the two sides of the door may be painted with different colors, causing the door to have to be repainted.
- Secondly, the door in a changed position may not fit well to the jambs. The door itself and its frame may suffer slightly over time - it may jam and be difficult to open.
Elimination of defects
It happens that doors that have been in service for a long time begin to fail. It is not necessary to change the box. You can get by with a little bloodshed.
If there is a gap between the frame and the door, there are several reasons:
If the door does not close, then you need to check the verticality of the beams and see if there is any curvature in the opening.
In addition to the obvious reasons, you need to pay attention to several nuances:
In addition, the door may not close if the door has expanded due to excess moisture or high temperature. In the first case, it is enough to dry it. In the second, remove the heating source.
Creaking can occur at any time. A lubricant or a graphite rod will help eliminate the unpleasant sound.
If a closed door is difficult to open, the hinges may have sunk too deep. To do this, you need to either replace them or put cardboard under them.
Many problems can be easily resolved. The main difficulty is to detect the problem and determine its cause.