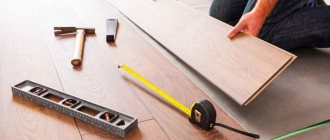
Laminate: material features
Laminate flooring, or laminate, is a special building material that is made from high-density fiberboard by covering it with facing films. The film top serves as a protective and decorative layer, giving the material wear resistance and resistance to mechanical damage. Laminate is resistant to temperature changes, antistatic, protects the floor from water, and in appearance it strongly resembles a more expensive floor covering - parquet.
Structure of laminated parquet
Laminate flooring is low priced and attractive. This increases its popularity among apartment and house owners. Laminate is suitable for decorating any room, as it can have a wide variety of designs and textures. On sale you can find imitation stone, tile, and leather materials.
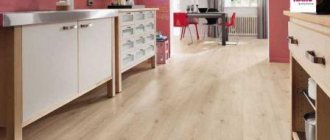
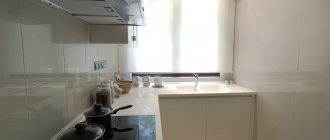
Kitchen ideas
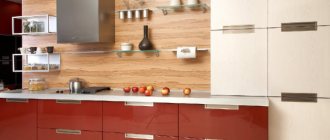
To prevent the remains of the laminate from gathering dust in the pantry, on the balcony or in the garage, they can be used wisely and profitably. Depending on the amount of remaining material, you can make small or large things: from boxes to pieces of furniture. A laminate apron looks great in the kitchen. This product lasts a long time, and caring for it is very easy.
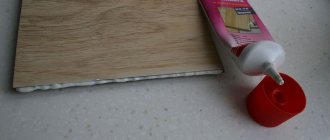
Creating a kitchen apron from leftover laminate flooring will help save money, protect walls from dirt, and completely transform the room. To arrange it, you need to stick the lamellas on the walls one by one and snap their fastenings into place. In the corners at the joints it is necessary to trim the end locks of the laminate, and then cut holes for sockets.
In addition to the apron, the following kitchen items are assembled from pieces of this material:
- False beam or decorative box. Allows you to hide wires, hide ugly pipes, exhaust system.
- Cutting board. Even one lamella makes as many as 4 boards for cutting food. If you decorate them in different ways, you can make a whole set for working with meat, fish, vegetables and fruits, and bread. True, such boards will have to be washed carefully so that the laminate does not swell from water.
- Hot stand. Thanks to the laminated coating, the product will last for several years. You can place even the hottest dishes on it, because its thermal conductivity is quite low. Making a stand is very simple: just cut out a square or rectangular piece of material with a jigsaw. If you have a special jigsaw file, you can even make a small round stand for a cup of tea and coffee.
- Shelves for kitchen utensils. Before making the shelves, you need to make all the necessary measurements so that the furniture fits exactly in the right place. By the way, on the shelves of the bookcase you can place vases for small items and sweets, which are also made from laminate scraps.
Laminate cutting board
Items for the garden
If you have a summer house and a bathhouse, then you are familiar with the problem of storing firewood in it. It is dangerous to store firewood near the stove, and there may not be a special box for storing it. Based on the size of the prepared firewood, you can cut blanks to assemble a box for storing firewood. You can store firewood in it both for one firebox and for use over a long period of time.
The same box can be installed in a house with a fireplace; a lid can be provided. And it is more convenient to collect the harvest from the garden in boxes, which can be made from leftover laminate and painted in different colors. For example, a box with red walls is for tomatoes, and a box with green walls is for cucumbers. Thus, the remnants of laminate after renovation can be widely used at home, in the country and in the garden.
P
After repairs, there are often surplus building materials that you want to use so that they do not go to waste or go to waste.
One of these materials is laminate - it is durable, but easy to use and it is a shame that such a building material will go to waste. As a rule, laminate is used in laying floors, but this is far from its only use, which is very important for those who have an abundance of this material. So how else can you use leftover laminate flooring?
From the remaining laminate with your own hands
you can make a bunch of useful and beautiful things and household items.
- flower pots;
- boxes for home mini-gardens, seedlings;
- shelves;
- toy furniture;
- tool boxes, etc.
All this can be easily created from the remains of this material. To provide additional protection from moisture, the inside of the products must be covered with polyethylene or other moisture-proof film. You can also put together boxes for storing some vegetables, to which you should also add a lid. Such a product is also useful simply for storing some things: children's toys, out-of-season shoes, tools.
If there are small scraps of laminate left, they will be suitable for stands for mugs and glasses or for hot dishes. You just need to cut a square or any other shape of a suitable size from an existing piece of laminate and use the resulting result for its intended purpose.
Long boards can be used as light shelves. Of course, they are not suitable for any things, because laminate is a lightweight material and can bend. But for light items, such shelves are quite useful - you can put keys, a small souvenir or a candle on them.
Crafts from leftover laminate
From the remains of laminate you can make not only light products, but also quite useful and strong things. For example, you can build a panel for radiators. Unfortunately, not all of them have a great design, so this decorative laminate panel will come in handy. And besides, this product will completely blend with the floor and not stand out from the overall scheme of the interior.
Laminate can be used quite creatively. For example, why not build a cat house from leftover laminate flooring
? Cat owners know how these furry animals love to hide in secluded places, which means this will be a great gift for their beloved pet. You need to cut out a door and a couple of windows in the house, but it is best to upholster the inside and outside of the house with a special material that will be convenient for the animal to sharpen its claws on. And in the absence of a cat, you can build a house for a child, supplementing it with children's furniture, also made of laminate. You can make a birdhouse or bird feeder.
Since we're talking about furniture, we can start making crafts that are more complex than a children's chair or shelf. From the remains of laminate, some manage to make quite strong stools, shoe racks, or use the material for decorating or finishing old furniture, although such delights are not suitable for every interior.
What else unusual can be made from laminate?
Finish the walls!
Yes, yes, laminate can be used on walls too! You can use solid boards and attach them additionally to the wall with screws, or you can make a decorative panel from various scraps of laminate. For example, if you cut equal rectangles from boards and fold them in a herringbone pattern, and then frame the composition, you will get an impressive and stylish decorative panel that can be hung like a picture. And the remains of the board left over from the craft should also be used: assemble a small box, glue another, but small panel, use it in the decor of some things. The scope for imagination is limitless;
you can make anything you can think of with your own hands from leftover laminate flooring After this, there will simply be no deposits of unnecessary laminate left!
Quantity calculator
Drawers and shelves
Laminate is used to produce various items for storing things, shoes, toys, books, magazines, bags. For example, at the dacha, such boxes will help you maintain order by neatly arranging all the things lying around or placing them in winter storage. In the same boxes it is convenient to store vegetables, fruits, fertilizers and other country “attributes”.
In the bathroom, powders, household chemicals, and various household supplies are left in a decorated laminate box. Floor drawers will replace chests of drawers and bedside tables, and small boxes will help to successfully organize storage in a small space.
Shelf made of laminated parquet
You can use leftover laminate flooring to create shelves for any room. They are sawed to obtain strips of the required size, the locks are cut off, connected to each other and mounted on the wall using brackets. Such products cannot withstand heavy loads, so you should not put too large loads on them. Usually framed photographs, stationery, and toys are placed on laminated shelves. Also, shelves for shoes are created from laminate, while the outer frame is made of strong wood.
Use of laminate for other purposes
Laminate cuttings are useful for decorating slopes, walls and much more.
Every owner should know that a laminated floor panel is always purchased with a reserve, so that it is possible to replace a broken or faulty lamella at any time.
If by chance it turns out that after installing the laminate flooring there is a large amount of this building material left, do not be upset. Your money is not wasted.
Since the remaining flooring can be used for other purposes, creating from the laminate with your own hands:
- slopes;
- doorways,
- Wall panels,
- ceiling cover;
- coffee tables;
- bedside tables;
- crafts;
- decorative shelves.
Indeed, many items for renovation of premises can be made from laminate.
You can see a more detailed structure of the laminate structure in the table diagram.
Laminate wall panels
The walls are covered with laminate very quickly
Laminate wall panels are a functional use of leftovers and create an excellent decorative item in the overall ensemble of the room.
It is worth saying that the use of laminate for panels is gradually becoming a second purpose of the material itself, since this method of framing and leveling walls is very convenient, fast and has a good combination with the same laminated floor.
The panels can be installed either on a wooden sheathing or on a flat wall (even on an old covering, such as wallpaper).
When installing laminate flooring on a wall, make sure it is level. It should not get damp, otherwise the laminate will quickly swell.
In the case of installing panels on a lathing or wall, installation is carried out either using an adhesive composition “liquid nails” or the panels are fixed at the top and bottom. The floor plinth serves as a fastener at the bottom, and a special strip should be used at the top, which will connect the laminate with plasterboard or other wall material.
Laminate ceiling
If you decide to decorate the ceiling with laminate, then think about the original design of the room
They began to use laminate as a ceiling covering not so long ago, and this is not done often, since the consumption of laminate is equal to the cost of flooring.
It is possible to make a ceiling from a laminate, and it will look attractive, but you should know that the option for fastening the panels will differ significantly from the floor version. This fact is due to the fact that the laminate is attached to the ceiling with adhesive mixtures, applying them to the reverse side.
The use of laminate for slopes
Laminate slopes have been manufactured for quite a long time. As with panels, laminate can be attached directly to the wall and to the sheathing. If the wall profile needs to be leveled, use lathing.
The panels are also fastened with glue. Along the edges the laminate is fixed with molding and corner. For more information about using laminate, watch this video:
https://youtube.com/watch?v=ROs3FJRaQfo
Based on the above, we can conclude that you should not be upset if there is laminate left. You will definitely use it to decorate rooms, knowing how to properly install the panels yourself without involving construction crews.
Furniture
Laminate can be used to make new furniture or update old furniture. This will require several packages of material. The simplest option would be to build a small coffee table on which you can put a lamp and books. Afterwards, you need to strengthen the legs of the product so that it can withstand the weight of lying objects. Also, with the help of laminate, old tables are updated, which are suitable for various purposes at home or in the country.
Table with laminate top
If desired, you can even make a wardrobe from a laminated board, if the amount of material is sufficient. Additionally, you should purchase all the necessary fittings, components, and fasteners. You can find a drawing of the cabinet on the Internet, and then transfer it to the material and assemble the entire structure. Also, if there is a large volume of laminate, shelving for a garage or workshop is built.
Small pieces of laminate are used to make a new coating for old cabinet furniture and doors. They think over the pattern, select the necessary pieces and stick them on liquid nails. Laminate with imitation stone will help to beautifully decorate the fireplace, giving it a noble look. Laminate cuttings are no less suitable for the following tasks:
- making a lid for an aquarium;
- door arch pasting;
- renovation of the stairs in the living room.
Laminate aquarium cover
Craftsmen even make beds from laminate with space for storing linen and drawers. A new bed will require solid laminated boards, and old furniture can be restored in pieces by covering its surfaces.
How do sliding systems work?
The compartment door is designed in such a way that its doors slide apart to the sides. This can be either one or two door leaves, moving parallel to the ceiling or sliding inward. And if the general operating principle of such doors is the same, then the installation and opening methods are different. Let's talk about this in more detail.
Table No. 1. Main types of sliding systems.
| View | Description |
| Mounted | In this case, the canvas is fixed on guides - on the ceiling or directly above the opening. This way the doors will move along the wall with a slight indentation from it. It is not recommended to install furniture or any other objects near the door - they will be an obstacle to the door panels. |
| Hanging | In this case, the door leaf is fixed to the cut of the opening. Accordingly, the door moves close to the wall, which looks more neat and aesthetically pleasing. Hanging doors allow you to place pieces of furniture next to the opening - they won’t get in the way. |
Table No. 2. Types of interior sliding doors by opening method
| View, illustration | Description |
Coupe | This is the most primitive version of sliding doors, so even an inexperienced person can handle the manufacture of such a model. The design comes with either one or two panels. |
Radial | The movement of the canvas does not occur along a smooth guide, but along a circle. This option is ideal for rooms with curved ceilings and is good for corner cabinets. The design has a very original appearance, but not every person can handle its manufacture. |
Cassette | They also come with one or two doors and move in different directions according to the same principle as sliding doors. The difference is that they slide into special recesses in the wall, which makes this design very convenient, because you can place furniture near the wall without any problems. Of course, making such a door will be a little more difficult, because you will have to provide for a niche in the ceiling. |
Telescopic | The design is designed in such a way that a separate guide is fixed for each blade. Such doors are often installed as interior partitions and for decoration. They can be assembled in a single part of the opening - just pull one panel by the edge, and the others will follow it. Of course, this is also a rather complex system, just like the radius, so it’s not easy to make. |
Intra-opening | The canvases are fixed in the opening and move towards each other. The design assumes the ability to open only one half of the opening. However, you can place various objects against the walls that will definitely not interfere with the opening of the doors. |
Harmonic | This is a very simple hinged door design. The canvas moves on rollers attached to the top. The disadvantages include not the best sound insulation. |
Design diagram with top movement mechanism
Window decoration
Window slopes and window sills are finished with laminate. The result is a beautiful combination of window and floor, and the room takes on a harmonious appearance. It is always recommended to lay a whole board on the windowsill, rather than individual cuttings. Before starting work, they dismantle the old slopes, clean the surface, foam the space, and then begin finishing the window.
Finishing window slope with laminate
Crafts
For handmade lovers, laminate can become a popular material. From different types of laminate they create unique accessories, useful items and interesting things. Handmade crafts will fill your home with coziness and replace expensive store-bought decor.
Laminate makes beautiful and durable doll houses. Girls of any age can enjoy this toy. For the safety of the child, there are no sharp corners or elements that could cause injury. To make the house, only safe adhesives without an unpleasant odor are used. The corners are covered with soft cloth, felt, foam rubber. Using saws and other tools, they cut windows, doors, build fireplaces, tables and chairs, and other doll furniture. Other materials are also used to furnish the premises of the house:
- paints;
- paper;
- foil;
- fabrics;
- colored cardboard.
Homemade bird feeder
Also, bird feeders, birdhouses, and cat houses are made from laminate, where animals will rest and play. The inside of the cat's housing is covered with material on which the pet will sharpen its claws, and soft bedding is placed on the floor. In addition, the laminate will become the basis for the manufacture of boxes, pencil holders, boxes for stationery, buttons, threads, and jewelry. Beautiful velvet or other soft material, or artificial suede is placed inside such boxes, and a variety of decor is glued to the outside: beads, buttons, coins.
Accessories for children's games
Only real specialists and craftsmen will be able to make a real miniature house from laminate with their own hands. This product is one of the most complex. It is important to think through everything down to the smallest detail. It should contain elements such as:
- doors;
- window;
- benches;
- fireplace;
- table.
Doll house
This element will be dangerous to the child’s life due to the sharp corners of the boards. To avoid this, you will have to cover everything with felt. It is also advisable to upholster the inside of the house with soft material, the same felt or thin foam rubber. For fixation, you can use PVA glue or a construction stapler.
To fill the resulting house with all the accessories, you can connect the child and use other, safe materials, for example:
- cardboard;
- colored paper;
- paints;
- textile;
- foil.
They will make window sills and indoor flowers. Cardboard is used for pots and window sills. Polystyrene foam is placed inside, and flowers are cut out of colored paper. Everything is fixed with glue. Do not forget that to decorate a window you need curtains, which can be any scraps. They also cover the table.
As a result of time-consuming and painstaking work, you can get a real house from your child’s favorite fairy tale or cartoon. Each element will be thought out and taken into account, which will allow the child to come up with a variety of games and, importantly, study everyday life and develop fine motor skills.
Panel
Using your imagination, you can make a stylish designer item. For example, laminate is used to create interesting wall panels. Such paintings look harmonious when the shade and texture match the floor covering or have a contrasting color. For large panels, solid lamellas are used, which are laid in a horizontal or vertical direction. The choice of arrangement of elements depends on the size of the room: in small rooms, panels with horizontal laying look better, in large rooms - with vertical laying. For rooms with low ceilings, you should choose a product that is slightly below the ceiling.
Wall panel made from small pieces of laminate
Laminate panels can be original in appearance. For example, individual elements are arranged diagonally, in a herringbone pattern, in a checkerboard pattern, like parquet. This type of work will require more patience and accuracy, as well as a significant amount of laminate. If desired, a drawing is applied to the finished panel with paints or photo printing is done in a special studio, and then it is placed in a frame.
Making a sliding door
Even a novice master can handle a simple version of the sliding design. We will look at the main stages of manufacturing a sliding door.
Before starting installation, you must prepare all materials and tools
Materials and tools
During the work we will need the following devices:
- electric drill, screwdriver;
- chisel;
- electric jigsaw;
- Bulgarian;
- building level;
- roulette;
- Screwdriver Set;
- a simple pencil and a ruler.
In addition, you will need to prepare materials:
- chipboard sheets for door leaves;
- guide rails, rollers, fittings;
- bars with a cross section of 5×5 centimeters;
- anchor fastenings;
- decorative additions;
- self-tapping screws
Calculations and drawings
It is recommended to draw up a drawing of the door leaf with dimensions. To do this, we will need to first measure the doorway (it is necessary to take into account the distance to the ceiling in order to determine the method of installing the sliding doors). In addition, you should take into account the distance from the opening to the corners, because in all cases it is not enough for the sash to slide out freely.
If you decide to install a frame over a doorway, then first of all you need to take into account the thickness of the floors - if there are too crooked walls, the measurements may not match, so they will have to be double-checked several times. In addition, you should make sure that the floor is level and not sloped.
This is what the measurement diagram looks like
According to the standard, the canvas has the following dimensions:
- width – from 40 to 90 centimeters;
- height – 275 centimeters.
When making a door yourself, you should not make it too large, because the rollers may not withstand excessive load.
When choosing the classic version of sliding doors, you need to make a leaf that will be 20-50 millimeters higher than the opening. The width of these doors should be 20-30 millimeters larger on both sides.
The table shows the maximum dimensions of door leaves. The possibility of deviation from these values is not excluded, but only to a lesser extent
In the case of installing a cassette mechanism, it is necessary to cut out the canvas exactly to the size of the opening, because first the mechanism itself will be installed, and only then the niche.
By combining materials, you can make the door leaf weightless. Here are some of the most popular lightweight design options.
If you think that it will be easier to make a door leaf from wooden blocks, then the following diagram of their connections will be useful in your work
In this case, you should use polished timber, which will not have to be further processed. In order to make the most accurate cuts, it is advisable to purchase specialized carpentry equipment.
The process of making a sliding door: step-by-step instructions
Step 1. First of all, we need to cut out a door leaf of the required size from a sheet of chipboard. This can be done at home, but it is better to turn to professional furniture makers. Next we need to process the edges. This is quite simple to do, using an iron or hair dryer with hot air, after which the edges can be cut off with a utility knife.
Treated and untreated chipboard edges
Important point! During work, you must use protective gloves for your hands and special glasses for your eyes.
Step 2. Now you need to take a wooden beam and measure the required length from it.
You should mark and saw off the beam using a jigsaw
Now, according to preliminary markings, we will need to fix the beam above the doorway (in our case it will be held on by four long screws)
Step 3. Now you need to measure the required length of the rails.
You can cut the metal guide using a grinder
Now you should make holes in the guide for the screws
It is necessary to place it on a chair, holding it with one hand, and drill through holes.
Step 4. Next you will need to screw the guide rail to the wooden block above the opening.
You need to hold it with one hand and screw in the screws one by one
Important point! If the guide is installed without a bar, then it is necessary to fix it a few centimeters further from the wall, otherwise the door will touch the trim when moving.
It is necessary to carefully check the correct position of the bar and the guide using a level, because the ability to freely open the door depends on this.
Step 5. Now you need to attach the metal fasteners from the kit to the door leaf.
We attach the hanging mounts for the rollers with self-tapping screws
Step 6. Now you should mark the location where the door handle is attached.
It is important not to make mistakes in the calculations and put marks on all sides
Now you need to make holes using a drill along the marking lines
This is necessary in order to place a jigsaw blade there and cut out a recess for attaching the handle.
You should also cut out the hole carefully, moving exactly along the marked lines.
Tips for choosing a jigsaw
It’s better not to rush here and, if necessary, make a few more holes with a drill on the other side.
The door handle mount should be installed in the resulting hole, after which you will need to insert the door handle itself
Step 7. The next step is to insert the rollers into the top guide.
You need to insert two rollers into the guide
Now you need to screw the door lock from below
The groove in the door leaf must be made using a grinder and a special circle.
Step 8. Next you need to hang the door leaf.
Using the screws located on the rollers, you should set the canvas to the optimal level, after which it can be secured with nuts
Next, you need to insert the clamps into the guide and wrap them up - this will be needed so that the door does not go beyond the rails
Step 9. The fastenings will need to be covered with decorative trim in the color of the door leaf.
First you need to measure the exact length of the extension, and then you will need to cut it to size with a jigsaw
The extension can be secured to small nails with decorative heads. It is important to carefully fix it on both sides. Now we need to mark and cut the side panels for our door. Then all that remains is to install them according to the same principle.
Upon completion of all work, it is necessary to check the functionality of the structure - the door should move smoothly along the guide without any obstacles.
Video - Sliding door from an ordinary one. DIY compartment door
This is the simplest option for making a sliding structure at home, which is suitable for beginners. If desired, you can also install a lower guide with rollers. In this case, it will be necessary to make a recess according to its dimensions in the floor. It is worth noting that this is a more modern option, because such a mechanism operates silently.
Important point! In this case, when hanging the door, the door leaf is first inserted into the lower guide, and then into the upper one.
Photo background
A photo backdrop is a background surface for creating beautiful photographs. This product is ideal for people who are interested in the art of photography. The photophone will also be useful for needlewomen who prefer to take photographs and post the results of their work on social networks, and for culinary bloggers.
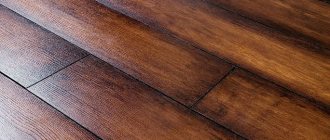
Nowadays, aged wood is a very popular material for photo backdrops, so you can easily find a suitable laminate. Also suitable for making a photophone is a material with colors that imitate leather, marble, and other types of stone. Textured laminate looks best. Smooth lamellas look less impressive, but are still used in design.
To make crafts, they look for pieces of laminate of a suitable size of one type or combine several textures together. The dimensions of the photophone depend on the needs of the user. To photograph small works (jewelry), items with a side of 15–20 cm are made. To display medium-sized objects (toys, hats, dishes), it is better to make a larger photo backdrop (50 x 50 cm or 60 x 60 cm). Large items are photographed using photophones up to 1 x 1 m.
Photophone made of laminated parquet
Making a photo backdrop is quite simple. You just need to connect the lamellas together, leave them in their original form or scratch them a little (aging them) and treat them with acrylic paint. To enhance the effect of aging, it is worth rubbing the half-dried paint with a sponge or cloth in certain places. Since the edge of the stand still does not fall into the frame, it is not necessary to process it, and defects in the middle can be hidden by the exposed objects.
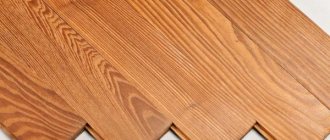
Laminate flooring
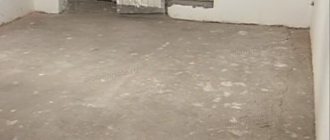
The flooring is made from solid laminate, as well as from its trimmings. This flooring option is only suitable for rooms with normal humidity, and in damp rooms it will quickly fail. The operating procedure will be as follows:
- Level the floor in the room.
- They lay waterproofing, carefully combining the joints.
- They make a test layout of laminate pieces, choosing an interesting combination.
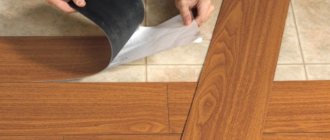
- If necessary, combine the laminate with the remains of other floor coverings, or combine different types of slats.
- The material is glued.
Laminate flooring
Advantages and disadvantages of sliding doors
Before you start manufacturing sliding doors, you need to carefully study all the advantages and disadvantages of such structures. It is worth considering that sliding doors are also not suitable in all cases.
Interior sliding doors can be incredibly aesthetic
The following advantages of sliding doors should be highlighted:
- such doors take up minimal space compared to any swing models;
- you can open and close the canvas without much effort; even a child can handle such actions;
- even if there is a draft in the room, the door will definitely not slam or open from it;
- this is the best way to divide a room into several zones, because glass sheets are often used as decorative partitions;
- some door designs do not provide for a threshold, so this option is suitable if disabled or elderly people live in the apartment;
- the design is perfect for any room, including the bathroom, kitchen, bedroom;
- If you have additional funds, you can install an automatic door opening mechanism.
Installing this design allows you to visually expand the wall
However, it is necessary to note the disadvantages due to which some people refuse to install interior sliding doors:
- if the canvas moves along the wall, then it is impossible to place furniture near it (it turns out that the design conceals useful space);
- poor sound insulation from extraneous sounds is often observed - this is due to the fact that there are gaps between the canvas and the frame;
- Because of such doors, heat in the room is worse retained;
- the cost of installing sliding doors will be significantly higher compared to the standard option;
- if you buy budget components, the door may fail within a few months;
- If you are going to install compartment doors with two leaves, then it will be more difficult to cope with this process, because these parts should be perfectly matched to each other, so you will have to involve a professional craftsman in the work.
Video - Installation of sliding doors in thin ceilings
Only if it is assembled correctly will you be able to evaluate the ease of use of sliding doors, so when installing it yourself, you must carefully take measurements. Even minor deviations will lead to the design not functioning properly. The work must be carried out slowly and carefully, then the result will definitely please all household members.
You can learn more about how to make sliding doors with your own hands by reading our article.
Key holder and hanger
Leftover laminate flooring is used to make interesting household items. For example, in the hallway, a key holder that is cut from just one piece of material looks great. The key holder is attached to the wall using double-sided tape or fastenings in hooks. To prevent the ends of the key holder from becoming unusable, they are coated with transparent silicone sealant.
For a hall or corridor, a laminate hanger is suitable, especially if an ordinary wardrobe does not fit here. To make it, cut out a piece of the required size, sand the edges with fine-grain sandpaper, and secure the top through the holes of the hooks. The lower part is glued to liquid nails, but this type of hanger is only suitable for light clothes. To place any, even heavy things on the hanger, you should attach it with self-tapping screws directly to the wall.
Unusual use
- The most creative use of pieces of material is a children's playhouse. For kids, such a device is a real dream, and from the remains of laminated boards you can assemble a small hut for home use, and a large house for outdoor games.
Edge processing is important here. In an apartment house, the edges are covered with felt or felt or covered with a plastic edge. In versions for the street, the edges are sanded.
- A variety of bird feeders are made from laminated boards in literally a couple of hours, and they will delight both birds and children for a long time.
The video suggests several ways to use leftover laminate.
After repairs, excess building material inevitably remains, so the question reasonably arises - what is better, use it for good or throw it in the trash? Many people do just that, getting rid of everything that takes up useful space in the house in one fell swoop. But skilled people don’t dare throw away a good piece of material, especially if it’s a type of flooring. In this article, together we will deal with the question of what can be made from leftover laminate flooring, how to use excess of this material with the opportunity to improve residential and even non-residential space.
What can be made from leftover laminate flooring?
Mosaic
Often, after repairs, there are pieces of different floor coverings that differ in appearance, color, and texture. They are used to make a mosaic, which is suitable for creating a picture, a functional area or finishing an entire wall. Various interior items are also decorated with mosaics. It is important that all materials have approximately the same thickness and similar technical parameters. Lay out the mosaic in any order on a sheet of plywood, starting from the border. This decor looks very beautiful if its outline is dark and the center is light.
Interesting ways to use leftover laminate flooring
An unusual solution would be a watch with a dial made from waste multilayer material. Work order:
- Make a round or square shape.
- Drill a hole in the center for the axis of the clock mechanism.
- Fix the arrows on the outside.
An interesting way to use a laminated board is to make a frame for a photo, painting, or panel. If you make frames in the same style and in several variations, and place them on different walls, you can achieve an original design for the room.
The step-by-step process looks like this:
- Cut the planks to suitable sizes.
- Cut the ends at a 45 degree angle.
- Glue all the frame elements together.
If the board is wide, then you can cut out a rectangle inside and insert a picture or photo there. If you need to decorate the embroidery beautifully, then it should first be stretched onto a thick base (plywood, cardboard) and secured on the other side with metal strips.
Battery finishing
Laminate waste can be used to make screens for batteries and radiators. Such a device will hide an ugly heating device that spoils the appearance of the room. The screen also has a practical function - it protects against accidental burns. When creating such a device, you need to connect the boards in the standard way, covering the ends with self-adhesive tape. Afterwards, the shield should be drilled to the window sill, leaving holes at the bottom for air circulation.
DIY screen for a heating battery
You can make a lot of useful things using pieces of laminate or leftover solid boards. The main thing is to approach the issue with soul and imagination, and the time spent will turn out to be beneficial for your home and family.
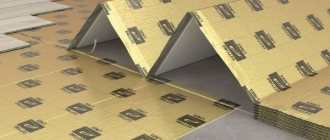
Laying underlay for laminate flooring
Laying laminate flooring involves laying a thermal insulation layer, which also eliminates unnecessary noise and covers the smallest roughness and unevenness of the base.
It looks like a special substrate that is laid over the entire area of the room. Substrates can differ both in thickness and in the material from which they are made. Most often, roll substrates made of foamed polyethylene are used. Expanded polystyrene sheet backing is less commonly used.
- How to make a ceiling with your own hands - 135 photos and video descriptions of how to make various types of ceilings
- Combined bathroom - stylish design methods and examples of competent interior selection (125 photos)
- How to install an interior door frame with your own hands - 130 photos and step-by-step installation video
Cork is an excellent and versatile material, but they are used quite rarely due to their high cost. The substrate strips are laid end to end and sealed with tape to seal.
In damp rooms, especially on the ground floor, it is recommended to additionally lay a thick polyethylene film, which will prevent the penetration of moisture, dampness and will serve as a vapor barrier layer.