No matter how hard we try to arrange our home space correctly, there will still be ineffective areas that can still be worked on. This phenomenon is especially relevant for compact interiors, which are in dire need of ergonomic solutions.
As a rule, we pay more attention to significant, noticeable elements, losing sight of the nuances that have high potential and the ability to improve the functionality of the interior. Our article today is all about innovative ideas on how to incorporate those details that we tend to forget into effective design.
If your home is quite comfortably furnished, but you are a perfectionist and want to add something else, take a closer look at the furniture in your kitchen, and perhaps you will notice those areas that seem ineffective at first glance. And more specifically, those compact spaces that are located at the base of the lower cabinets.
Such a plinth can become a practical container for many household items that usually take up scarce space in kitchen cabinets. Narrow drawers can be pre-fabricated at the interior planning stage, or included in the existing package.
So, sit back and get acquainted with the most creative examples.
Secret hiding place
To make sure that the deal is really worth it, carefully examine the area and you will see how many opportunities it hides. As a rule, it is convenient to store some types of dishes, household items needed in special situations (flashlights, candles, etc.) and even pet bowls in this plinth. Usually we are talking about a standard retractable system, which may not even be noticeable at a quick glance.
Make a cradle
Our drawer sides and cradle were the same length as the drawer sliders - yours may not be. So be sure to position the front ends of each drawer piece and cabinet piece flush with the fronts of the drawer and cradle. Slide the slides together, place the box upside down and screw it onto the base of the stand (Photo 4 ). Then turn the entire block over and check your work. Make sure the drawer opens smoothly. When the box is closed, the front of the box should be flush with the sides of the cradle, plus or minus 1/16 inch. Any problems are easy to fix by removing the screws and repositioning the slides.
Note: When assembling our drawers, the side walls are the same height as the drawers. Your drawers may end up a little higher or lower.
Convenient storage
Today, the easiest way to obtain such practical additions is to order the manufacture of furniture and initially functional plinths. Dennis Palazzolo, vice president of EW Kitchens, says: But if you still want to equip an existing composition with them, this is not a problem.
Modernizing your interior will not be difficult: there are many video instructions and electronic manuals with step-by-step explanations posted online. They describe the entire manufacturing process and its nuances in a simple and accessible form.
Tools for creating a storage box
You can build boxes with just hand tools and a circular saw, but a hand saw and miter saw will give you faster and better results. A nail gun is another way to save time.
All materials are available in most stores. In the hardware aisle, select the fullness of the side drawers (see Photo 3).
So only 3 to 5 inside. the open drawer will be covered by the overhanging cabinet front. With cheaper “3/4-extension” slides, only about half the drawer will be accessible. If you can't find full expansion slides, or if you want “overtravel” slides that extend even further, shop online. Search for “drawers” to find suppliers online. Slides are available in 2-length increments. Most cabinets accept 18 – or 20 in. slides.
Choose hardwood plywood such as birch or oak for your drawers. The class structure tends to deform. Most home centers carry plywood in 2 x 4 foot units. and/or 4 x 4 feet. sheets so you don't have to buy a full 4 x 8 sheet. Choose out straight pine 1x4s for the sides of the cradle. (Check out these tips for choosing the best plywood for the job.) For the drawer edges, you'll want a solid wood that matches your cabinets. If your toe-space height is 4 inches. or smaller, a 1x4 board will do. For higher legroom you'll need a 1x6. Most home centers only carry a few types of wood, such as oak, cherry, birch or maple. If your cabinets are made from a less common species, look for a lumber yard that has a wider selection (check Online for “hardwood”). Or improvise—with the right stain, you can make birch or maple roughly match the color of almost any wood. The grain may look different, but the difference is usually not noticeable in the dark space of the toe. We used maple faces even though our cabinets are cherry.
Subtleties of the process
Whether you install the base boxes yourself or call a professional, you will still have to spend money on fittings and raw materials. The cost of the project will depend on many factors: the complexity of the work itself, the size of the components and even their location. But in the case of a small kitchen, where every centimeter counts, this will be a long-term investment that will fully justify the cost.
What can be stored in the plinth?
Depending on the height, the space inside can be used for storing various items:
- baking sheets, trays and flat baking dishes;
- frying pans;
- sets of flat plates;
- bottles of wine or oils;
- products: vegetables, cereals, spices, etc.;
- rolling pins, corkscrews and other small kitchen tools;
- extra cutlery (knives, forks, spoons);
- brushes, sponges, rags, household chemicals, gloves and other means for cleaning and maintaining cleanliness;
- foil, sleeves and baking paper, cling film, plastic bags and garbage bags in rolls;
- pet food;
- skewers and grill grates;
- books and notebooks with recipes;
- folding chairs.
Other interesting storage ideas: Magic corner for the kitchen - 3 types of mechanism and features of use
Invisible inclusions
According to average estimates, converting plinths can cost a couple of hundred dollars. But this amount is significantly less than what would be required to manufacture furniture with the additions already provided. You will be pleased to know that you have the opportunity to use not only traditional designs, but also devices that open with a simple press.
So, with one easy movement you can open the base and then close it. This technology is preferred by many homeowners who have already appreciated the benefits of such an innovation.
Types and sizes
There are several options for installing drawers in the plinth:
- with a common bar;
- separately under each cabinet.
Depending on the design, they can be made separate or double. In the first case, the box is installed independently under the bottom of the headset.
In the second case, it is combined with the lower drawer of the kitchen and turns out to be deeper and more spacious.
Depending on the mechanism, the structure can be installed:
- on furniture wheels;
- on roller guides;
- on ball guides.
You can choose different opening methods, which directly affect the aesthetics of the headset’s appearance:
- with the push-to-open system - the most aesthetic option when it opens by pressing, and there is no need to select handles that match the style;
- with sink handles - this option also looks very neat, but too large brackets can cause injury by catching your legs;
- knob handles and handle rails will be conspicuous and spoil the appearance of the kitchen, so they will be a less preferable option.
Drawers can be with or without closers. If you can pay more for the mechanism, it is better to choose soft-closing fittings.
Since the drawers in the base are small in height, this disadvantage should be compensated for by width. It is not recommended to make them less than 60 cm wide.
Convenience for all inhabitants of the house
The next device is equipped with recesses for bowls so that the latter do not slide along the bottom of the drawer. The thoughtfulness of this design can hardly be overestimated: with such a design, you will be sure that your children will not spill water from your beloved dog’s water bowl while playing ball, and you will not trip over a cup of food while heading to the refrigerator in the dark - to take an apple, of course...
Plastic dividers for middle and lower drawers
Another idea for your little kitchen tricks for convenience: look for plastic drawer dividers in Leroy or Ikea. There are similar devices in other well-known hypermarkets.
After such an addition, all containers and jars in the deep drawers of the kitchen set will stand fixedly, without moving or falling every time the drawer is pulled out.
Additional functions
Such devices can be used not only for storing things, but also as a low step, from which it will be easier for you to reach the upper shelves. And for those who have small children, such devices are the most necessary: with them, kids get the opportunity to wash their hands and brush their teeth independently, without resorting to outside help.
JOURNEY TO IKEA – BUILDING A KITCHEN USING A NEW METHOD
I'm probably late with my report on the new Ikea Method kitchen building system. But the beginning of April was too busy... And walking around IKEA usually takes me a lot of time :))) But today it so happened that I found three hours and went to study the new “method” from IKEA :)
“We are excited to introduce you to METHOD: this is our new modular kitchen system. By the word “new” we mean fundamentally new elements included in its composition: frames, facades, hinges and much more! All these elements allow you to create the most convenient and unique kitchen for you. Have you thought that your dream kitchen won't fit in the space you have or won't fit into your budget? Or maybe they just didn’t find anything suitable? Explore this section - don't limit your dreams!” - the words sound from the IKEA website.
Interesting? Of course... it’s interesting not even because it’s something new... but because now, unfortunately, in this price range (already far from cheap) IKEA still has no competitors.
I also loved the old Faktum, especially in the last couple of years Ikea pleased me with the colors of the facades and the quality of the finishes... It’s a pity that 6 years ago there was no such choice.
After today's walk, I'll probably say that I won't mind getting an IKEA kitchen. Although my love was given to the Germans.. hmm... But we are talking about Ikea :) and the new Method.
What's new in it? basically EVERYTHING! I warn you - there are a lot of photos :)))
Let's go over the sizes: The new method has become a multiple of 20 cm. And the size range of cabinet widths is now as follows:
The width of the cabinets from METHOD is 20, 40, 60, 80 cm.
Cabinet depth: 37 and 60 cm. Lower cabinets also have a depth of 37 cm.
together with the door the depth will be: 62 and 39 cm, respectively.
Cabinet height:
lower cabinets are all 80 cm high. top: 40, 60, 80, 100 cm columns: 200, 220, 140 cm superstructure height: 40 cm leg height: min 8 maximum 16 cm plinth height – 8 cm.
Yes, there are no more 30 cm cabinets... and there is no 45 cm cabinet... and there is no 45 cm facade. Therefore, there is no need to set a goal - to go torment IKEA salespeople and managers - how can I install a 45 cm dishwasher... It’s very simple - choose a 60 cm facade. In the remaining 15 cm, build a pull-out a 10-15 cm basket for tablets and other cleaning products - very convenient.
However, there is one BUT in choosing built-in equipment: Ikea gently hints at purchasing equipment from it... Let's see...
Here on the wall in the office. the VKONTAKTE group had a question about a free-standing gas stove: “- Good afternoon! Question about new METHOD kitchens: is it possible to install a non-built-in gas stove? The height of the bottom drawers is more than 90 cm (drawer + base + tabletop), the height of standard slabs is 85 cm. What to do with these?
– Evgenia, good afternoon! If you are interested in a podium for the stove, then the METHOD kitchen range includes a special add-on that allows you to raise the stove to a height of up to 7 cm. “
Many began to complain about the inconvenient sizes... Well, I don’t know, my opinion is that everything is fine. This is not a premium kitchen, where everything is specially made for your kitchen. This is a segment that you don’t have to wait for... you can “design it yourself for your loved one,” bring it and assemble it in almost one day. Of course, you can’t assemble it in one day... well, in three or four - for sure!
What are other news? Or old?
Color.
I liked the color palette and the level of quality of the facades. The color scheme and style of facades are quite diverse. I think now you can easily choose a combination for almost any interior idea.
And glossy facades, and veneered, and painted. From bright white to black colors. With glazing and simply deaf. framed and frameless... I liked the beautiful yellow color. so nice... very nice. But the black kitchen also looked very stylish. I really didn’t like the sample handles. From this set of handles there are 30 options as is now
Could have picked others too. IMHO.
There are now two main colors for frames: white and dark brown. And for the interior decoration, funny inserts called TUTEMO appeared. The brightest colors. The stand features a white kitchen with such inserts - very cool! Of course, the idea is not new.. and the Italians have been offering such open colored shelves for three years now... But now the trend has reached Ikea.. But look carefully at the sizes. These inserts are not available in all.
Fronts 10 cm high for drawers appeared. Now you can make 8 drawers in one closet! Cool... good for storing tablecloths, napkins... little things.. (I already imagined how I would put all my culinary stuff there.
There are no complaints about the cabinets, I twisted them, turned them, opened all the doors in almost all the kitchens on display...
Opening system.
There are a lot of samples with the “push-up” system or “handle-free” facades. The kitchens look very stylish, of course... I pressed a lot... the result: the opening is smooth, they open not to the full depth at once, but to 10 cm. Then use your hands to bring it to the desired angle of rotation.
They also close smoothly. Of course, there were fingerprints on all the glossy facades... not so noticeable on the light ones, more noticeable on the dark ones.
Loops.
Everyone said that the bloom would go away... it didn’t go away... at least it’s everywhere in the samples. I checked it personally :)
The filling for the cabinets is similar to what it was before. They just changed the sizes. I liked the containers, my favorite ones in the new method. They fit there very well in terms of width and depth. If anyone doesn’t remember, they cleaned out my non-IKEA kitchen cabinets. READ about this story
.
What else? The back part is the same... ordinary hardboard, but everything seems to be well made and of high quality. I noticed that all cabinets are now offered to be mounted to the wall on a strip, both upper and lower. The upper cabinets are approximately 5 mm behind the wall.
I liked the proposed built-in illumination of the work area. Pleasant, not very bright, but comfortable light.
It seemed to me that they increased the variety of countertops. At least the choice for 4 rows pleased me. Lots of natural wood.
The thickness of the tabletops is from 1.8 cm to 3.8 cm.
Everyone is talking about cost now. I can’t speculate, since the last time I shortchanged IKEA customers was two years ago... But there are reviews that it has become more expensive - tell me, what hasn’t become more expensive over the past six months? :)
You can still plan everything yourself. The site has an updated IKEA planner. Managers say it works well. I haven't checked it myself.
“Friends, currently the METHOD kitchen planner is working normally, we have not noticed any glitches. If the program does not load or does not work correctly, we recommend checking the system requirements. In addition, changing your browser or clearing your cookies often helps get rid of such problems.” from the office of the IKEA VKONTAKTE group.
At IKEA Khimki (Moscow), they increased the number of tables with computers for working both with themselves and with managers. Today there was no huge queue, but since it is completely electronic, walking through the halls, you periodically hear people being called for someone who is eager to get a kitchen by number.
I liked the idea of an impromptu buffet. These legs are sold in Ikea in the Dining room - tabletops and legs section.
Ventilated inserts appeared in baseboards and cornices.
I really liked the pull-out sections on the tabletop cabinets.
The dream sink has returned... costs almost 15 thousand rubles...
After the walk, I sat in a cafe, ate my favorite cake... and leafed through the METHOD manual. I can say - a useful thing! It’s not in vain that I took it for myself :) And I advise you!
I hope you enjoyed my trip to IKEA.
GOOD LUCK WITH THE REPAIR!
The blog “On the Wave of Decor” is a non-profit project and is created only by the author. If you appreciated the article and liked it, I would be grateful for a little financial support. Thank you!
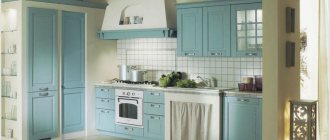
Kitchen without wall cabinets
If the room is spacious and you don’t need to save it, then a kitchen without top drawers will look great. The absence of wall cabinets is one of the modern design trends. Typically, island kitchen models are chosen for it, in which part of the set is separated from other furniture.
A kitchen without top elements looks stylish and impressive. No need to worry about running out of storage space. In addition to wall cabinets, there are plenty of ideas on where to hide items.
- With such a kitchen set, instead of the top drawers, you can install a shelf, hang a picture, or decorate it with other decor. Different types of railing systems would also be appropriate.
- With them, a pipe is attached to the wall above the tabletop. Holders, hooks, or the kitchen utensils themselves are attached to this pipe.
- With an island model, the set, additional storage boxes are also made on the island.


