For a small area, a 5x4 bathhouse is the best option. If you approach the design competently and competently, then you can easily organize all the necessary premises in it. The location of the sink and steam room should be planned in different rooms - this will give additional comfort when visiting the bathhouse. But the remaining parts should not be ignored, because rest depends on it.
Material advantage
- lighter than logs;
- easier to install;
- minimal shrinkage;
- affordable price;
- easy calculation of the amount of material needed so as not to purchase too much.
For example, if you have a bathhouse made of timber 150 by 150 mm, the volume of material with a standard length of 6 m is equal to: 0.15 * 0.15 * 6 = 0.135 m3, and in 1 m3 = 7.41 pcs.
If you need a 5x5 sauna:
- 5 * 5 * 3 = 75 m3 - the total volume of the building.
- 75: 7.41 = 10.12 m3 – total volume of timber.
Taking into account window blocks and doorways - 9-10 m3.
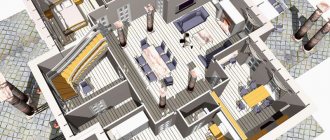
Layout of a 5 by 5 bathhouse for a summer cottage
Construction stages
Project and result
After watching the video in this article, you will learn to understand projects. But there is still construction ahead. If you decide to do everything yourself, then do not forget that all responsibility then falls on you - approach the matter seriously.
You have the following stages of construction ahead:
- Create a foundation.
- If necessary, arrange a separate foundation for the furnace.
- Arrange the floor and create a sewer in the bathhouse.
- Build the log house yourself.
- Make a roof.
- Perform a blind area.
- Install a stove or boiler.
- Organize a chimney.
- Arrange water supply and electricity.
- Install doors and shelves.
- Arrange all rooms.
Having completed all this work, you will receive a wonderful bathhouse that will serve you for a long time.
Foundation
The reliability of the foundation is the key to the durability of the building. When building a foundation for a 5 by 5 bathhouse, you must adhere to the basic rules, and not think that the larger it is, the better. Particular attention should be paid to waterproofing, which will not allow moisture from below to penetrate the wood and quickly destroy it.
Layout of a 5x5 bathhouse with a veranda
Varieties
Each type of foundation depends on the soil at the construction site, the size and weight of the building. It does not have to be deep; for example, on heaving soils it is usually shallow.
Selection factors
- natural conditions;
- maximum load;
- soil freezing depth;
- groundwater;
- soil density and type.
Wrong choice of foundation will lead to distortion of the walls, deformation and destruction of the building.
Bathhouse plan 5 by 5 with a large relaxation room
Attention! The weakest foundation structure is made of brick, where even the densest reinforcement will not help. The concrete base deteriorates more slowly, but cracks and fractures may appear in it.
Depth device
For a bathhouse from timber, you can make a recessed base and a shallow base. If previously it was customary for wooden buildings to install a foundation whose base would be below the level of soil freezing in a given area, now it has been decided that this is impractical, since a wooden building does not have much weight.
In addition, the cost of a buried foundation is higher, which is what made the shallow-depth option the leader.
Bath plan 5x5 made of wooden beams
Construction type
- Columnar is an inexpensive base option. When constructing it, concrete blocks are most often used, which are installed at the corners of the building and under massive partition walls. The distance between the pillars is up to 1.5-2 meters.
The fastest option is from asbestos-cement pipes:
- drill holes in the ground;
- install pipes in them;
- pour concrete into them.
- Tape - the most common, strong and durable, located along the perimeter of the future building and along the line of partitions. During construction, reinforced concrete is used, where a reinforcement frame is installed in the center of the foundation to strengthen the structure.
- Pile is a good solution for swampy and unstable soils. Piles are driven into the soil to a depth below the freezing point of the soil. Then a reinforced concrete frame is made around the perimeter.
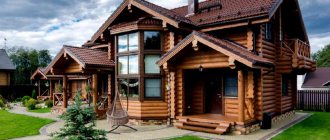
High bathhouse 5 by 6 by 5 for a suburban area
Creating a Project
Often, owners of land plots, in addition to a residential building and outbuildings, think about building a bathhouse. Of course, you can also buy a ready-made project, created taking into account the customer’s preferences. It is very convenient and fast, but very expensive. It’s not at all difficult to create a project yourself. Moreover, in such a square there is plenty of room for your imagination to run wild. Plus, you can add additional zones to the main zones in the bathhouse (if desired).
Attention.
You can use standard projects that are freely available on the Internet. Such projects, if necessary, can always be adjusted at your discretion.
Before you start drawing up a project, you should understand how many rooms and what sizes will be in this bathhouse. The following premises must be present there:
- rest room or dressing room;
- sink or shower;
- steam room
It is also important to consider the installation of ventilation and chimney. In order for the bathhouse to be visited by the whole family or with friends, it is worth taking this into account at the planning stage. You can sacrifice the size of the sink and visit it one at a time, but at the expense of this you can increase the steam room and the relaxation section.
Waterproofing device
Below are instructions for installing it.
- Apply melted bitumen on top of the foundation plinth.
- Place a strip of roofing felt on top.
- Apply a second layer of bitumen after the first has cooled.
- Place the 2nd layer of roofing felt.
What does a 2 by 5 by 5 bathhouse look like in cross section?
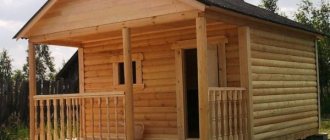
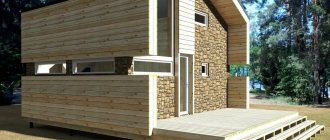
Project 4x5 – a pleasant bathhouse in all respects
To make you comfortable and cozy, the specialists of our architectural bureau worked hard on the 4x5 bathhouse project. A family of 3-4 people or a small company can easily accommodate here. You will certainly enjoy the comfortable layout, thought out to the smallest detail, and the aesthetically attractive appearance of the building. The 4x5 bathhouse project is really good both outside and inside. The total area allows you not only to take a steam bath, but also to plunge into a plunge pool or small pool, relax and unwind after bath procedures. What a pleasure, isn't it? Ready to try? Then order the project right now!
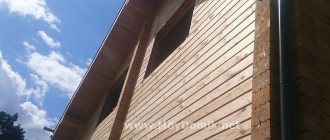
Wall installation
Advice: never tightly fit elements of wooden buildings. Drying the wood will reduce the height of the timber, so the bathhouse may warp if you do not leave gaps.
- Prepare slats 15 mm thick so as to cover the foundation with them in increments of 250-300 mm. They will additionally protect the timber from rotting.
- Install the crown beam on top.
- Fill the free space between it and the slats with mounting foam.
- Make sure that the crown has a horizontal surface before finally securing it. Use a building level.
- Secure the beams together with steel brackets from the outside. After construction, bathhouses are usually removed.
The crown beam is usually not fixed, since after the walls are installed, the weight of the building will guarantee its stability on the foundation. This will especially help when it needs to be replaced after a while.
- Lay insulation, for example, flax jute, on top of the crown beam.
Laying the remaining beams
- Prepare a beam with a cross section of 150 by 150 mm.
- Install and secure the second crown. Use metal pins or wooden dowels for this. In the first case, it is necessary to prepare unloading holes in the timber according to the diameter of the pins.
- Do not secure the 2 upper crowns, as they will have to be removed to install the ceiling beams after the frame shrinks.
Beam connection
Butt-butt
In this case, the beams are connected end to end, with the connecting seam overlapped by the next one. The reliability of the method depends on a perfectly flat end surface, which must be sawn off strictly at a right angle. Heat loss with this option will be high, even with a fairly tight connection.
Warm corner
Such a connection is also called “root tenon”, when a special groove is made in the end part of one beam, and a vertical tenon is made in the end of the other. You can also make several vertical spikes, this knitting is called “double or triple slotted spike”.
Advice: be sure to use inter-crown insulation for a bathhouse, which increases the joint density and thermal insulation of the log house.
Two-story bathhouse 2 by 5 by 2 by 5
Intercrown insulation
The best choice is flax-jute fabric. It is sold in rolls of different sizes and can be easily cut into strips. Thanks to the installation of this insulation during the construction process, after shrinkage the walls become a solid monolith.
Connect the crowns of the log house to each other at the corners and along the perimeter with wooden dowels. It is advisable that they be made of hard wood, such as larch.
How to make a dowel
- Prepare a board 25 mm thick.
- Cut it into bars of the required length.
- Remove sharp corners from the sides, giving the bars a rounded shape.
You can also use ready-made cuttings from brooms and rakes, which can simply be cut to size.
How to connect timber with dowels
- Drill through the top beam and halfway through the bottom.
- Remove the top beam.
- Drive the dowel into the bottom beam with light blows of a hammer until it stops.
- Put insulation.
- Return the top beam to its place by placing it on the dowels.
Window and door frames
Install the door block on a row of frames at floor level. To level it vertically and horizontally, use a plumb line and a building level, then secure it in the opening. The window block is installed in the same way at a predetermined height.
Tip: leave a gap of 80 mm or more above the door and window units, filling it with insulation. It is necessary for subsequent shrinkage of the material.
Roof
- Place wooden beams horizontally on the top frame of the walls.
- Install rafters on them every 1 m. They should be flush at the roof ridge.
- Place roll boards on the rafters or make slate sheathing.
- Cover the ridge with galvanized iron.
- Cover the gables with boards or siding.
The final stage of construction is insulating the bathhouse. Use non-flammable materials, such as mineral wool, after protecting them from moisture.
Steam room
The steam room is the heart of any bathhouse. Accordingly, this room will reasonably have the highest requirements. With a bathhouse size of 4x5, the steam room is designed to be spacious and this room must be very well heated and maintain a fairly high temperature. To create a good temperature, it is recommended to install a stove-heater.
To place it, you need to think about the location in advance, even at the stage of pouring the foundation. This stove is quite profitable. The only negative is that it takes up a lot of space. Many people install electric heating elements in the steam room, but this is quite uneconomical and plus you will have to lay additional wiring. With this heating method, it is necessary to provide additional insulation and install more steam generators in order to somehow reduce energy consumption.
Depending on the location of the steam room, it can be rectangular or square-shaped. For shelves, use massive, narrow wooden boards. Be sure to round the corners on them (for safety reasons). You need to remember about ventilation and leave small gaps between the boards so as not to impede the free passage of air. When working on a paired compartment, it is important to take into account the comfort of movement. It would be rational to reduce the area of the shower and dressing room to increase the steam room.
A 4x5 bath allows you to experiment with the space inside. But this needs to be done thoughtfully, so that moving around and being in such a recreation area is comfortable for a family of 5-6 people or a group of friends.