Popular wisdom says: “there are no generals in the bathhouse.” However, one quick glance at the shelves in the bathhouse is enough to understand which of those present occupies what place not only in the bathhouse hierarchy, but also in the registration card file of the local clinic. A person with good bath experience and good health sits comfortably on the top shelf, a newcomer with youthful enthusiasm and a sparkle in his eyes settles in the middle, an avid but weak bath lover, whose heart muscle has been undermined by a chaotic life and family troubles, hesitantly huddles at the very bottom, closer to the exit. . Polk actually has a lot to say. Let us take a closer look at it.
What is a shelf in a bathhouse?
An important factor when placing benches in a bathhouse is the area of the room itself: in a small steam room, a couple of benches of different heights are enough, but if there is free space, corner shelves are placed in several tiers.
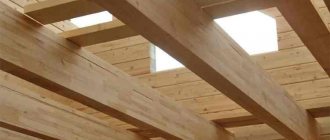
The multi-tiered canopy organization system allows you to choose the most comfortable steaming temperature. The higher the shelf level, the hotter it is. The distance from the last shelf to the ceiling should be at least 120 cm, which will allow the average person not only to lie on the top tier, but also to sit and steam with a broom.
From the floor to the lower tier, the height should be at least 25 cm and no more than 40 cm. The optimal height between tiers is considered to be 50 cm. The width of the canopies is about 40 cm (for sitting) and over 60 cm (for lying).
The length of the shelf in the bathhouse is selected in accordance with the height of the tallest guest or family member. The person should lie comfortably so that their feet do not rest against the stove or another guest.
Making a headrest
These products usually lie on the lower tier or in the dressing room. They are taken with you to the bathhouse and placed under the head like a pillow, and they should not be hot at that moment. Headrests are made from different materials and differ in shape.
Selection of headrest material and design
For headrests, it is better to choose linden - a cheap, easy to process and high-quality material. Even a beginner will be able to make with his own hands a model that is light in weight, convenient in shape and easy to make. The most difficult step will be cutting out curved surfaces with a jigsaw.
The curved parts of the headrest need to be cut with a jigsaw
The dimensions should be such that the product fits generously on the shelf, is small and convenient for placing under your head, for example, 340x353 mm.
The optimal headrest size is 340x353 mm
Table: materials for headrest
- We draw the side supports on the scraps of the board and cut them out with a jigsaw according to the diagram.
The side supports of the headrest are cut out with an electric jigsaw
- We fix them in a clamp and process them with grinding wheels until they are completely smooth.
- Cover with impregnation for shelves and walls and dry.
- Then we cut the planks and process their edges. We also cover them with impregnation for shelves and walls and dry them.
The planks also need to be coated with impregnation for shelves and walls and dried
- We prepare the pins. We count and check for smoothness.
- Using a wood drill, we make blind holes with a diameter of 6 mm on the underside of the planks.
Non-through holes are drilled on the slats at a distance of 4.5 cm from the edge
- We try on the planks to the support. We drill the same holes on the top side of the supports according to the diagram, but not right through.
Holes in the support are drilled according to the diagram
- We insert the pins there and tap them with a hammer. They should go in with force and sit tightly.
The pins should fit firmly into the holes and be tight.
- We connect the planks with the support on the pins. We start from the center bar to set the correct distance. We tap them on top with a felt hammer so as not to damage the appearance of the wood, or with a regular hammer through a rag.
- The headrest is ready. The connections will not be visible from either the top or bottom.
If you make a headrest on pins, then the joints of the parts will be completely hidden
Types of curtains in the bathhouse
- Bench shelves. Suitable only for sitting, but considered the most popular.
- Beds. You can lie and sit on them.
- Sun loungers. An alternative to a bench and a couch.
Canopies should not be placed near a hot stove (this can lead to injury) or near windows (when hovering with a broom, the glass may be accidentally broken, which will cause injury). Bath shelves are extremely simple, functional and do not require special care.
Decorative elements are not welcome, since at high temperatures and humidity from hot steam, artificial ornaments can release toxic substances. Making shelves for a bathhouse with your own hands is quite simple even for an untrained person. It is worth preparing the material and carefully following the instructions.
Briefly about the main thing
The bath canopy is made of wooden boards and timber. Sanded workpieces are pre-impregnated with protective compounds containing fire retardants and antifungal additives.
Self-assembly of the structure begins with drawing up a project. In this case, the recommendations of the craftsmen regarding the location of the benches should be taken into account: location, height, width.
Assembly begins with the installation of a supporting structure, then the sheathing for the boardwalk is constructed. Additionally, you can make a headrest and footrest. Installation of backrests is performed at the discretion of the bathhouse owner.
Ratings 0
Material for bath canopy
Wood for a bath shelf must meet several criteria:
- Do not release resin when heated.
- Excellent tolerance to elevated air temperatures and humidity.
- Be resistant to fire.
- Have reduced thermal conductivity so that the material does not heat up and allows visitors to relax on the warm wood of the shelf.
- Be stable in use (do not delaminate, without knots and splinters).
Coniferous wood is not suitable for constructing a bathhouse canopy. The material will release a lot of resin, which becomes extremely hot in the bath, sticks to the body, hair and clothes, and can also cause a burn.
It is recommended to build the frame of the canopy from inexpensive pine, but not the sunbeds themselves. The resin will allow the frame legs to more easily tolerate moisture and not rot.
Suitable for bath canopy seats:
- Linden is a popular material with an optimal price-quality ratio. It is worth noting the pleasant light shade of linden, its delightful aroma, low thermal conductivity and high performance characteristics.
- Alder is a practical and durable wood, but the price of the material is slightly higher than linden. Alder heats up less and demonstrates high resistance to elevated temperatures and humidity.
- Aspen is an excellent and inexpensive material for a bathhouse, durable and reliable, not prone to rotting, but after a while the wood turns gray.
- Abash (African oak) is an elite type of wood that does not split during installation, does not rot, does not change its size after installation, does not easily absorb moisture, and does not change its color. The main advantage of wood is the complete absence of knots.
Construction stages
As in the construction of any other structure, there are a number of rules and principles.
Read also: How to build a dog from Lego? Scheme?
Canopy design
- As a rule, curtains are installed along the longest wall in a steam room, free from windows, doors, ventilation holes and vents.
- Measure the dimensions of the steam room as accurately as possible and make a drawing of it in two projections, indicating the stove, heating boiler, windows and vents.
- Schematically but accurately indicate the location of the shelves, following the recommendations of experienced craftsmen.
- The finished sketch should indicate the dimensions and places where the shelves are attached to the walls and floor. Moreover, it is recommended to attach the upper rows to the walls, and the lower rows directly to the floor (this will significantly simplify the process of cleaning the steam room). The overall composition should be as compact as possible.
- Based on the drawing, calculate the approximate amount of wood, adding 5% “in reserve.”
- It is very important to accurately determine the design of the canopy, because nothing can be corrected either during the process or after the completion of the work. And the rework will be costly.
Even experienced craftsmen, before taking up the tool, draw up detailed drawings that indicate not only the dimensions of all canopies, but also the frame diagram, locations and method of fastening.
Bathhouse drawing
All this will help to calculate the number of boards, timber, fasteners, and decide on the selection of tools.
To prepare the parts you will need:
- hacksaw, circular saw or jigsaw;
- plane;
- manual or electric sander with a set of blades or attachments.
For assembly, depending on the fastener, you need a screwdriver and/or a hammer; level.
Finishing with protective compounds will require a set of brushes.
DIY bathhouse shelves (step by step)
Before you make shelves in the bathhouse with your own hands, you need to draw the future structure, distributing the number of shelves and sunbeds, their height and length, based on the dimensions of the room.
When calculating materials, it is important to take only beams with dimensions of 50 by 50 mm or 50 by 80 mm.
The maximum cross-section of the beam should not exceed 100 mm (there is no point in taking thicker beams). The step between the 50 by 50 mm leg supports is at least 60 cm. The smaller the diameter of the bar, the more often the supports are placed.
- The thickness of the frame board should be at least 25 mm, and the width should be 4 times the thickness. The boards are placed at intervals of 1-2 cm. The wood must be carefully sanded, eliminating any knots and cracks.
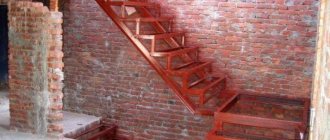
- To fasten the frame you will need zinc screws and corners. Installation of the canopy begins with the construction of the upper tier adjacent to the wall. The required number of supports and crossbars are cut.
The strapping bars are attached to the wall at the calculated height. Under the harness, support bars and intermediate ones are placed, which are fastened to the second row of support bars with jumpers. The supports of the second row are tied together using jumpers. The bottom row trim is attached to the outer supports. The process is repeated.
Design
The element is assembled from a frame, base and boarding, which can be stationary, removable or folding. The basis is made up of support posts (vertical), as well as jumper boards - such a frame is attached directly to the wall. But between the shelves and the wall you need space for ventilation - this is about 8-10 cm. The flooring is made of narrow planks.
Ramunas
In theory, the frame is made from racks - vertically located bars. A diffuse film (membrane) and a vapor barrier are attached exactly over them, and then along these racks (vertically) an air gap is attached, forming a lath two to two and a half cm thick. And the lining is already attached to it - let me remind you, the lining is attached HORIZONTALLY with a “folder” at the top . And the shelves are attached precisely to the racks through this entire sandwich - that is, fastening occurs only at certain points of the wall and not just anywhere.
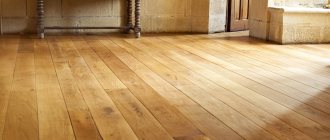
It is important to leave a gap between the wooden planks of the shelf flooring (it is better to make it removable so that it can be washed and dried in fresh air) so that the water drains and does not remain in puddles. A suitable step is usually 1 cm - sometimes a little more.
Kern:
Kern
I left 1.5 cm gaps between the boards (ours are made of abasha) - this makes them easier to wash and sweep away leaves. The sides were not sewn up, I think there should be some ventilation there
Advice from the experts
Experienced craftsmen advise using the method of cutting into half a tree instead of steel corners. Rubber pads or plastic plates are placed under the racks to reduce the effect of moisture on the wood body.
During installation, it is necessary to use a building level to identify frame deviations.
- The screws should not stick out, so you need to carefully select the length of the material and compare it with the thickness of the board.
- It would be a good idea to treat the wood with antiseptic solutions, which are recommended for use inside the bath complex.
- The impregnation should not release toxic substances when heated.
After bathing procedures, it is necessary to thoroughly ventilate the room and wipe the benches with clean cloths. Building shelves in a bathhouse will not be difficult, and properly selected wood will last for decades, giving a feeling of comfort and bliss when visiting the steam room.
How to care for shelves
Despite the fact that making shelves does not require serious financial investments and labor costs, any bathhouse owner does not want to redo them every few years due to loss of appearance, mold or other problems. Simple rules for caring for bath furniture will help you avoid them:
- Each time after completing the bath procedures, the steam room must be ventilated by opening the door and window, if any.
- To speed up the drying of the shelves, wipe them with a dry cloth that absorbs water well.
- During drying, all water from containers must be poured out or closed with lids.
- Things remaining on the surface should be removed, and traces of dirt and soapy compounds should be washed off. You cannot use abrasive or chemically aggressive products for this.
Regular cleaning and ventilation are required to extend the life of bath furniture Source scontent-cdg2-1.cdninstagram.com
In general, the interior of the bathhouse should be kept clean and dry, periodically carrying out general cleaning. It is better to make the beds of the shelves in the steam room removable, and in hot weather take them out to dry in the sun.