According to the classical definition, a pediment is a part of a wall that borders on the sides with a roof and at the base with a cornice. In modern low-rise housing construction, the base of the pediment in the corners coincides with the beginning of the eaves of the side overhangs, with the exception of the Dutch hipped roof. And the type, or shape, depends on the design of the rafter system.
How to sheathe the gable of a house cheaper and more beautifully
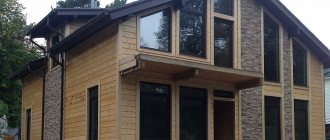
The pediment is the face of the house, so the issue of its cladding is of particular importance.
Experts suggest how you can cover the gable of a house beautifully and cheaply. The lining is installed on the pediment horizontally, diagonally, vertically or herringbone
The lining is distinguished by the texture of natural wood and a pleasant color. At the same time, it is a relatively economical finishing material. The lining is fixed to a special frame made of wooden blocks using nails and self-tapping screws.
When facing the pediment with clapboard, a number of features should be taken into account:
It must be used in combination with protective materials that will prevent the formation of mold and mildew on the surface. It is important to use a paint coating that repels moisture. This will protect the material from negative external influences. The use of lining increases the risk of fire since it is highly flammable. Protective coatings must be systematically updated to prevent the negative effects of moisture and microbes
On average, work should be carried out once every six months.
It is easier for an inexperienced craftsman to implement planking vertically or horizontally. In addition, there will be significantly less scraps, which means you can “fill your hand” with minimal expense.
The good thing about siding is that it is easy to level the surface of the finished gable
This is the most inexpensive and at the same time practical material of all possible. The siding is installed on the pediment using a metal profile frame.
Siding is durable. It does not change its technical characteristics and does not lose its visual appeal for 50 years or more. The material can be painted in absolutely any color. The texture of the paint also does not matter. This allows you to design the pediment in the same style as the walls and roof of the house.
Unlike lining, siding is resistant to moisture. This eliminates the need for systematic application of protective agents. To update the appearance of the coating, it is enough to wash it with soap and water when it gets dirty. This can be done using a hose.
The most economical siding options are plastic panels. They differ from more expensive models only in the limited color palette.
Finishing methods
Often the house design provides for additional finishing of the facades, often combined with insulation, and this can be:
- simple or decorative plaster;
- facing with ceramic, artificial or natural stone tiles;
- covering with plastic, fiber cement, and other types of sidings or panels;
- use of the so-called ventilated facade. This allows outside air to pass freely under the cladding and remove excess moisture. And also make the building less cold in summer and cooler in winter.
Timber building
In this case, the material and manufacturing methods may differ from how the walls are constructed. So, for example, the walls can be made of brick, and the gables can be made of foam concrete blocks or wooden panels. After uniform finishing of facades and frontal parts, they can look like they were built in the same style.
Types of siding
Siding is a finishing material that looks like individual elements or panels. The walls of a house covered with siding are visually no different from planks. Each module is equipped along its entire length with snap hooks and a perforated edge for fasteners. The sizes of the panels are different and depend on the capabilities of the manufacturer, most often their width is 100-300 mm, length up to 6 m. This is a very durable material, thanks to the qualities of which the finishing of the roof gable does not suffer from moisture, does not require treatment with paints and varnishes and lasts up to 50 years. The following types of siding are available in construction stores:
- Vinyl. Panels made of polyvinyl chloride are single elements made monolithically. Vinyl siding is environmentally friendly, withstands temperature changes, does not burn and has a wide decorative potential due to the variety of colors and textures. Finishing gables and vinyl siding is low cost and can be done yourself.
- Metal. Aluminum and alloy steel panels are also used as roof gables. Thin and light metal siding, thanks to its hidden lock, looks great and neat, and the varied palette of polymer coating allows you to match it to the roofing material of any shade. Such panels are stronger and do not change color under the influence of UV rays, however, the cost of this cladding option is much higher. Installation work takes longer, since cutting metal is more difficult; I use polyvinyl chloride.
- Cement. This type of siding imitates the structure of wood and consists of cellulose fibers and cement. Possessing significant weight, cement-cellulose finishing requires a reliable frame, but it allows you to quickly bring the appearance of the roof gables to ideal condition. However, the cost of cement siding is much higher than siding with other types of house siding.
Cement fiber panels
Work order
If anyone hasn’t realized yet, I prefer vinyl siding to all the materials listed above. It has a fairly low price, protects the pediment well from destructive natural influences and is easy to use.
So that you can verify the latter for yourself, I’ll tell you how to decorate the gable of a house with siding.
Materials and tools
First, let's determine what materials are needed to carry out the work. Let me clarify right away that in my case I will need several materials, depending on the specific conditions at the site. So you may not need them.
So let's get started:
- Vinyl siding. Basic material for work. You can choose the appearance and color yourself, and I described the characteristics and varieties in detail above.
Siding for finishing the gable of a cottage.
- Galvanized profile for the frame. I use this and not wooden blocks. Galvanization has the same geometry, and this cannot always be said about the bars; it does not need to be additionally treated with antiseptics and, in my opinion, it lasts longer.
Profile for siding installation.
You will need both a guide (UD) and a supporting (CD) profile. In addition, you need to stock up on U-shaped brackets for mounting parts on the wall.
- Siding accessories. Parts without which it is impossible to install siding. We are talking about the starting strip, connecting elements, G-profile for installation around the window opening, and so on. The specific list of products depends on the configuration and size of the pediment.
- Dashboard. It will be installed in the lower part of the pediment, that is, at the junction with the main load-bearing wall. I will use a metal part that is attached to self-tapping screws with press washers.
Drip strip.
- Metal slopes for a window opening. I need them because there is a dormer window on the pediment. I use ready-made white metal parts that match the color of the siding. In the upper part the part will be wider, since the roller shutter is supposed to be installed there.
Metal slopes for a window opening.
- Protective roller shutter for windows. It consists of a box and guides that will be attached to the slope and for which I will make embedded parts. You can read more about choosing roller shutters in my article on this site.
Protective roller shutter for the window.
- Wind strip for roof. In my case, at the end of the roof, the roof covering (slate) is slightly damaged, so I will use a metal wind strip to eliminate the defect. It will also serve as decor for the front of the house.
Wind bar on the roof.
- Waterproofing membrane. A special polymer film that does not allow moisture to pass through, but does not prevent air from penetrating through the pediment. In my case, it is wooden and such a membrane will help reduce humidity in the roof space.
Waterproofing film.
As for the other little things, I will mention them already in the process of describing the installation technology.
Siding installation
So, the instructions for installing vinyl siding on the gable of a house are as follows:
- I am preparing the pediment for finishing. In my case, the work will be done with a wooden pediment equipped with a plastic window. The roofing material is slate, the roof has a slight overhang over the gable. There is no need to insulate the wall. Before we started, everything looked like this:
Pediment before siding.
The process of preparing the pediment for work is as follows:
- installed scaffolding to provide easy access to the outer gable;
- removed scraps of old plastic film that had been used to “waterproof” the gable;
- cut off the protruding remains of polyurethane foam used to seal cracks and install windows;
- cleaned the wooden boards of dust and debris.
- I am waterproofing the surface. To do this, the film is simply attached to a wooden surface using a construction stapler. You need to start work from the bottom of the pediment, gradually moving upward.
Installing a waterproofing membrane on the gable (photo from another site).
The edges of the films must overlap each other (top to bottom) by a distance of at least 10 cm. After installing the film, it is necessary to glue the joints with adhesive tape to ensure a completely sealed waterproofing coating.
The bottom of the waterproofing membrane should be positioned to cover the wall on which the flashing board will then rest. Then the accumulating condensation will not cause the wall to become wet.
- I am installing a frame made of galvanized profiles. To do this, you will need guides and supporting profiles, as well as “pawns” to secure them at the required distance from the wall. As a result, you should have the design shown in the photo.
External view of the pediment after installing the profiles.
I’ll tell you in more detail how the individual stages of work are performed:
- first, guide profiles are installed along the roof overhang and the lower part of the gable, which will serve as support for the load-bearing ones;
- the distance from the wall to the frame should be about 3 cm to create a ventilation gap to remove moisture;
- profiles must be placed so that they are positioned strictly vertically (for alignment, you can use a plumb line attached to the upper profile);
- load-bearing profiles (CD) are installed vertically (since the siding will be installed horizontally) and mounted in guides;
- To hold wall profiles at a given distance from the wall, U-shaped fasteners are used.
A few words about the window. In my case, it will be protected by roller shutters and decorated with metal shimmers.
Therefore, I installed embedded elements along the borders of the window block. Their role was played by guide profiles, inside of which I inserted wooden blocks for strength. This part is marked with an arrow in the photo.
Embedded part for fastening the roller shutter guide.
- I install the drip plate. I bought a ready-made metal part, which I secured to galvanized profiles using self-tapping screws and washers. There is such a moment here. The length of the pediment is such that it was not possible to make one ebb. Therefore, I used two parts, which I overlapped each other (at a distance of 10 cm) and secured with fasteners. The result is the design shown in the photograph.
The junction of two parts of the casting strip.
I also attached the lower part of the metal part to the wall with a self-tapping screw so that the wind would not damage the structure.
- I install metal slopes on the window opening. In my case, this was quite easy to do. You just need to screw the finished parts to the embedded profiles. To prevent water from leaking under the siding, at the joints (marked with an arrow in the photo), the profiles need to be bent one on top of the other, and not just cut.
Installation of window profiles around the window.
In my case, the upper part of the window slope was made wider so that there was enough space to install the protective roller shutter box. If moisture gets behind it, it will simply flow down and will not cause the enclosing surface of the gable to become wet.
- I am installing roller shutters on a window opening. To do this, you need to fix the box at the top of the window and screw two guides on the sides. This issue is covered in detail in the article on roller shutters for windows. After installing it, you need to attach a G-profile for vinyl siding around the guides on the window slopes. This can be done using self-tapping screws with press washers. The result will be the design shown in the illustration below.
Roller shutters on the window opening.
- I'm installing the starting strip for the siding. It is fixed above the drip strip at a distance of 10 mm from it in such a way that it is easier to install the siding (it will not rest against the ebb).
Attaching vinyl siding starter strip.
You need to fasten the plank to the profile with self-tapping screws in such a way that it “walks” a little. This gap serves to compensate for the thermal expansion of the plastic. If this is not done, the finish may warp from heat.
- I'm installing all the other siding hardware. Here you need to act based on the conditions at your site. Fastening is done in the same way as in the case of the starting bar. I will not give a specific set of fittings, but I will post here a small diagram that gives an idea of the existing additional elements for the described exterior decoration.
Planks for installing vinyl siding.
- I cover the frame with siding. To do this, you need to install the first strip in the guides formed by the fittings, and then secure it through special holes to the profile. Incorrect and correct installation methods are shown in the photo.
Scheme for attaching vinyl siding slats.
All subsequent siding strips are inserted into the previous ones and secured in the same way. The exception is the very top bar, which cannot be tightened. I used plastic glue to put it in place. It turned out like this:
Siding strip installed with glue.
How to cover the front of a house
The word pediment comes from the Latin frontis, which means the front of the wall, the forehead. In modern construction terminology, a pediment is understood as a facade space enclosed between the roof slopes and limited from below by a cornice.
The purpose of the building is as follows:
- protection of the attic space (attic, attic) from precipitation, moisture and wind;
- forming a support for the roof along with other load-bearing structures;
- maintaining heat inside the house;
- improving the appearance of the building.
There are various geometric shapes of pediments.
- The keeled pediment has the shape of a convex triangle, similar to the inverted keel of a sea vessel. It was often practiced by architects who built Orthodox churches to decorate gates, prayer cells, and belfries. Traditional decoration consists of wood patterns.
- The bow pediment, as the name suggests, has the shape of an archer's bow. It is finished with plaster and decorated with artistic stone stucco.
- An interrupted pediment is the space between the roof slopes, not limited by the cornice. If the interrupted pediment is located on two supporting points (such as columns), it is called a semi-pediment. Facing is carried out mainly with sand-cement coating, marble or ceramic tiles and other similar materials.
- A semicircular pediment is half (or a segment) of a regular circle. Accompanying the domed roof. Exterior finishing can be done with any materials, but taking into account the specific shape of the building (for example, installing lining will involve the difficulty of using standard skirting boards).
- A loose pediment is characterized by elements protruding from the wall. They are called braces. The coating of these elements consists of sand-cement plaster.
- A torn pediment looks like a triangle, the top corner of which is torn. Inside the gap there is a place for stucco molding or other decoration elements - sculptures, vases, bowls, etc.
- A stepped gable looks like steps going up. Traditionally used in the construction of Gothic religious buildings. These forms are characterized by stone finishing. In the modern version - glass.
- The male gable is an extension of the log (or lumber) wall, tapering upward according to the shape of the roof. It is used to this day in Russian northern architecture. It has a triangular or trapezoidal shape. It is made of the same material as the load-bearing wall and is its continuation.
- The triangular pediment has the shape of an equilateral triangle. One of the most common types of pediment. A variety of materials are used for finishing, ranging from vinyl siding to “wet facade”.
- A trapezoidal pediment is an isosceles trapezoid. The horizontal edges are cornices that extend beyond the gable. The cladding can be very diverse.
There are internal and external finishing of the pediment. The first is intended for insulation and interior decoration of an attic or attic space. The second is carried out outside the house and serves as protection from unfavorable climatic factors.
What it is?
The pediment (from other Greek: Front - forehead) is a natural continuation of the end wall of the building. It is located above the cornice, which coincides in level with the ceiling between the top floor and the attic. Usually this is a plane limited by the roof slopes. More often they are simple triangular or polygonal broken in shape, sometimes semicircular or bow-shaped (reminiscent of the bend of a stretched bow). There are also other configurations, for example, in the form of a trapezoid.
The pediment is a natural continuation of the end wall of the building
Since the ancient times of Ancient Greece and Rome, the pediment began to be used as an additional independent architectural element decorating the building. In this capacity, it was widely used in palace and temple buildings, small architectural forms - rotundas, triumphal arches, etc. Coats of arms, wreaths, emblems, cornucopias, allegorical figures of Muses or Geniuses of glory were placed in its field.
Cheap sheathing materials
The desire to save on house cladding is quite understandable and logical. The total cost of the work depends on the cost of the material and may well be reduced. Cheap materials for cladding do not mean bad or low-quality. Their advantages are ease of installation, availability of finishing, easy restoration in case of damage, and the possibility of replacement in the future. The final outer skin of this element can be made from a variety of materials other than wall coverings. There are private houses where the gables are decorated with glass - thanks to this, the attic becomes light and looks spacious.
Question “How can the pediment of a private house be finished?” Domestic producers decide. Local materials are cheaper, since there is no need to spend money on their transportation and customs clearance. You can cover the gable of a house with external coverings such as lining or siding yourself. At the same time, it can be distinguished by a coating of a different material or a different color - after all, it is this part that is responsible for the external attractiveness of the structure.
Siding
One of the most popular and long-used methods is siding. This is an economical, simple, stylish and quick way to decorate. The best siding composition is vinyl. This is a durable and environmentally friendly material. The only thing that can ruin it is severe mechanical damage, but such risks are not typical for private houses, since cutting down a wall with an ax is a pointless exercise.
Vinyl siding is not subject to rust, it does not burn and does not deteriorate from wind, sun and rain. The gable cladding is made in several layers; a layer of air remains between the wall and the covering, which helps to avoid humidity and retain heat in the house. The shape of the siding panels helps create such an air layer. Another plus when deciding on the question of “how to sheathe the roof gable” in favor of siding is its lightness, it practically does not weigh down the structure.
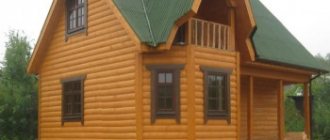
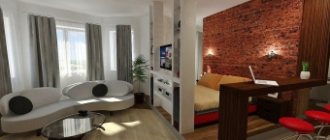
Cladding
One of the oldest techniques for creating a beautiful pediment is clapboard paneling. There is no doubt about how to sew up the pediment of a wooden house. Lining is the same wood from which many private buildings are built; it is more than appropriate in such a situation. It is perfect for those who do not know how to cover the gable above the terrace, or decorate the walls of an extension or porch.
The lining is painted after covering the house, this allows you to update your beautiful pediment at any time, even every spring. The painting process is very simple, does not require special skills and allows you to use a large selection of modern paints, including those with fire-retardant coating characteristics. At the same time, siding solves the question of “how to cover the gable of a house from the inside.” Indoors, such a covering on one of the walls helps to create an atmosphere of comfort, warmth and organically complete the design of a room with a sloping roof.
Sheathing with corrugated sheets
A convenient solution to the question “how to sew up the roof gable” is offered by corrugated sheeting. This coating will help to make them in one color - an excellent option for covering over a garage, furnace or technical room. On the other hand, the pediment above the facade, covered with a single panel without seams, also looks attractive.
Large-format finishing materials, which include corrugated sheets, are quickly gaining popularity. When deciding how to cover the gable of an attic roof, choose corrugated sheeting, since you can cover the entire area with just one sheet. The advantage of this method is that the number of joints and fastening points, and therefore the places for moisture penetration and corrosion formation, is significantly reduced.
Conclusion
Modern technologies for the construction and finishing of private houses have become convenient, economical and accessible for independent use. There are so many options that everyone will choose the right one according to their taste and wallet. Sheathing the roof gables is done in one day and is quite feasible even for a novice builder.
Siding, clapboard or corrugated sheeting - how to cover the roof gable depends on the size of the house, the material from which it is built, and your artistic taste. The financial side of the issue will not affect the choice, since all these methods are very economical.
Foam block pediment: how to lay it out yourself – Beton Stroy
28.06.2019
March 20, 2021, Vasya
Our neighbors were building a house of this type - they laid it out in blocks, the pediment was also in blocks, they began to install the rafter system, and that day the wind was very strong. The pediment could not bear such pressure and fell, so I advise you to monitor the weather forecast. I also recommend nailing the strips for rigidity.
Alternatively, you can foam while installing the first rafters for better stability. You will have to fasten the entire system through the Mauerlat, and it, in turn, is fastened with anchors. Regarding the armored belt, I’m not entirely sure whether it is needed, since I haven’t even seen it. The neighbor didn’t even have extra fittings.
Either the reinforcement was carried out only along the foundation, or the pediment was reinforced when I was not there.
To be honest, I’m more accustomed to seeing a wooden pediment, but many people prefer a block one - the only question here is the price, since both will have enough strength, they just achieve it in different ways.
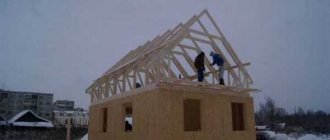
The pediment is usually called the end part of the roof located between the slopes. I will not say that making a pediment with your own hands is easy, but believe me, such a task is quite within the capabilities of an ordinary home craftsman.
Without going into architectural subtleties, we will step by step analyze the technology for constructing the gable roof gable for a house made of aerated concrete, plus I will give a simple calculation of this sector of the roof structure.
A three-gable roof at the ends is arranged in the same way as a gable roof.
Installation of sheathing on the gable
The general principle of installing lathing is the same as the rules for installing on walls. If there is a need for external insulation, then a primary sheathing is installed with the direction of the planks being the same as the location of the siding panels.
The plane of the slats is carefully leveled, for which it is convenient to use a stretched cord between the outermost slats installed first. The height above the wall surface should not be less than the thickness of the insulation. The pitch of the planks corresponds to the width of the insulation (usually 60 cm).
After installing the insulating material and steam-hydroprotection, the counter-lattice is installed. It will play the role of a supporting system for the siding panels and, at the same time, provide a ventilation gap between the sheathing and wall materials.
The spacing of the planks is most often made about 40 cm for greater strength of fastening of the sheathing.
The material for the sheathing was traditionally wood - smooth, straight bars of the required thickness were used. This option is not the most successful, since the wood is subject to warping, swelling and other changes in structure, which negatively affects the condition of the cladding as a whole.
Recently, metal guides for gypsum boards have become the main material for lathing; they are free from all the disadvantages of wooden bars, allow precise adjustment of the plane, and are not subject to corrosion due to the galvanized layer.
Considering the minimal difference in price, the choice of metal strips is completely justified and rational.
Options for installing gables
The pediment is the upper part of the wall of a building, bounded below by the ceiling, and above by the planes of one of the pitched structures. These are inevitable companions to the construction of a gable, sloping, single-pitched or Danish hipped roof.
They are constructed in a strictly vertical direction, most often have a triangular or trapezoidal shape, less often round or polygonal.
The gable walls limit the ends of a non-residential attic or attic space equipped for housing. Depending on the conditions of planned operation, they may be insulated or not. Thermal insulation is laid between the gable posts of cold roofs or placed between the sheathing bars of heated attics.
In general, according to house-building terminology, gables are considered to be the triangular tops of load-bearing walls made of stone, foam concrete or brick. Similar elements made of wood are called gables, which is why roofs are called “gable roofs.”
However, in low-rise construction, both of these categories are unofficially combined into the class of pediments. Similar materials are used in their arrangement, although there are differences in construction technologies.
Based on technological characteristics, methods for installing pediments can be divided into two groups:
- Covering the posts of a gable wall built according to the frame principle. The easiest to implement and budget method, accessible to an inexperienced performer. It is actively in demand in private construction as the most acceptable option for constructing a light, practical roof.
- Sheathing of a solid pediment wall, erected during the construction of a house made of brick, foam blocks, timber, logs. A method that requires at least basic carpenter or mason skills. It is mainly used during building reconstruction and repair work. It is sometimes used to improve the status of a house built from inexpensive building materials.
In the field of cladding the gables of a house, there are a lot of different materials. These include sheets of moisture-resistant plywood and drywall with subsequent painting, polymer finishing panels, corrugated sheets and even opaque polycarbonate.
However, the list is confidently headed by the good old board and vinyl siding, which is displacing lumber from the market with enviable persistence.
Insulation of the upper part of the facade wall
All wooden supporting structures of a home being built by yourself must be impregnated with specialized varnishes or antiseptics. Then the façade is insulated with mineral wool or polystyrene foam.
When using cotton wool, a waterproofing film is laid on the outside of the sheathing, and the sheets themselves are secured on the inside of the building.
Insulation of the facade with polystyrene foam can be carried out both from the outside of the building and from the inside, with careful sealing of the seams with polyurethane foam.
A special mesh is fixed on top and the surface is plastered with putty with the addition of antibacterial agents.
Installing siding on the gable
Before cutting and installing vinyl panels, frame the dormer windows and doors, if any, are arranged. First, waterproofing is installed in the openings in the form of tin, aluminum or bitumen flexible aprons.
The thickness of the gable wall determines the method of arranging the openings:
- Window and door blocks of cold roofs are designed using special platbands or J-profiles.
- The openings of insulated roofs are framed by window profiles intended for cladding slopes.
After arranging the openings, they begin to make the templates required for cutting the siding according to the size and shape of the pediment.
Preparation of fastening profiles
Template marking is done manually. To work, you will need two random cuts of the J-profile. The first is applied along the ceiling line, the second is placed under the overhang. He will cut off a line on the first trim that follows the slope of the slope. It is outlined with a pencil, then the excess is cut off according to the markings.
The left part of the J-profile is marked. The bottom is marked and trimmed using an inverted template. The cut profile is applied to the installation site in order to mark the next cutting line in the area of the ridge. To clearly mark it, use a plumb line, because it must be perpendicular to the ceiling.
The right part is then made using the template turned back over. On the right profile, only the nail strip is cut off; the front part does not need to be touched. When installing two profiles in their designated place, the fixation is carried out according to the rules for fastening vertical parts. The attachment points are installed flush with the top edge of the hole.
The uncut upper part of the right profile is inserted into the channel of the left profile to form a closed unit. Before installation into the profiles fixed around the perimeter, the panels are trimmed according to the fact.
The function of the J-profile when covering gables can be performed extremely successfully by corner connecting analogues. This option is much more practical if at the same time it is planned to cover the gable overhangs. The corner profile allows you to attach elements on both sides: it is incredibly convenient to work and the result is beautiful.
Installation of panels: horizontal and vertical
To correctly install vinyl sheathing horizontally, you should again stock up on templates made using the method described above. Using two pieces of siding, you need to determine and mark the slope line of the slope.
For each side of the roof, templates are made separately, because there is always some difference even with ideal construction. To arrange the gable of a sloping roof, you will have to make four templates.
Templates are used for cutting regular siding. When cutting panels, be sure to observe the temperature offset from the actual edge of the pediment. At the panel located at the very top, you need to cut off the nail strip completely and drill a hole at the top for through fastening with a self-tapping screw.
The point for drilling is determined empirically during application to the installation site. In any case, the hole cannot be drilled close to the cut edges of the panel. It is necessary to retreat from the edge at least 3 cm.
It’s worth tinkering with vertical siding installation if you want to achieve a perfect result. You will need to be patient and use the next templates.
Algorithm for vertical installation of vinyl sheathing:
- Corner or J-profiles are installed along the perimeter of the pediment.
- A plumb line is released from the top of the roof, according to which the central axis must be outlined.
- Along the drawn line, either two J-profiles are installed, facing each other, or one H-profile. The latter option is better because it does not have a leaky joint.
Installation of panels cut according to templates made according to actual data begins exclusively from the corner, if the central axis was equipped with paired J-profiles. When using an H-profile in the center of the gable, vinyl panels can be installed both from the corner and from the center.
The process of sealing the gable of a cold roof with an unedged board:
Technological nuances of covering gables with siding:
The final stages of facing the gable with siding:
We presented proven options with a detailed analysis of how and how best to sew up the gables. The information we offer will help you choose the best method and implement your idea yourself.
Types of overhangs
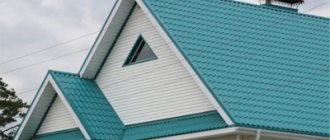
There are two types of overhangs in roof construction: cornice and pediment. The first is located at the bottom of the roof and plays an important role in providing ventilation. The overhang on the facade is located at an angle and is the end of the slope. It is usually formed from lathing. This option is used for light coverage:
- metal tiles;
- soft roof;
- euroroofing felt.
The protruding sheathing is hemmed at the bottom, and the end is covered with a metal profile.
Another design can be used when the gable overhang is made with a rafter beam. The extension of the outer rafter pair determines its depth. Supporting elements such as a mauerlat, ridge beam, and intermediate posts are also placed outside the pediment. The reliable design does not limit the length of the overhang and is suitable for any roofing covering, such as ceramic tiles and slate. For a roof with low weight, the rafter leg is replaced with a cornice board; with the help of crossbars it is connected to the rafter system and the eaves overhang.
How to calculate the area correctly
Two important parameters of the pediment are the width of the base and the height of the pediment at the ridge point. Knowing these parameters, it is easy to calculate the area of the pediment using simple formulas from a school geometry course. In addition, such calculations help determine the required amount of building materials.
The height of the roof at the ridge point depends on several parameters: the purpose of the attic space, the design features of the rafter system, the planned angle of inclination of the slopes. Here's how the purpose of the attic affects the height of the gable:
- For an unused attic (it is constructed only to protect living quarters from snow, precipitation and heat loss through the roof), a height of 80 cm is considered sufficient.
- If the attic is not planned to be used for living, but the possibility of placing some equipment in the attic (or simply storing things) is included in the project, the height of the ridge should reach 1 m 20 cm. It will be uncomfortable to be in such a room for a long time, but for temporary storage of things it will do.
- In a full-fledged residential attic, the height of the ridge should be at least 1.5 m (preferably 2 m or more). In a residential attic, it is necessary to make high-quality hydro- and thermal insulation of all partitions, build windows and ventilation vents.
The width of the gable base is determined by the overall width of the building. Area calculations are done using geometric formulas or specialized programs - calculators. For example, for a pediment in the shape of an isosceles triangle, the area is obtained by multiplying the height of the roof by half the width of the base. For example, if the width of the wall is 4 m 20 cm and the height of the roof is 2 m, the area is determined as follows: (4.2 m/2) x 2 m = 4.2 sq.m.
The height of the pediment significantly affects the appearance of the building. For example, if the height of the gable is noticeably greater than the main height of the walls, the roof will look heavy and heavy. And too low the height of the pediment gives the building a squat appearance.
Installing siding on the gable
Before cutting and installing vinyl panels, frame the dormer windows and doors, if any, are arranged. First, waterproofing is installed in the openings in the form of tin, aluminum or bitumen flexible aprons.
The thickness of the gable wall determines the method of arranging the openings:
- Window and door blocks of cold roofs are designed using special platbands or J-profiles.
- The openings of insulated roofs are framed by window profiles intended for cladding slopes.
After arranging the openings, they begin to make the templates required for cutting the siding according to the size and shape of the pediment.
Preparation of fastening profiles
Template marking is done manually. To work, you will need two random cuts of the J-profile. The first is applied along the ceiling line, the second is placed under the overhang. He will cut off a line on the first trim that follows the slope of the slope. It is outlined with a pencil, then the excess is cut off according to the markings.
The left part of the J-profile is marked. The bottom is marked and trimmed using an inverted template. The cut profile is applied to the installation site in order to mark the next cutting line in the area of the ridge. To clearly mark it, use a plumb line, because it must be perpendicular to the ceiling.
The right part is then made using the template turned back over. On the right profile, only the nail strip is cut off; the front part does not need to be touched. When installing two profiles in their designated place, the fixation is carried out according to the rules for fastening vertical parts. The attachment points are installed flush with the top edge of the hole.
The uncut upper part of the right profile is inserted into the channel of the left profile to form a closed unit. Before installation into the profiles fixed around the perimeter, the panels are trimmed according to the fact.
The function of the J-profile when covering gables can be performed extremely successfully by corner connecting analogues. This option is much more practical if at the same time it is planned to cover the gable overhangs. The corner profile allows you to attach elements on both sides: it is incredibly convenient to work and the result is beautiful.
Installation of panels: horizontal and vertical
To correctly install vinyl sheathing horizontally, you should again stock up on templates made using the method described above. Using two pieces of siding, you need to determine and mark the slope line of the slope.
For each side of the roof, templates are made separately, because there is always some difference even with ideal construction. To arrange the gable of a sloping roof, you will have to make four templates.
Templates are used for cutting regular siding. When cutting panels, be sure to observe the temperature offset from the actual edge of the pediment. At the panel located at the very top, you need to cut off the nail strip completely and drill a hole at the top for through fastening with a self-tapping screw.
The point for drilling is determined empirically during application to the installation site. In any case, the hole cannot be drilled close to the cut edges of the panel. It is necessary to retreat from the edge at least 3 cm.
It’s worth tinkering with vertical siding installation if you want to achieve a perfect result. You will need to be patient and use the next templates.
Algorithm for vertical installation of vinyl sheathing:
- Corner or J-profiles are installed along the perimeter of the pediment.
- A plumb line is released from the top of the roof, according to which the central axis must be outlined.
- Along the drawn line, either two J-profiles are installed, facing each other, or one H-profile. The latter option is better because it does not have a leaky joint.
Installation of panels cut according to templates made according to actual data begins exclusively from the corner, if the central axis was equipped with paired J-profiles. When using an H-profile in the center of the gable, vinyl panels can be installed both from the corner and from the center.
Main types of pediments
Back in ancient times, ancient architects erected the first pediments, which had an unusual intricate shape and were decorated with statues of ancient heroes. In the process of development of modern construction, the roof gable began to acquire strict geometric shapes - triangle, trapezoid, etc. At the same time, today the following types can be distinguished:
- one of the most common is the triangular pediment with equal sides;
- second place can rightfully be awarded to the trapezoidal design;
- Stepped gables are also popular, which are built in the shape of a step;
- not so long ago one could find a keel-shaped roof pediment, which really very much resembles a ship’s keel, only overturned as in the photo;
- the torn shape is a very interesting decorative solution. Such a pediment does not reach the end of the roof canopy, and a plaster sculpture or flower pot is installed in the resulting space;
- The semicircular pediment looks very original;
- bow designs - in their shape, as you can see in the photo, they also resemble a semicircle of a stretched bow string.
Naturally, this is not a complete list of designs for the end side of the attic. At the same time, I would like to note that not even all of the above forms of pediments are actively used in construction. However, judging by the variety of options, such finishing of the end parts of the roof facade indicates its popularity in the construction of private houses and not only the external component of the roof, but also its reliability depends on which type is chosen.
conclusions
As you can see, every home craftsman can build a high-quality pediment, provided that the instructions are followed. Professional assistance will be required when performing the end part of the roof from logs and beams. If all installation conditions are met, you can build a high-quality and durable structure.
Recommended Posts
Finishing the walls and corners of the house outside.
Facade plaster lamb
Exterior decoration of a country house
Options for facade finishing of the house
House finishing boards
Advantages and disadvantages
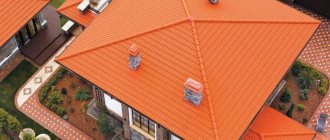
In construction, steel sheets that have a corrugated shape after processing on a profiling machine are especially in demand. This processing not only gives the material an original appearance. Corrugations also significantly increase the resistance parameters of a building structure to mechanical loads.
With an increase in the thickness of the steel sheet and the height of the profile, the rigidity increases, which expands the scope of use of the material. Corrugated sheets, due to their low weight, can reduce the load on the “skeleton” of the building in conjunction with all elements of its structure, including the foundation.
Like any other construction and finishing material, corrugated sheets have their pros and cons. Let's look at the benefits first.
- Economical. The design features of the material allow it to be used economically, leaving virtually no waste during the installation process.
- Relatively low cost in comparison with other equally popular building materials. In addition, it is worth considering the minimum costs for delivery, unloading and lifting of material during the installation process.
- The corrugated sheet is easy to install. If trimming is necessary, use a regular hacksaw. In case of replacement, the metal sheets can be easily dismantled.
- The material is used for cladding the facade and roofs of buildings of any type.
- Available in a wide range of colors, textures and profile shapes.
- The high strength of corrugated sheets significantly increases the safety of the building during operation.
- Profiled steel sheets are designed for many years of service, which is calculated from 30 to 50 years.
Despite the effectiveness of cladding the gables crowning the facade of the building with corrugated sheets, this material also has some disadvantages.
- Thermal conductivity properties of metal sheet. Under the influence of the environment, the properties of metal sheets do not change, but the walls require insulation to be laid under the facing material.
- Under the influence of rain and wind, vibrating thin sheets of corrugated sheets can make unpleasant sounds.
Correct technology for laying soft tiles
The material has several names, the most common of which are soft roofing and bitumen shingles. In its appearance it resembles an analogue of ceramic material, but in its technical characteristics it is closest to roll roofing.
Flexible tiles are made from cellulose or fiberglass and have several layers. The topmost one is a mineral layer that protects the material from external factors. Underneath there are two layers of bitumen, between which, in fact, there is fiberglass as a base. If this is a self-adhesive flexible roof, then the lowest layer is an adhesive surface protected by a silicone film. The front side of soft tiles imitates ceramics using special patterns.
Bituminous roofing material has many advantages:
- Flexible tiles are lightweight, which means there is no significant load on the roof structure. One square meter of it will weigh only about 8 kg;
- Affordable cost of material and installation compared to other tile analogues made of ceramic or metal;
- A soft roof withstands ultraviolet radiation and neutralizes the noise of rain and other precipitation;
- The material does not collapse due to sudden changes in temperature and does not absorb moisture;
- The service life of soft tiles is about 30 years, although in fact, it often exceeds this;
- If damaged, it is easy to repair;
- Flexible material can be used on structures of any configuration whose slope exceeds 12 degrees. Do-it-yourself installation is quite simple.
Compared to so many positive qualities, bitumen-based shingles have only three disadvantages.
- For installation you will need a reinforced sheathing device;
- Laying flexible tiles cannot be carried out at sub-zero temperatures;
- Even if the damage to the surface of a shingle roof is minor, a fairly large area will have to be replaced.
Types of roofing materials include laminated tiles and metal-coated materials. The first option is made in the form of a multilayer coating, as a result of which such material is stronger than a conventional bitumen roof. The second option is represented by a soft roof, the top layer of which is covered with aluminum, zinc or copper foil, and not with mineral chips.
Cutting out the sheathing elements
Having fitted the first sheathing element made of painted tongue-and-groove boards into place, we tightly joined the blank for the next element to it. Using the beveled end of the finished element as a base surface, the markings were transferred using a ruler, first to one edge of the workpiece, then to the other. A guide bar for the circular saw was attached along the marking line applied to the workpiece. The correct installation of the tire was additionally controlled by a tuned small scale.
The edges of the workpiece were filed with a circular saw to make the cut even and smooth. In addition, on the working edge of the guide bar there is an anti-splinter clamp made of elastic plastic, thanks to which no unnecessary processing marks remain on the front side. All cladding elements were manufactured using this technology, starting from the second. It turned out pretty quickly.
Reference by topic: Structures, types and construction of roofing
Base for flexible tiles
Despite the fact that soft roofing can be laid on almost any roof, the requirements for the base for installation are quite stringent.
The base must be even and smooth, otherwise the soft material may take on an irregular shape, which will significantly spoil the appearance of the roof. An individual sheathing should be made, because roofing structures made from other materials are incompatible with bitumen shingles.
The technology for laying flexible tiles requires laying plywood with moisture-resistant properties or OSB boards on top of the sheathing structure.
To further protect the roof from possible water leaks, an underlayment carpet is used along with a flexible roof. But it doesn’t make sense to use it on all types of roofs. Typically, underlayment is installed on pitched structures with a slight slope. It is laid on top of the plywood, starting from the bottom point of the roof with a slope, overlapping. Therefore, the liner strip at the very top overlaps the carpet underneath, preventing leakage.
To install the lining yourself, the surface of the base must be lubricated with bitumen mastic, and then, after installation, heated with a gas burner so that the coating becomes solid.