How to make a weather vane
The main task of a weather vane is to indicate the direction of the wind. Making a metal structure yourself is quite difficult and few people can do it. Let’s focus on simple options, when materials available to everyone are useful for making a windsock - paper or cardboard, plastic dishes, wood. Information on how to make a weather vane in the shape of a pinwheel will help you involve your own child in the exciting process.
Varieties of weathervane design
Wind catcher designs can be divided into several subtypes, each of which has its own purpose:
Meteorological
This is a device with minimal decorativeness and maximum sensitivity to wind direction. This is usually a simple checkbox.
Meteorologists use a special cap-shaped design made of thin fabric
Weathervane Wilda
An even more complex design, additionally equipped with a thin flexible plate that bends under the pressure of the air mass.
The greater the angle of inclination of the plate, the stronger the wind
Chimney weather vane
This is a design that protects the open chimney opening from the wind. It reacts sensitively to gusts and covers the pipe from excess air flow.
Example of a chimney weather vane
Weather vane with propeller
This is a design that can serve as a wind generator and bird scarer.
The weather vane, directing the propeller perpendicular to the air flow, ensures its rotation
Decorative weather vane
It is more of a decoration than a functional item.
Often decorative weather vanes are completely rigidly fixed to the roof and do not rotate in the wind.
DIY paper pinwheel for children: step-by-step master class
Necessary materials:
- Thick square paper (we use scrapbooking paper)
- Scissors
- Pencil with eraser at the end
- Ruler
- Simple pencil
- Pin with cap
Scrapbooking paper has two sides: colored and white. It is on the white one that we will do all the markings. Let's draw two diagonal lines using a simple pencil.
Next, you need to make marks at a distance of 3 cm from the center along all 4 lines.
We will rely on these marks when we cut our future paper pinwheel.
We take scissors in our hands and make 4 cuts strictly along the lines, without going beyond the pre-made marks. Each of the 4 resulting elements can be slightly bent
All that remains is to assemble our wind from paper using a thin sewing pin. We outline the center of the future toy from the front side.
Do three
Making a windmill rocker arm - the part to which the wind wheel and tail blade are attached. The tail blade is necessary to direct the wheel into the wind. We are looking for a block with a side section of 1.5-3 cm and a length of 35-65 cm. A scrap from a board or a piece of a wooden stick from a mop will do. On one side of the block it is necessary to make a cut to secure the disk.
Making a cut
Dangerous way
Drilling a hole
You can use a metal saw or a normal hacksaw. You can saw by holding the workpiece in a vice or using a more dangerous method. It turned out great! The other end of the rocker arm should have an even cut. Drill a hole with a thin drill (2-2.5mm) in the center of the cut. This hole will make it easier to attach the wheel and reduce the chances of a crack in the workpiece along the mounting screw. It is useful to cut the edges around the hole at an angle to prevent the wheel from possibly touching the rocker arm. Is the workpiece ready? Let's move on.
Round fan
The classic “four-blade” mini-vane is easy to make. However, there is a more complex option, when the material for the weather vane is folded like an accordion. For the fan you will need:
- thick paper (but not cardboard),
- glue gun,
- scissors,
- carnation with a decorative cap,
- hammer,
- stick.
Several of these fans of different colors and sizes look especially beautiful at once, so you can color the finished products by adding decor, for example, in the form of sparkles:
- Bend 4 rectangles into an accordion along the long side.
- Bend the accordions in half.
- Glue the edges together so that each accordion becomes a quarter of a circle.
- Glue the quarters together to make a circle.
- Insert a nail into the center of the circle and nail it to what will hold the “fan”.
It is important that the head of the nail is larger than the hole that will remain in the middle of the circle. The nail must not be nailed all the way so that the fan can spin. A do-it-yourself paper pinwheel is ready; you can use it to decorate the fence of a suburban area or the interior of a house.
Do two
To reflect light you need a mirror surface. The cheapest surface CD, DVD discs. Of course, you don’t have to run to the store to get them. If anyone has problems purchasing discs, go to the forums. Experience in operating wind turbines forced us to find alternative sources of mirror surfaces - pancakes from hard drives. How to extract them is a separate topic. So we have
and you need to fix them on the wheel. Again about safety precautions. If you don’t have experience, we buy disposable gloves. We put on gloves and, without putting much effort (you don’t need to be pumped up with steroids for this), slightly rocking the disk, insert it into the cut. This must be done carefully, without bending the disk. Did it work? Is the disk cracked? Throw it away. Next. Let’s assemble the wind wheel - the turbine and Let's take it apart a couple of times. Do you have the skill? We disassemble the wheel. Now we need to firmly install the blades.
Hot melt adhesive
Molecular glue
Glue moment
We will do this with glue. Experience has shown that Moment glue in all modifications, instant second adhesives, rubber glue and hot-melt adhesive do not provide reliable fastening of the blade to the wheel, and molecular glue also damages the disc creating a zone of fragility at the fastening boundary. The record for the survivability of wind wheels was shown by the method of fastening using epoxy resin. We accept this glue as the most reliable.
Disc is inserted
Apply the edge of the disc
Epoxy adhesive
It is better to glue in air. Cover the work surface with newspaper or magazine. The fumes from the glue won't lead to insanity, but they won't add health either, they will only take away. According to the instructions, we dilute the glue components. Spread the edge of the disc at the point of contact with the wheel. You should not apply a lot of glue; the contact is tight and excess glue will drip onto your hands and clothes. Be careful not to get glue on the bearings. Insert the coated edge of the disc into the cut. Try to keep the center of the disk in the plane of symmetry of the wheel. We do the same with other blades. Carefully apply glue to all the voids from the cuts. Alternating the mirror side and the non-mirror side will increase the chances of the device operating when the windmill is unfavorably positioned relative to the sun, that is, the sun will be reflected when the turbine is illuminated both from the front and from the back. In the end it should work
.
Glued wind wheel
Five-bladed wheel
Two-bladed wheel
Three-bladed wheel
We place the turbine on the table and carefully adjust the blades. The wheel should be parallel to the surface of the table and all blades should touch the surface. It turned out great. If it doesn’t work, don’t care, it will still spin, albeit with vibrations. Place the wind wheel in a safe place to dry. Carefully! Excess glue may drip from the wheel. The drying time of the glue depends on the temperature. My glue only hardened on the second day. On that hot summer day it was +14°. The photographs show photographs of wheels with a different number of blades. I managed to glue an eight-bladed wheel.
Holidays in the Bosporus Kingdom. Guide to Crimea
Every summer, my children and I have lessons not at a desk, but outdoors :) Biology, botany, geology, geography, literature, art history, ethnography... When traveling, a child encounters all this in real life, not in theory.
During these holidays, Katya's main focus was ancient history. After all, we went to the sea on vacation and dived into the history of the Bosporan kingdom. We just drove from Simferopol to Kerch (two and a half hours on the road) - and then...
You don’t have to go far from the beach - the ruins of ancient cities are right here. And there are museums here. We spent more time in them than on the beach :)
And here in every ruin
geocaching caches
. You remember that we play this game with geopositioning and treasures on the map? So they played here, and how!
7 cities of the Bosporan kingdom were successfully “taken”. Panticapaeum, Tiritaka, Nymphaeum, Myrmekios, Artesianus, Gorgippia, Hermonassa. Next, see the map I drew. And about each ancient settlement in more detail: what kind of city it is, what to see and what was there before. This will be a post as part of my stories “Guide to Crimea” - see the rest at the link!
Do it once
We mark the wheel to make slots for the blades. For complex markings, I attach stencil files (
,
,).
Making a cut in the wheel
Wheel in a vice
Marking a wheel for four blades
We make marks on the wheel, for example, with a ballpoint pen. If this is your first windmill, then it is better to start with two or four blades. So, we marked it out. Wheel designs are different, if there are removable bearing linings, then we dismantle them and put them in a safe place. Then it is better to adhere to the given technology; for this you will need a vice and a hacksaw. If you suggest another reasonable way to make cuts, I will publish it. We clamp the wheel in a vice, it is better to clamp it so that rubber sawdust does not fall on the bearings. In the photo, sawdust gets on the bearing! It is not right! We select the angle of inclination of the hacksaw blade (30-45°) and begin sawing from the top point of the wheel. We saw slowly and carefully with a metal saw. If you are in a hurry, you may end up with broken hacksaw blades. We cut to a depth of half to two-thirds of the thickness of the rubber, in my case to the steel pads.
The cut is done
Result of work Marking the wheel
Having made the first cut, we re-clamp the wheel in a vice and make a second cut, and so on. The result should be something like this. If you are left-handed, you can saw with your left hand in a different direction.
Paper pinwheel with eight blades
If you want your child to be especially popular on the playground, then you can make him a paper pinwheel with 8 blades. It will look especially impressive if you use two multiples of different colors.
We create a sketch of our toy using a regular notebook piece of paper.
We transfer our sketch to each of the prepared squares, cutting along the lines with scissors.
Now you need to combine the two sheets so that the grooves of one sheet fit into the grooves of the other sheet.
All that remains is to assemble our paper pinwheel by making holes in each corner and bending them towards the center.
You can fix the structure as in the previous version, using a pencil and a pin, or you can use another method.
For this we will need several beads and thin wire.
We wrap the wire around our stick and fix it. We put on the oval bead, after which we put our blank in place and put in a few more small beads.
All that remains is to bend all the petals onto the wire and secure with the remaining end of the wire.
Types of weather vanes
The popular belief that if you meet a chimney sweep on the street, you will have good luck all day long, is reflected in weather vanes with the outlines of this character. Today, such a meeting is almost impossible, so attract good luck to your home by installing a figurine of a chimney sweep with a windsock on the roof.
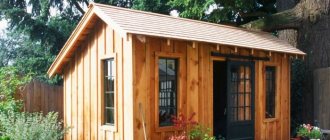
A cottage with numerous turrets and passages can be decorated with a series of weather vanes , which are easy to make with your own hands. Stylized images of figures from the Russian ethnic group will perfectly complement the roofs of buildings made according to folk motifs.
The cat has long been considered the guard of the house and its protector from dark forces. By placing a weather vane in the shape of a mustachioed purr on the roof, you can create an aura of kindness and tranquility around your home.
As a symbol of Heaven and the Sun, the eagle embodies strength and power, speed and greatness. A weather vane installed above the house in the form of this proud bird can indicate the independence of the owner, show his social status and high social position.
A weather vane in the shape of a horse is suitable for purposeful people with an active lifestyle. Those who are guided by prudence and nobility in their lives will be able to express this to others by using this simple and elegant solution.
A griffin installed on the roof may indicate its owner’s internal struggle with light and shadow, and fluctuations between good and evil. In addition, a half-lion-half-eagle figurine can speak of the strength, warlikeness and vigilance of the owner, as well as protect the house from evil forces.
A weather vane in the shape of an ancient Russian boat will be in harmony with a large house with many windows, doors and stairs. By establishing such a figure, the owner of the household will be able to tell others about his remarkable mental abilities and desire for new knowledge.
Traditionally, an owl is a symbol of wisdom and patience, so a person who decides to install such a weather vane should think about how much his self-awareness corresponds to the chosen image. And even if everything turns out to be very difficult in this regard, a personal owl on the roof can give an impetus to self-improvement.
Religious motifs are not found on weather vanes very often, therefore, when deciding to make a weather vane based on the Bible or the Koran with your own hands, think about what you want to convey to others with such a decision. As a last resort, choose some heroic figure, for example, St. George the Victorious slaying the serpent.
A ship flying across the sky with full sails - what could be more beautiful and romantic? Having decided to make such a weather vane with your own hands, you must remember the complexity of such work and the need for accurate calculations.
Remembering old fairy tales, you can find that, despite the negative image, Baba Yaga has always been a positive character. Note that this fabulous figure is an excellent solution not only from an aesthetic standpoint, but also from a constructive point of view. The broom with which the witch is depicted is an ideal windsock.
Often the weather vane with Baba Yaga is also decorated with a figurine of the Black Cat - her indispensable companion and adviser. The beauty and originality of such a composition will attract admiring glances not only from children, but also from adults.
Do six
An important stage . Wheel balancing. Due to different weights of the disks (if they are different), inaccurate installation (violation of the symmetry of the cuts, different depths of attachment of the blades), excess glue on any blade, the wheel becomes unbalanced. Imbalance is harmful due to the appearance of vibrations during rotation and the fastening units will suffer from it and strong mechanical noise may appear. If everything is balanced, then turning the wheel to any angle, it will not rotate further.
Windmill wheel
If the wheel, after any rotation, tends to return to its previous position, then the blade located below, after the rotation has calmed down, is heavier relative to the others. We eliminate this by gluing small weights to the edge of the opposite blade or blades. This work requires skill and the presence of a small amount of small metal or other rubbish. Sometimes it is enough to attach a piece of chewing gum to the edge of the blade. In my area it will never slip off the blade, but where it’s hotter, I don’t guarantee anything. The balancing was successful - good. If it doesn’t work out, it doesn’t matter. It will rotate. In strong winds, a broken windmill operates on one blade!
What you will need
Paper weather vane for simple experiments
- Thick paper (such as a folder, cardstock, or Whatman paper)
- Drawing pencil
- Scissors
- Drinking straw
- Paper plate
- Plasticine
- Pencil with eraser for weather vane axis
- Pin
- Glue
- Waterproof marker
- Compass
Weather vane made of cardboard and plasticine
- Cardboard
- Drawing pencil
- Scissors
- Unsharpened pencil for the weather vane axis
- Plasticine
- Empty coffee or soup tin
- Sand or gravel
- Waterproof marker
- Compass
- Scotch
- Pen cap
What is a wind turbine?
Maybe someone doesn't know this. But a windmill is a kind of structure that can convert wind energy into mechanical energy. Plastic turntables are beautiful accessories.
They are not capable of such feats, but their rotation can turn into relaxation energy. After all, sometimes it’s so nice just to look at a beautiful windmill. Its rotating blades soothe and relax. Therefore, every summer cottage is simply obliged to acquire such a windmill.
Working with wood
Paper and plastic are not durable. We will discuss later how to make a weather vane from a more durable material. The information presented will be useful for people who know how to handle wood. For any wind direction design, it is important to meet two conditions: the front end of the boom must be made smaller than the rear part, and the indicator must rotate freely on a vertical axis. To make the process of balancing the weather vane easier, it is better to make the arrow flat. 3D shapes require additional steps to determine the center of gravity. The main stages of producing a weather vane from wood:
- The sketch of the arrow is transferred to a wooden block, its approximate thickness is 5 cm. It is preferable to make the weather vane arrow from a light but durable material, for example, balsa wood.
- The figure is cut out with a saw or jigsaw.
- Rough edges are treated with sandpaper.
- Treating its parts with protective agents will help extend the life of the weather vane. It is better to make the coloring bright so that the structure stands out against the sky. The photo below shows an example of the finished arrow:
- While the pointer is drying, you need to make the base of the weather vane. The wooden block for the body is selected taking into account the weight of the finished arrow; it should be heavier.
- Then the pin is prepared. It can be a metal rod or a wooden rod. Based on its diameter, a hole is prepared in the weather vane body.
- The pin is fixed in the body with glue (if both parts are wooden), as shown in the photo:
- An important step in the manufacture of a weather vane is determining the center of gravity on the indicator. Your own palms will help you do this procedure; this is shown in the following photo:
- At the desired point of the arrow, a hole should be made for the rod; its diameter is similar to the size on the body. After which the arrow is placed on the rod.
At the final stage, after determining the installation location of the weather vane, the cardinal directions are indicated on its body. For accurate readings, use a compass. Letters on the structure can be drawn or ready-made blanks can be glued on. An important step is fixing the windsock. It can be nailed or secured in some other secure way, depending on the material of the surface on which it will be installed.
Do four
secret-mastera.ru
Screeds
Now you need to decide where the device will be installed. This is an important moment to achieve your goal. The sun should fall on the windmill, and it, in turn, should send bunnies into places where there is no sun. It is rational to place the windmill on the north side (if you live in the northern hemisphere). The figure shows an example of windmill placement. So, we decided on the place. It is necessary to find a blank for mounting the windmill. This can be a pole 2-6 meters long if it is intended to be installed on the ground, or the remainder of a mop handle for mounting on a balcony, roof ridge or pole, etc. In my conditions, the windmill was installed on a pole. The upper end of the pole should have an even cut, and we will also drill a hole in the center of the cut. Let's take care of the method of attaching the pole to the surface or to the tree. Examples of fastening poles are shown in the photographs. There is no need to secure it tightly. The windmill requires maintenance. Screeds or improvised materials are good for fastening.
Pole attachment
Pole attachment
Pole attachment