03.12.2021
Drainage system
Editorial staff of the “New Place” website
Share
From this article you will learn
:
- Options for designing a drainage system around the house
- Drainage around the house: what determines the price
- Building codes for drainage around the house
- Types of drainage structures for drying areas
- Open drainage device
- Construction of an effective storm drain
- Construction of closed drainage systems
- Factors affecting the price of drainage around the house
Drainage around the house significantly increases the service life of the foundation and protects the cellar from filling with groundwater. Such a system is necessary not only in a residential building, but also in the country. In addition, drainage prevents rotting of the roots of fruit trees.
In areas with poor drainage, the area becomes swampy, a large number of single-celled algae are observed in the soil, slush is felt, plants either grow poorly or do not take root at all.
Our material is about in what cases it is necessary to urgently do drainage around the house, what is taken into account when designing it and what types of systems are most often used.
What are drainage wells for and what are they?
A private house or cottage is often located in an area prone to waterlogging; its foundations can gradually collapse under the influence of groundwater. Also, owners are often faced with the fact that there is no sewerage system, which means there is nowhere to put the water from the septic tank. There is a possible threat of flooding of residential and non-residential buildings, especially such as a cellar, garage, bathhouse, garden and vegetable garden. In these cases, a drainage well, and possibly an entire drainage system, is needed.
Collecting excess water in an underground container, by gravity or pumping, with constant or periodic removal - this is the meaning of a drainage well. The system is installed once and will work for the entire period of operation of the house. But during use, the drain well requires periodic cleaning. To do this, silt deposits are lifted from the bottom of a clogged well with a stream of water, followed by pumping or draining them.
The drainage well device can be of three types :
- Inspection (inspection) and drainage wells for sewerage, located at the places where drainage pipes turn and intersect or every 40-50 meters of drains, periodically clean them, and if there is no drainage, pump them out. To construct such wells, it is often enough to use a pipe with a diameter of 34 cm or more.
Inspection well at the intersection of drainage pipes Source rinnipool.ru
- Collectors (water intakes) are the final points for draining water, most often only surface water (storm water, melting water, stream water), with its pumping into a sewer system, reservoir, or use for household needs. They are characterized by a rather large volume, often an impenetrable bottom, and a built-in staircase is common for them. The placement of the pump and maintenance procedures impose restrictions on their diameter - at least 70 - 100 cm.
- Backfill (absorption, filtration) , they are located in places where they want to get rid of puddles, for example after washing cars. Around them it is planned to pour a large mass of rock, crushed stone, and screenings, both for supplying water to the well and for draining it through its bottom into deep water horizons. In particular, the bottom of the grouting well is covered with a layer of crushed stone 30 cm thick. In this device, partial bacterial and mechanical treatment of wastewater occurs, with periodic washing or mechanical extraction of silt and sand.
This is what the diagram of a filtration well looks like Source flotenk.ru
In cases of mixed type wells, their functions overlap, and the structure of the drainage well changes. Thus, a water intake well can discharge water into a grouting well. In this case, it does not require a sealed bottom and can do without a pump, but it still needs periodic inspection and cleaning, like an inspection well.
Factors affecting the price of drainage around the house
Before you begin equipping a site with one or another drainage system, you need to calculate the cost of materials and work required to install drainage around the house. To do this, develop an estimate that includes the price:
- drain with a diameter of 110 mm and a total length equal to the length of the main line;
- parts connecting drains (you will need one less than pipes);
- adapter necessary for fastening the main branch with a container for collecting liquid;
- a collector well with a volume corresponding to the approximate estimated amount of water that will flow into it;
- inspection wells (calculated number taking into account their placement and distance with turns);
- corner fittings (the number of units is equal to the number of turns of the pipeline);
- the amount of geocomposite materials and geotextile fabric (the calculated size of the trench and the recommended thickness of the layer of crushed stone or gravel (40 cm), sand (10-15 cm) are taken into account).
Construction work takes into account:
- digging ditches for pipelines up to 2 m deep (the cost of operations increases with increasing depth);
- installation of fasteners across the entire width of the trenches;
- laying waterproofing coating;
- creation of layers of drainage materials;
- wrapping pipes with geotextiles if they initially did not have an additional filter braid;
- laying a drainage line;
- installation of water intake and inspection wells;
- covering laid drains with crushed stone or gravel;
- backfilling the main with soil removed from the trench at the initial stage of work;
- installation of storm sewer elements.
If necessary, the cost of implementation is also included here:
- dismantling reinforced concrete foundations and asphalt concrete pavements with the subsequent creation of new ones;
- installation of wooden flooring and transitions.
An estimate with a detailed calculation of all the data gives a complete visual idea of how much it costs to arrange effective drainage around the house.
The first step when installing drainage around a house is to carry out a competent project, for which you get recommendations from a hydraulic engineer in order to prevent gross mistakes and irreversible consequences, such as subsidence of the soil or building foundation.
Therefore, the best option is to draw up a drainage diagram around the house simultaneously with the construction plan; only in this case can all the details of drainage and construction be most accurately taken into account in one project.
Drainage system
Did you find this article helpful? Share it with your friends:
Manufacturing materials
The traditional material for the walls of drainage wells is reinforced concrete rings. Reinforced concrete is also used as a bottom material (a reinforced concrete disc is placed at the bottom of the hole, at the base of the future drainage well) and a cover (with a hole for a hatch). Reinforced concrete is quite cheap, strong, and durable.
However, the installation of ready-made reinforced concrete requires the use of lifting equipment or large labor costs; the joints formed during installation can be difficult to seal.
See also: Catalog of companies that specialize in installation and design of sewerage systems
Installation of reinforced concrete rings will not be possible without the use of special equipment Source gidroguru.com
These structures are usually installed by first digging a large pit. And after installing the first ring and installing asbestos, ceramic, cast iron or other heavy and fragile pipes, it is gradually covered with soil using bulldozers and excavators.
This is a rather expensive technology that disturbs the top layer of soil. Recently, wells made of plastic and composite materials are increasingly being used.
Requirements
When choosing a material, you should take into account the basic requirements for wells. Let's take the following points as an example:
- High tightness.
- Long service life.
- High strength.
- Easy to maintain.
- Ease of installation work.
The most suitable materials are selected to meet these requirements.
Video description
About the installation of plastic drainage wells in the video:
Advantages of a plastic drainage well
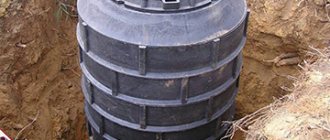
Instead of massive reinforced concrete rings with steps and pipes in which a person can easily fit, composite and plastic thin-walled devices, including small diameter ones, are increasingly being used. In this case, you can immediately install a ready-made well on the site.
This approach allows you to quickly and cheaply equip and maintain the drainage of a private house, garage, or bathhouse.
Drainage wells made of plastic are distinguished by the fact that the installation of a drainage well, dismantling and reinstallation of the new system and light pipes leading to it (usually also plastic) can be done by one person without the involvement of special equipment and without serious disruption of the landscape.
Plastic wells will require fewer resources to install Source giropark.ru
Features of the design
Local sewerage is designed to collect wastewater generated during domestic use. The sewage system of a private house, depending on the design, can be of three types:
- storage well;
- drain hole;
- multi-chamber septic tank.
These sewerage options in a private house differ in scale and shape. However, they all share common required design elements, including:
- a neck that can be closed with a hatch or lid;
- work compartment;
- sealed or draining bottom.
Installation sequence
How to install a drainage well:
- Pouring the concrete bottom of the well if its tightness is necessary.
- Installation of a composite or solid well.
- Laying and inserting inlet and outlet pipes.
- Arrangement of such parts as a ladder, cover, hatch, pump.
- Using a level, check the verticality of the well and the horizontal slopes of the pipes.
What tools and materials will workers need?
The main responsible and time-consuming work when installing a drainage well is making a tie-in and its subsequent sealing. In addition, it is necessary to dig holes and trenches, adjust pipes to length, adjust their slope to gravity, and adjust the depth and height of the well.
Based on this, a grinder (angle grinder) is required for work. If the material of the well is concrete or composite, asbestos and ceramic pipes are used, then the grinder requires diamond discs for concrete and a sledgehammer. If the well and pipes are plastic, metal discs and a hammer are enough. In addition, you definitely need a level, which can be supplemented with a plumb line, a level, as well as a tape measure, cord, shovels, trowel, and bucket. For digging narrow trenches, a convenient device is made from a piece of tin, twisted into the shape of a truncated cone and nailed to a stick.
Trenches for pipes and a hole for a well can be dug manually, but it is unlikely to cost less than calling an excavator Source deilo.ru
To seal the cut-ins and level the bottom, giving it the shape of pipe trays, use cement mortar, or, if dealing with plastic, use glue, plaster or tape, or sealant.
Construction work order
Before starting work, you need to carefully study the topic and learn how to properly make a sewer well. Primary requirements:
- ensure the specified height of the entry and exit points so that the slope of the pipes complies with the standards;
- the depth of the container should be 50 cm below the soil freezing level (sometimes more);
- the diameter of the working part corresponds to the size of the pipes (up to 160 mm it is 70 cm, over 160 mm the diameter is taken equal to 1 m).
Let's look at how to make a sewer out of a well using concrete rings:
- marking. The outline of the reservoir socket is marked. It is necessary to ensure that the distance to the foundation is maintained (at least 5 m);
- excavation. The soil is removed and either temporarily stored next to the trench or immediately removed;
- At the bottom of the nest, a layer of sand backfill 20 cm thick is placed. The sand is thoroughly compacted;
- install the bottom and carefully level it horizontally. Before installation, the outer part must be covered with a layer of waterproofing;
- install rings. They are placed on top of each other, connected, and the joint line is isolated;
- lay the lid, install the neck;
- connect pipes;
- install thermal insulation, fill the cavity of the nest with soil.
Almost all types of wells are built using this method. The difference between them consists of additional equipment or devices for working with pressure flow, rotating elements, and other parts. The installation process is the same in all cases.
Where to place the drainage well
As for the inspection well, it is usually located a couple of meters from the lower (or conventionally lower) corner of a residential building, which is surrounded by drainage pipes. In such a well, most often there are three inserts for pipes: two drainage and one drain (this pipe can drain water into a sewer, a reservoir, into loose soil down a slope, or into a drainage well of another type). It can be very small, and then to check its condition it is enough to have a tiny removable hatch and a sludge dipstick (like a car one, which is used to measure the oil level).
A collector well is necessary if the soil is clayey and does not absorb water well. It is located a couple of meters from the lower (or conditionally lower) corner of the site or behind it, in cooperation with neighbors. They immediately provide for how to safely descend into the well in an emergency. Let's say it's raining, and a bag of garbage is stuck in the drain hole, what should you do? They also find out what useful volume the collector needs (practice shows that it is better to immediately take it with a reserve).
The volume of the collector well should not be small Source vi.decorexpro.com
A grouting well is usually installed after a septic tank, if there is no sewerage or other drainage area nearby, and the volume of discharge of household or cleaning waste is small (about 1 m³ per day). Concrete is practically unsuitable for such a structure - it is better to take composite, metal, or plastic. Before backfilling, such a well is lined with soft material, protecting it from damage by blocks of stones and rubble, and after backfilling it is perforated by drilling holes in the lower part from the inside.
Application of large diameter plastic pipes
A modern solution for creating a drain well is the use of large-diameter pipes made of various types of plastic. The following are the features of plastic pipes:
- The design is seamless, which ensures a high level of tightness.
- Plastic does not react to exposure to high humidity, unlike many other materials. Therefore, it is ideal for creating a drainage well.
- Plastic is made from petroleum products, which ensures resistance to various substances.
- The pipes in question do not respond to low temperatures and can be used if the temperature of the wastewater is very high.
- The low weight means that there is no need to prepare the base for the creation of the structure in question. In addition, the light weight of the pipe simplifies its transportation and installation.
- Modern production standards determine that pipes can withstand significant pressure from the environment or wastewater.
However, there are also a few disadvantages to consider. An example is the following information:
- If the soil is not properly stable, it can have a significant impact on the pipe structure, resulting in cracks or deformation.
- The indicator of possible pressure exerted by the accumulated liquid or soil is also relatively low. Therefore, plastic pipes are practically not used in cases where the structure is deeply buried.
- Plastic is susceptible to certain chemicals. Therefore, they should not be used in the case of wastewater disposal from industrial buildings.
A fairly large list of advantages is determined by the fact that today almost everyone in suburban areas uses large-diameter plastic pipes as a well.
What type of pump should be used to pump out drainage water?
A pump is a common attribute of all types of wells. To pump out drainage water, both stationary and periodically used pumps are used. For continuous operation, select a pump of small capacity but sufficient power, such as a submersible drainage or drainage float pump.
A powerful and efficient pump is used to periodically pump out silt and sand deposits. If a pump is used to pump out a pond, extract sand, or deepen the bottom of a port, it is probably suitable for getting rid of sediment from a drainage well.
A submersible pump for a well will help you easily pump out liquid from an overflowing container Source abad.uz
Pumps suitable for removing sediments are called differently: mud pump, submersible pump, fecal pump, centrifugal pump, sand pump, hydraulic pump - the question is not the principle of operation or name, but whether this device is intended for pumping out sediments, including silt, sand and even small pebbles.
In principle, any pump according to the technical passport “drainage” should pump out accumulated deposits, but for this it may not have enough power (say, the “Malysh” pump) or steam. Two pumps are usually used to remove deposits. Also, a container of about 200 - 300 liters may be required. The sequence of work is as follows:
- A mud pump pumps water out of a drainage well.
- A water-type pump supplies, as powerfully as possible, clean or settled water from a container or other source.
- A mud pump (for example, Pumpex SK series, Makita, Kärcher, Grandfoss), switched on when the water flow starts, pumps out the turbid water, carrying away sediments.
- Another option for cleaning sediments: a team scoops out sediments with buckets, trowels, and shovels by hand.
The manual cleaning method is the cheapest, but not the cleanest Source megapolis-tula.ru
In any case, drainage storage wells require maintenance using pumps (the water still needs to be pumped out before manual cleaning).
Polymers
The main difference between polymer structures is simplicity and convenience. They can be seen on private plots, industrial sites and parks. Most often, structures made of polymer materials are mounted on inspection cable wells, on sidewalks, and transition paths. Polymer products are distinguished by their lightness, high strength, long service life and attractiveness.
You can solve the question of how to install a hatch in a city sewer yourself if you follow certain instructions:
- Lay a high-strength concrete or reinforced concrete floor that complies with the standard. A support ring is installed on it. This element evenly distributes the load on the floor and prevents premature collapse of the structure.
- To seal the ring with a concrete or reinforced concrete floor, it is recommended to use concrete mortar. After installation, the structure is left until the concrete hardens completely.
- At the next stage, the supporting element of the structure is installed. It serves as an intermediate link between a concrete slab and a polymer product.
- The top cover is mounted at the level of the soil or road surface.
- To secure the polymer structure around the neck of the well, a blind area with a slope is created. This design effectively removes excess moisture.
- After deciding how to install a sewer hatch, a layer of lithol or salidol is applied to the surface. This will prevent corrosion on the upper working part of the well.
Types of systems
Drainage systems differ in several ways.
By installation method
- Vertical drainage is a set of connected pipes that help reduce the amount of water to a reasonable level. Drainage (drainage and distribution) systems can control 100% of the site or a separate fragment of it. Another name for a vertical system is a wall system; the purpose of its use is to secure the foundation.
- The horizontal scheme involves the preparation of shallow channels laid on the surface.
- In the combined version, of course, both types of means used are combined.
The modern wall layout, in addition to the pipeline, includes wells, from which water is pumped out by pumps. In a situation where drainage was not provided for some reason at the time of construction, wells are made at the corners of the building, connected along the perimeter by pipes. Vertical drainage is often complemented by trenches laid from the bottom and sides with crushed stone, gravel or broken bricks.
Drainage is complex and expensive, so you need to immediately design it so that the structure will last for more than one year, justifying the investment and effort. The vertical system is built by draining liquid through pits from the basement. Pits are recessed trays into which water flows and is then redirected deeper. Since there is a risk of it randomly entering the well or well, the pipeline must be laid with an inclination towards the collecting manifold. The smallest permissible inclination angle in clay is 0.02, and in sand and similar rocks it is 0.03.
By device type
Wall drainage can be done with both polymer pipes and asbestos-cement channels. The only condition is to use side holes no larger than 1.5 mm. It is recommended to use pipes made of low-density polyethylene, since they resist soil shifts more stubbornly than others. The corners of the vertical drainage system are equipped with inspection wells to help clear clogged pipes. The lowest point serves to prepare a well or well, through which the collected water will begin to flow beyond the boundaries of the territory.
The distance between any part of the wall drainage and the protected structure itself cannot be less than 1 m. The drainage well is constructed by digging a pit, the dimensions of which must correspond to the tank being buried.
When there is a lot of water, and its natural maintenance is difficult, normal protection of basements is guaranteed only by a combination of these approaches. An external water release system involves laying pipes on the floor or slightly inserting them into the soil. In the second case, a water collection network is placed around the perimeter of the foundation, making deeper trenches for it than inside.
The use of internal drainage is required to protect the underground parts of the building from liquid that has already penetrated into them. The labor intensity of such work is relatively small, but their effectiveness is also less than that of external insurance.
Floors in damp basements must be raised to a height equal to the diameter of the pipes. Please note: if construction is carried out in a region with a warm climate, drainage along the external contour is more economical in terms of costs and labor costs. The whole point is that it becomes possible to get by with trenches of less depth. And when it is definitely established that the aquifers lie deep, it will be possible to limit ourselves even to gutters for storm drainage. To prepare grooves in the concrete layer, use a hammer or a hammer drill.
Backfilling of pipes that drain liquid is done using coarse gravel or crushed stone. Then a concrete screed is prepared, the floor is waterproofed and a new full floor is created. In such a scheme, it is tacitly assumed that the liquid will be collected inside the tanks, and that it will be discharged with or without the help of pumps (through natural drainage). Under favorable geological conditions, liquid drainage occurs into the foundation cushions. First, a pit with dimensions of 30x33x30 cm is dug in a randomly selected corner of the foundation.
The center of this very pit is used to prepare a well with a diameter of 30-40 mm, reaching a depth of 200-300 cm. A plastic tube with double-sided holes is inserted into the well. The upper end helps water enter the tube, and through the lower ends it seeps into the sand. But such a design is not applicable everywhere. It is better to consult with engineers in advance, avoiding mistakes.
