The originality of carved frames for windows and doors is striking in its spirituality. If you are not afraid of carpentry and want to make wooden trim with your own hands, then all that remains is to come up with a composition for framing.
Below are sketches of carved frames in a small size and mediocre quality. But these templates can be downloaded for free. The main idea is the idea, and the template can be made to the desired size.
The procedure for manufacturing a platband with slotted threads
We will divide the production into 2 stages: roughing and finishing.
Rough work
First you need to find and download the template. You will find sketches of drawings and stencils for wood carving below. It can also be drawn by hand and then perfected on the computer.
We apply the stencil of the ornament and pattern to the board and transfer the drawing with a pencil.
Now the main work begins. First of all, we take away the parts of the tree in the drawn slots. We do this with a drill and jigsaw according to the instructions:
1. In order for the jigsaw to cut inside the board, you need to drill a hole. The average width of the file is 10 millimeters, so the hole should be at least 11-12.
2. Insert a jigsaw file into the hole and cut along the contour.
3. So we cut out the entire platband.
By the way, instead of a jigsaw, you can use a hand router. In many cases it is much more convenient, for example, when drawing out roundness. And if you cut with a jigsaw, but you have a router, you can use it to bring the roundness to perfection. Even subsequent processing with sandpaper and a drill is not required.
We are talking about through holes, but what about slotted threads? For this case, we bought a set of cutters. There is nothing complicated here: we go along the contour with a hatchet or a blunt knife and then take away the material with semicircular chisels. To cut out egg-shaped recesses you need a cranberry - a spoon cutter.
For a better understanding, you can watch this video:
Grinding
It is best to buy planed boards. There are no scratches on it anymore, and the surface is even and smooth. If not, you will have to do it yourself. Let's start by grinding the plane. If you have an eccentric sander or grinder, just buy sanding wheels for it. No? You'll have to do it manually.
In this case, it is recommended to buy a sanding block. It costs only 2 dollars, but it’s twice as easy to work with. It doesn’t overwhelm the plane, picks up more wood at a time, and your hand doesn’t get too tired.
We start with P100 grit. She cleans up the biggest bullies. When they have already been removed, we move on to the P320. We derive a flat, almost smooth surface. Then we take the P600 and it may already be the last. After it, the wood will be slightly rough, almost mirror-like. We can continue, but there is no point in going higher than P1200.
We grind the slots with a flap wheel for a drill. Just insert it into the hole and press the button. Carefully walk along the bends.
Primer
Decorating windows with platbands will not last long if the wood is not primed. Moreover, we need soil with an antiseptic. Fungus, bark beetles, furniture grinder, blue stain - this is what we will have to protect ourselves from.
In the store we buy any antiseptic primer for wood, even an inexpensive one. It will prepare the material for painting and protect it from insects with mold.
Painting, varnishing
Well, it's time to give our platbands a new look. There are 3 options to choose from:
- Dye. The cheapest and simplest. You can take any moisture-resistant enamel or acrylic. But there are pitfalls here. Even exterior paint will crack and wash off over time. Once a year it will definitely have to be changed, and this is: sanding, priming, painting, and so on every year. And it hides the beauty of the wooden texture.
- Varnish. In fact, its only advantage over paint is that it does not hide the wood. Otherwise, the same disadvantages. Only the varnish is also more expensive.
- Oil. Perhaps oil impregnation is the best solution. Firstly, the platbands look like decoration. The oil impregnates the wood fibers, making the pattern and shape more expressive. You won't have to change it for years. But there are also disadvantages: it will show all the errors, it takes a long time to harden, it’s expensive.
So we have finished making carved platbands with our own hands. All that remains is to install them.
To see how easy it is to make a carved frame from wood, watch the video:
How to do it?
Stencils are made in different ways:
- Using a graphic editor. The desired image is found and processed in Photoshop. Every computer has the Paint application, it is used for editing, coloring and drawing. By visiting this page, you can develop personal images, from simple to complex projects. It is possible to add text and various elements to existing picture files.
- Photocopies. A drawing that you really like is selected and, when copied, it is immediately enlarged to the desired size. The second option is to scan and print the sample on a printer.
- Manually. The technology used here is scaling (copying) and by cells (linear scaling).
You can download the finished ones from the following link:
Making threads
We make a template from cardboard, the size should be natural. A personal template is made for all elements of the design.
Now, you need to lay it on the board and trace the outline with a pencil.
We mark the locations for the holes. Let's say you need to cut out a piece of paper. First, a hole is drilled, then a leaf is drawn out with a jigsaw. Following the holes, we make all the internal patterns, then move on to the external ornament.
There is a copying method for drawing. Here we use carbon paper. We trace the drawing through it onto the board and get a pattern on the wood.
Required tools:
- sandpaper of various numbers;
- jigsaw;
- drill with a set of drills;
- set of chisels;
Instructions:
- We make the pattern the same on all windows. To do this, we use a stencil or sketch.
- We place the pattern on the workpiece correctly, where we place all the elements not across the fibers, but along them. This will prevent the thread from cracking.
- We paint over the slotted areas with a pencil.
Wood carving is done in two ways:
- Invoice. In this option we use a thinner workpiece, then the work is simplified. Here we make individual elements, which we will then put together on a single board.
- Proreznaya. In this case, we make a slit through it, resulting in the appearance of lace that elegantly and beautifully frames the window.
Installation of platbands
Creating a beautiful product is one thing. But attaching it to the window correctly is another matter.
Aesthetic appearance and long service life closely depend on the quality of installation of the platbands.
There are two methods of mounting on wooden windows:
- Through tenon. The method is simple and not very reliable. Spikes should be installed in places where they will not be visible. This provides additional protection from moisture.
- Dull thorn. The tenon goes into the casing. Whereas a hole for it is drilled in the frame. You need to lubricate the tenon with glue and insert it into the groove. Fastening is considered complex, but it is more reliable than with the first method.
Step by step guide:
- We take measurements from the window.
- We choose a type of wood and dry it well. The choice of width and height does not play a big role for carved platbands, the main thing is that the thickness is 3 cm. This is the case if the carving will be slotted, for an invoice - 1 cm.
- We sand the wood with sandpaper, starting with coarse-grain sandpaper, and finally with scratch paper.
- Cut out the stencils.
- Take a simple pencil and apply a drawing or pattern to the front side of the wooden surface. We paint over the through slots.
- Let's start cutting out the pattern. Let's start right away with the through holes. Where the jigsaw will enter, it is advisable to use a drill for a more accurate cut.
- We carefully sand the holes with sandpaper.
- To remove dust from blind holes, use a vacuum cleaner.
- When using elements of applied threads, we attach them to nails without heads. Moreover, to be on the safe side, let’s apply glue along the back side.
- Now take a damp rag and wipe the pattern until the area is completely dust free.
- We will consider the finishing operation to be stain, with which we will tint the casing or immediately coat it with varnish.
Manufacturing materials
Modern manufacturers make platbands from a variety of materials: wood and its derivative raw materials, metal, plastic. Naturally, finished products are distinguished by wear resistance, appearance and practicality. Models that are inexpensive and require minimal maintenance include plastic and metal trims. They should only be occasionally cleaned of street dust by wiping with a damp cloth. Wooden frames require periodic painting and impregnation with antiseptics. The frequency of impregnation depends on the stability of the selected composition and the requirements of the manufacturer (many companies recommend re-treatment after 3-5-8 years). But the frequency of changing paint layers directly depends on the wear resistance of the compounds used and their service life. As for cashed MDF, it is intended exclusively for interior work.
Wood
The quality and durability of wooden platbands directly depends on the wood used and its characteristics. Often for the manufacture of such elements the following are used:
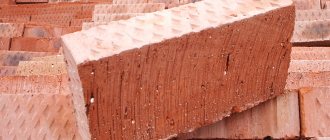
- hardwood species (oak, beech, ash): have maximum resistance to negative influences, but are very difficult to carve;
- soft-leaved species (alder, aspen, linden): easy to process, therefore they are mainly used for the production of carved platbands, but require high-quality protection from moisture;
- conifers (pine, spruce): they are accessible and, with proper protection, retain their pristine state for quite a long time;
- fruit (cherry, apple): they are distinguished by their excellent softness and ease of cutting; elements from them are used as decoration for platbands.
According to the types, wooden platbands are divided into standard (with or without chamfer, with rounding) and carved. The former have a slight thickness and are most often made straight (or with minimal bending). On carved models, figured recesses are cut out in the form of patterns.
Plastic
Plastic platbands are an ideal frame for metal-plastic windows. They can also be installed to frame wooden window structures, painted white or light gray. The advantage of this type of product is its low cost and ease of maintenance. Unlike their wooden counterparts, they do not require constant protection from negative external influences. In addition, they are much cheaper than metal counterparts. The disadvantages of such frames include a small selection of shapes and shades. But with the right color selection, the purchased frame will look appropriate against the background of stone or white brick, and against the background of siding. Installation of plastic platbands can be carried out both inside and outside. Such products are minimally susceptible to temperature changes, and thanks to the high-quality colors used in their manufacture, they will not fade or turn yellow in the sun.
MDF
Modern MDF platbands attract the lowest price. At the same time, their range is quite wide: both straight and rounded elements can be used in the base. The upper part is covered with a special film, which allows you to stylize unusual frames. In addition to the monochromatic design, you can easily find MDF trims with imitation wood, stone and metal surfaces. The only disadvantage of such products is the inability to use them outside. Even with short-term exposure to moisture, the base (MDF) will quickly become unusable and require replacement. Such platbands can only be used for indoor framing of windows or doors.
True, it is recommended to install them with extreme caution in bathrooms with insufficient quality (or low-power) ventilation. They do not require special care: simply removing dust or wiping with a slightly damp sponge will be enough
Metal
Metal casings are a universal and inexpensive solution for any building. In most cases, they are used to stylize administrative buildings and provide additional protection for window openings. But windows in a private house made of brick or stone will also complement well. It is recommended to install such products in addition to metal-plastic windows: they will look out of place with wooden frames. Metal cashing consists of galvanized strips coated with wear-resistant paint. That is why metal frames will last for many years without the need for periodic processing. They look great against the backdrop of non-standard facade decoration: siding, metal and PVC panels, lining. They emphasize the rigor and modernity of the exterior design.
We determine the required dimensions of the future ornament.
It should be remembered that for house carvings you should not choose sketches with small details. Small elements will reduce the durability of carved products and will be lost against the large background of the facade, since house carvings look beautiful upon a holistic inspection of the building, from a distance.
The size of a separately located ornament is determined by the place where it will be located. And here, I think, you will not have any difficulties.
Therefore, I would like to focus on ornaments in which the pattern is repeated several times, the so-called ribbon ornaments. Such ornaments are used to decorate the piers of roof slopes and cornices. To place a pattern in a ribbon ornament, it is necessary to determine the width of the pattern in order to place a whole number of them at a given length. Those. the distance at which the ribbon ornament will be placed must be divided into X equal parts, the size of which will correspond to the width of the pattern.
Drawings and templates
Before work, you should find suitable trim patterns for the jigsaw. Now they are sold in construction stores, published in relevant magazines, and posted on the Internet. Templates can be made from thick paper, cardboard or fiberboard.
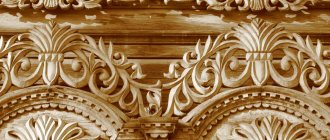
What might a diagram of patterns for platbands with a jigsaw contain? Whatever your heart desires. The most popular are various geometric patterns of lines and figures, plant patterns, and images of animals. The cladding can carry features of different styles without interfering with your design imagination.
The main components of the circuit for any type of framing:
- Top bar.
- Vertical slats or frame.
- Bottom strip or window sill.
The standard scheme can be supplemented with various elements:
- top of the frame: diadem (kokoshnik), “ears” of the headband, “crackers”, “valance”, “forehead”, panel;
- The bottom can be varied with overlays and overhangs.
Methods for making templates
Ready-made stencil, these are sold in stores.
If you have a desire to decorate the windows of your home with decorative carvings, you should decide how to make a template for it.
At the moment there are such simple ways to do this:
- Using a computer graphics editor. Developers produce a huge variety of software for image processing. The best option, however, is still Photoshop.
- Using photocopying. If you don’t know how to use computer programs, this is the best solution. In this case, you can immediately select the required copy sizes by reducing or enlarging, expanding or compressing the source.
- You can also use a printer. First scan and then print the diagram in the required format.
- Another way to reproduce trim frame patterns is by copying. This option involves the use of carbon paper.
A piece of carbon paper is placed on the workpiece, and the selected template is placed on top of it. Then it is fixed with push pins. After this, the outline of the drawing is outlined with a pencil, and it is reproduced on wood.
Source scaling.- Finally, you can use manual cell scaling. Experts call this technique linear copying (using scaling). In this case, you can change the proportions of the source.
The stencil for window coverings is made from cardboard. Its size must be life-size. For each ornament, element, pattern, you need to draw your own template.
The resulting stencils are placed on the blanks. Then their contours are outlined with a pencil.
Transferring the outline of the design to the workpiece
After the sketch has been created, you need to make a stencil directly onto which all the elements of the design for the carved frames are transferred. You can transfer the contour to the workpiece in the following ways:
Cutting the platband according to the template
- The most common method is when the design is cut out of thick paper or cardboard. The resulting templates are applied to the board and traced along the outline with a pen, felt-tip pen or pencil.
- The stencil can not be cut out, but transferred to future trim using carbon paper.
- You can press the outline of the sketch through the paper onto the wood with a pen (an inconspicuous mark remains). You can make the outline clearer without carbon paper by applying a layer of graphite on the back of the sheet with a soft pencil.
The stencils should be placed on the workpiece along the grain of the wood: in the future, the thread of such a casing will not crack. For convenience, the places where the cuts will be made can be colored.
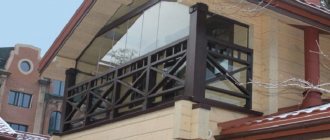
Finishing slopes with plastic panels
Finishing of window slopes inside can be done using plastic ceiling panels or multi-layer sandwich panels. The installation of this material is so simple that it is possible to finish the inside of plastic windows with your own hands. How to make slopes for plastic windows in a house will be described below.
PVC panels are most often used to finish slopes from the inside.
Sandwich panels are better than ceiling panels due to the presence of a layer of insulation inside. However, ceiling ones also have thermal insulation qualities due to the air chambers between the internal stiffeners.
Installation and repair of slopes inside a building using these finishing materials is possible due to their qualities:
- PVC slopes are durable;
- the use of panels for finishing window slopes gives them an attractive, neat appearance;
- finishing options can be very diverse thanks to a wide range of colors,
- which have external surfaces of panels;
- it is possible to install plastic on arched structures;
- Repairing plastic slopes is not difficult;
- ease of installation - window openings are finished with your own hands, and installation does not take much time;
- PVC is easy to process;
- slopes lined with plastic on the inside are easy to maintain;
- finishing window openings with this material increases the energy efficiency of the window system;
- The interior decoration of windows prevents them from fogging and freezing.
Installation
How to install internal slopes for windows made of PVC panels is shown below.
- remove excess polyurethane foam using a stationery or construction knife;
To remove the remaining foam, use a stationery or construction knife along the perimeter of the window opening near the frame using self-tapping screws and fix a wooden block;
A wooden block is secured around the perimeter of the frame; we attach the starting profile to the block;
A starting profile is attached to the block along the outer perimeter of the window and a rail is installed;
The rail is fixed along the outer perimeter of the frame, first it is better to insert the side elements;
The side panels are installed first, then we insert the top panel, bend it, foam it a little and fix it in the required position;
A small layer of foam is blown between the upper slope and the PVC panel
fix the side parts in the same way; After the structure has dried, the corner parts are decorated with decorative elements - corners or platbands.
Corners are covered with platbands
Sandwich panels can be installed in the same way or without a starting profile. In this case, the panel is placed in a groove cut in the mounting foam. This installation method is relevant when it is not possible to place the block around the perimeter of the window frame.
Sampling through holes
The first step is to trim the edges of the workpiece and make holes in the center. Everything is simple with the edges: we cut out the excess with a jigsaw, retreating 1–1.5 mm outward from the marking line for subsequent processing. To cut out shapes in the center of the plane, drill the part at the very line of each cutout, then select the inner contour with a jigsaw.
For making large holes, it is wise to use core drills. In this case, it is necessary to mark on the template not the contours, but the centers of the circles into which the centering drill bit of the crown will be installed. A similar technique can also be used when making oval holes or elements with small rounding radii: a complex bend is drilled with the appropriate radius, and everything else is cut out with a jigsaw.
When the excess parts of the workpiece are cut out, the cut edges must be carefully processed with a rasp and then with sandpaper. It is recommended to use bars of square, round and rounded profiles, which are filled with sandpaper. This way you'll be less likely to fray the edges and will be able to get straight corners on each edge.
Rectangular ribs look rather rough, so they are smoothed with chamfers and slopes of different profiles. The easiest way to diversify the product is to go along the external and internal contours of the casing with a figured cutter. But manual processing options are also possible:
- to remove a chamfer, walk along straight edges with chips, keeping the angle of inclination of the handle to the part constant;
- a semicircular convex bevel can also be made with chips, changing the inclination of the blade, or use a concave cutter for this;
- a concave semicircular joint is made with a chisel or cutter with a rounded edge. Such elements must be cut out in stages, removing small chips layer by layer and carefully controlling the depth of the tool and the tilt of the handle;
- if the descent has a profile of a complex shape with several convex, concave and straight elements, this profile is divided into several stages and cut in a strict sequence, starting from the widest outer part and ending with the deepest and shallowest tier.
Application area
Widespread use of framing around various openings has found itself in doors and windows. The location of the planks can be either on the outside of the street or inside the room.
Basically, the same type of platbands are installed, but the threads may differ. And at the same time maintaining the general theme. For example, in a children's room, the bar will have a bunny. Flowers are carved around it. Then the teddy bear in the kitchen should also be framed with the same flowers.
Now the brand is considered to be plastic double-glazed windows. Some people manage to put a wooden plank on them. In this case, you need to paint it white or choose a double-glazed window made of wood.
The strips around the window opening perform several functions:
- They unite all the buildings in the yard into a single style.
- Reduce heat loss.
- Protect from dust and litter, moisture, draft.
- Increases sound insulation.
- I emphasize the uniqueness of the residential building.
- An opportunity to express the traditions of a region, family, country.
- The ability to visually stretch and expand the house.
- They add completeness to the construction.
- Cover the assembly seams.
Related article: Fastening plates for plastic windowsIf we consider the platbands by material, they can be from:
- wood;
- metal;
- plastic;
- foam and polyurethane;
By form:
Before starting work, it is worth stocking up on templates or stencils for carved platbands; without their help it is impossible to achieve an excellent result. And only a master who has been working on wood carving for many years can perform his work without them.
Today you can get stencils freely - in stores, magazines, and the Internet.
You can apply any design on them that the customer or craftsman desires. Plant outlines, animal figures, and patterns of geometric lines and shapes are very popular.
The style of the product can be different, and here the most unusual fantasies of the performer are realized.
Adviсe
- If you are just starting to work on a stencil on a platband design, you should choose a simpler design with large shapes. The smaller the drawing, the more complex it is. It is good to try elements of the design from through holes.
- Open elements are cut out with a jigsaw.
- Beech, larch and oak are expensive and difficult to process, but they have a long service life.
- The easiest material to process is linden.
- The material most often used is pine.
Related article: Standard sizes of window openings for plastic windows
Kinds
Judging by the large number of platbands that can be seen on buildings (all of them are different in design, material, configuration), they are presented in significant variety. Let's figure out what modern types of platbands exist and how they differ from each other.
First of all, platbands are divided into categories depending on the material used in their creation.
First of all, you need to name the tree. This is a traditional material, it is good at painting and other processing, and holds the temperature perfectly in our climate. There are a large number of various impregnations, varnishes, enamels and paints for wood, so there will be no problems with the final design of the platbands.
- Composite materials include MDF (medium density fiberboard, in fact, it is compressed wood chips) and the familiar plywood (in fact, also a wood material, only characterized by multi-layering - made by gluing specially treated veneer). This category also includes veneered and laminated trims.
- The building materials market also offers plastic platbands made of extruded polyvinyl chloride (PVC) or other materials (foamed polystyrene, polyurethane). Its biggest advantage is its affordability. Also among the advantages is a huge selection of textures and colors.
- Metal trims are made of steel or aluminum.
There are also platbands made of other materials - stone, ceramic tiles, gypsum cement. It is not recommended to install them yourself. Now let's look at the different types of platbands depending on their shape. Platbands are, in industrial terms, molded products (that is, measured in linear meters). Manufacturers offer three main shapes (meaning the cross-section): flat casing, rounded and curly.
Based on the installation method, platbands are divided into overhead and telescopic.
- The invoice (as the name suggests) is mounted by placing the platband on the desired surface and securing it to it.
- As for the telescopic one, it (unlike the overhead one) has a so-called beak (also sometimes called “wings”) - this is a small protrusion that is located perpendicular to the plane of the casing, which fits into the groove on the box. The distance by which the platband extends from the corresponding box can be adjusted, thereby ensuring complete closure of the gap at the junction of the box and the platband. This is very important if the walls have different thicknesses.
Minimum required tools
The manufacture of platbands, in contrast to artistic wood carving, involves repeated execution of the same type of operations, resulting in a rather primitive repeating pattern. Therefore, most of the work is done with an electric tool: this not only increases the processing speed, but also achieves uniform quality in different areas.
1 - jigsaw; 2 - drill; 3 - belt sander; 4 - vibration grinder; 5 - manual router
The main work is done with a jigsaw and drill. The tool must be reliable and of high quality, capable of being in continuous use for a long time. To clean and polish products, it is better to use an electric grinder, at least a simple belt grinder. Quick finishing of the relief is possible using vibration-type machines.
If you intend to add additional small details to the edges of your product, you cannot do without a router. Slopes, chamfers and figured borders can also be done manually, but only if you have a variety of chisels, cutters and specific skills in working with wood.
Set of wood cutters
What is it and why do we need it?
Carved wood trims are special strips that are used to hide installation seams at the border of the window system and the wall. In the house, such wooden fixtures can be used not only on windows, but also on doors. Platbands have been used as an element of the facade of a building since the 15th century. Currently, their relevance has become slightly lower, but the functionality has not changed. In multi-storey premises such devices are considered inappropriate and therefore are not used.
In simple terms, a platband is a frame made of wood about 40 centimeters wide, which is used for window framing. It is necessary not only for its aesthetic function, but also to bridge the gap that forms between the window frame and the wall. As a result of the use of such frames, thermal insulation is increased and the penetration of dust particles and water from the environment is prevented. In addition, the noise level is reduced.
Installation instructions
There is no special trick to installing platbands with a slotted pattern. The structure can be assembled on a table and then placed on the window as a whole or attached in parts. In a log house, for installation of cladding, it is necessary to prepare areas around the perimeter of the opening, cutting the logs to the width of the board.
Element-by-element assembly using self-tapping screws is carried out in the following order:
- Treat all carved parts with varnish and place them in places on the prepared board to form a pattern.
- If you need to make a large top, then use several boards connected by corners as the base.
- Screw each element to the base by screwing in the screws on the back of the board.
- Install the finished casing flush with the window frame so that it closes the gap, and secure with long screws. For doors that open outward, make an indent of 1-2 cm so that they swing open 90°.
Advice. To prevent the ornamental elements from moving during fastening, carefully pull them to the base with clamps.
How to correctly install carved flashings is shown in the video:
We make carved window frames with our own hands: how to choose the right wood?
Despite the wide choice of materials, most home owners prefer wood. It is necessary to select the type of material taking into account the performance characteristics:
- Hardwoods - for example, beech, ash. Such boards have the greatest strength and rigidity. If you plan to create light and delicate patterns, this will be quite problematic.
- Soft hardwoods - alder, aspen, etc. These types of wood are quite easy to process even for a beginner, so they are suitable for creating platbands with a large number of patterns. There is also a drawback - window frames made from such boards will have to be constantly treated with special means, otherwise they will simply lose their original appearance over time.
- Apple, cherry - wood species are ideal for creating small products that can later be easily attached to the main product.
- Birch, pine - wood has excellent quality characteristics and is easy to process even by hand. Using such materials you can create even the most complex elements. In addition, carved platbands made from such types of wood are quite simple in further use.
DIY wooden windows
The process of manufacturing a wooden euro-window will require certain financial investments - the cost of wood, components, equipment. It is also easier to order double-glazed windows from professionals, although some craftsmen manage to assemble this unit themselves. But even taking into account the impressive cost of the finished product, which is an elite and therefore quite expensive product, the savings will be significant. If we are talking about building a new house or completely glazing an old one, the difference can be tens of thousands.
Requirements for platband material
In addition to high aesthetic qualities, the platband must meet practical requirements. Its important qualities are its ability to withstand temperature fluctuations and high humidity. In addition, the material must withstand wind loads.
In this regard, MDF as a platband material can only be used inside a home. The manufacturability of the material determines its simplicity and relatively low cost. In addition, it does not take much time to receive ready-made platbands. Such platbands on the facade will require constant care and additional processing.
Our ancestors have been making frames from wood for many centuries. Oak and beech are the most common types of wood used for this. Pine and birch have found less use for the production of platbands. Wood tends to absorb moisture, so to increase the service life of the product and its appearance, it is necessary to use protective coatings. In addition, over time, wood tends to darken, so restoration of the original shade of the material is required.
When using gypsum as a decorative facade element, they also face the problem of interaction of the material with moisture. When water that penetrates inside the plaster freezes and thaws during temperature fluctuations, such architectural details are destroyed.
There are certain requirements for materials
The use of glass fiber reinforced concrete and polymer concrete makes it possible to avoid the negative effects of temperature and moisture. Their use is limited by the significant mass of products. In some cases, when installing such platbands, the increased load on the wall is taken into account and made more powerful.
Polyurethane compares favorably with other platband materials. This is due to the fact that its use does not allow the problems described above, and its characteristics make it possible to create additional thermal insulation. In addition, its weight is comparable to the weight of wood, which facilitates the installation of these facade parts.
Conclusion
Making a wooden window with your own hands is an opportunity not so much to save money as to express yourself. For many years, a beautiful, environmentally friendly design will remind you not of the money spent, but of your own skill.
Everything related to the technical parameters and features of Euro-windows, as well as step-by-step instructions, diagrams, installation details and characteristics of products from different manufacturers are discussed in the “Windows, profiles, glazing” section. Details of the manufacture of the wooden windows mentioned in the article are laid out step by step in the topic “Report on the creation of wooden windows”. After studying the article about the technology of gluing boards, you will learn how to obtain high-quality and durable timber for future frames. How to replace wooden windows with your own hands without dismantling the old frame - a video about new technology answers this question.
Subscribe to our Telegram channelExclusive posts every week