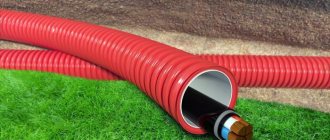
How they differ from resistive ones, their advantages and disadvantages, as well as all the points for choosing and laying such a cable ON pipes and IN pipes, read in a separate article.
Here we will look in detail at all the methods and nuances of connecting a heating cable to 220V power wires.
Such a cable cannot simply be twisted, wrapped with electrical tape on top and plugged into an outlet.
Maybe this design will work, but not for long. Among other things, the adhesive layer on the electrical tape tends to dry out gradually, which means that the joint will no longer be airtight.
For a short-term performance check, some people even use Wago terminal blocks. As a temporary connection, there is nothing “criminal” about this.
But if you want the cable to last its entire declared service life, then the connection must be made using more reliable electrical methods.
There are three options:
- modular
- with installation of coupling
- without installing a coupling
Modular connection method
The method is very expensive and problematic in terms of finding the required components. The most widely used heating cable for installation is the Raychem brand.
This manufacturer has a special system called FlexiClic.
There is no need to press, solder or twist anything here. The cable is sold in ready-made kits. The connection of one piece of cable to another, or to the supply wire, occurs through factory connectors.
You just snap them together, plug in the heating and everything works.
You can not only consistently build up straight sections along the water pipeline, but also make branches to the sides.
Just keep in mind that when extending two pieces of heating cable, you must use brands of the same power. Among other things, the joints will not have the same heating effect as the rest of the pipe.
Let us repeat once again that this method is not very common in our realities and is not cheap. Therefore, let's look at more “down-to-earth” connection options:
- with installation of the coupling through pressed sleeves
- without installation of a coupling with direct connection of the heating cable to a 220V network
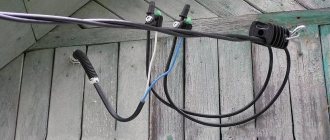
Insulating the free end of the wire
After connecting the heating cable to the supply cable, the second end remains without insulation. It must be placed in the coupling. To do this, a small longitudinal cut is made, approximately 1 cm, separating the two wires from each other, after which one core is cut off to form a “ladder”.
This cutting method will reliably protect the two wires from accidental connection and short circuit, which will lead to burnout of the heating cable.
Take two pieces of heat-shrinkable tube: the smaller one is about five centimeters long, the larger one is 7-8 cm. The first one is put on the insulated part of the wire by 3.5 cm and heated with a hairdryer until the cable is tightly compressed.
The free part of the tube is clamped with a crimper or pliers. After this, a second larger tube is put on, and the procedure is repeated to securely seal the heating cable.
Coupling installation
What materials will you need?
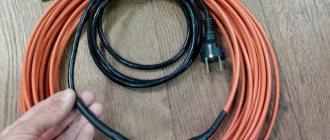
- self-regulating shielded cable
- plug with wire and grounding pin
The wire must be three-core, copper. The cross-section is selected depending on the current load (cable power).
Mistake #1
Moreover, according to the instructions, it cannot be less than 1.5mm2.
Even if you have a very short section of low-power cable.
- wire stripper
- crimper for crimping sleeves
- coupling set
It is important to note that heat shrink tubing comes with and without adhesive.
Mistake #2
Do not use thin-walled tubing without adhesive.
They will simply insulate the connection, but will not create the required tightness. It is also desirable that the tube be of mid-wall thickness.
Thin walls are very easily damaged by external influences.
- construction hair dryer
- stationery knife
Heating mats
Methods for cutting and bending a heating mat
To simplify the installation of a heated floor using a heating cable, special mats have been developed. They consist of a mesh base on which heating elements are fixed.
The main advantage of this design is that you don’t have to make a concrete screed, but you can immediately lay the finishing layer on top (most often tiles are used).
Installation of mats is very convenient because it is easy to change direction and can be laid in any order, bypassing the furniture locations. Most often, a resistive two-core cable is placed in the mats.
Laying the heating mat
[ads-mob-1][ads-pc-1]
Cable preparation and cutting
First of all, use a knife to cut off the outer insulation from the self-regulating cable. The length of the cut depends on the brand and section.
Usually it is about 7cm.
The cut must be made carefully so as not to damage the grounding braid. Next, this braid needs to be unwoven.
The most convenient way to do this is with a thin screwdriver or an awl.
After unbraiding, the fibers are twisted into one braid.
We get to the inner thermoplastic shell. Make a cut at a distance of 4cm from the edge and remove the middle layer of insulation.
Hidden under it is the so-called matrix with copper conductors on the sides.
You cut through the matrix, heat this area with a hairdryer and pull the sheath off the cores.
When making a cut, do not damage the veins themselves. They are quite thin.
You can extract the veins in another way. Use side cutters to bite the corners of the matrix, and use pliers to forcefully pull out each vein.
Then remove the matrix and remaining insulation from the copper.
Next, put connecting sleeves on the ends of the cores and crimp them with a crimper on one side.
Mistake #3
Do not crimp sleeves with regular pliers.
They will never create normal contact at such a critical junction.
Mistake #4
Also note that it is recommended to install the sleeves in a “ladder” pattern, and not at the same level.
First of all, this applies to moments when you do not use insulated sleeves, but ordinary bare GML.
Otherwise, with sufficiently dense shrinkage, this place will be the most likely source of insulation breakdown. Sometimes one sleeve can even push through another.
After crimping, insert small heat shrink tubes onto each core.
The tube should creep and overlap the sleeve by a few millimeters. Heat it with a hairdryer and reliably isolate this area.
Be sure to allow time for the connection to cool down. After that, insert a wide heat tube onto the inner thermoplastic shell and heat it until the glue comes out.
It should equally cover both the section of the inner shell and the individual veins.
While this insulation has not cooled down, move the cores apart and use thin-nose pliers to flatten the middle for a few seconds.
You will get 100% reliable tightness and no moisture will get inside.
Let's move on to the power cable and plug. Remove the outer insulation from it.
Mistake #5
In this case, you cannot leave all three wires the same length.
The grounding conductor must be longer than all the others.
Pull the largest outer sleeve through the cable, and stretch small heat shrinks onto the working cores.
Then you insert the stripped wires into the sleeve on the heating cable and crimp them with a crimper.
Mistake #6
In this case, stranded wires do not need to be twisted before inserting them into the sleeve.
Otherwise, during crimping, some of the veins will crush themselves. This is the most common mistake when working with similar tips and sleeves.
People often ask, is it possible to simply solder the wires together without using any press pliers? Yes, you can. But this is provided that you have enough experience and skill in this matter.
Crimping of tips and sleeves is less prone to errors due to the influence of the human factor and almost always creates 100% reliable contact (provided the sleeve size is correctly selected).
Slide the heat shrink onto the sleeve and warm everything up with a hairdryer. There should be glue coming out from both ends of the tubes.
As a result, you will get a connection in which each working core:
- sealed from each other
- sealed from braid
Give the connection time to cool and proceed to grounding.
What types of heating cable are there?
There are two criteria for classifying heating cables under screed:
- By the number of conductors: single-core; Single-core resistive cable diagram
- two-wire; Twin cable
- resistive; Resistive heating cable
A single-core resistive wire for a concrete screed has the simplest structure and is characterized by low cost.
Grounding braid
If the cable is laid through a plastic pipe without any metal valves or clamps, then many do not even connect the grounding conductor.
With the ground not connected, the heating cable works without problems. The braid in this case performs only the function of additional mechanical protection.
There are even inexpensive self-regulating cables that do not have a braid in their design initially.
Mistake #7
If the pipe is metal or the heating is built into the water supply, then in no case can such heating be used without grounding.
As we said earlier, the ground wire on the power cable should be the longest. This is necessary so that the connecting sleeves are not located at the same level.
In this case, the coupling will be too thick. You put a shrink sleeve on the grounding, and insert the core itself into another sleeve.
From the reverse side, insert a braid twisted into it.
Mistake #8
At the same time, do not leave a large reserve and unnecessary rings, which will subsequently prevent the topmost heat shrink from “shrunk” tightly.
Crimp the joint with a crimper. The heat shrink on top acts as mechanical protection.
Sealing the connection is not so important here. At the very end, move the outer coupling and isolate all three sleeves and the connection itself.
Mistake #9
The most important thing here is to heat the coupling starting from the middle, gradually moving the hair dryer to the edges, and not vice versa.
There should be no air gaps or bubbles formed inside. And drops of glue should appear at the ends of the heat tube.
To ensure that the coupling sticks securely and fits like a glove, it is recommended to lightly sand the areas on the outer sheath of the cable before installing it.
Additionally, while the coupling is still hot, you can press it along the edges with pliers.
But this is provided that your cable is not round.
Briefly about the main thing
When choosing a heating cable for utilities, you must first decide on the method of its connection. If it is external, you will need aluminum tape for secure fastening. When the wires are laid inside the pipe, you need to additionally purchase a special tee and a pass-through kit for easy placement of the wires.
When connecting conductors to each other, it is better to use special sleeves and heat-shrinkable sleeves. Reliable sealed contact will be the key to the overall safety of the device. For additional protection, it is necessary to take care of installing circuit breakers to turn off the power in the event of an electrical circuit break.
Write in the comments what you think - is it worth using a self-regulating cable? After all, it is much more expensive than the usual resistant one. Isn't it better to just turn on the heating during severe frosts and turn off during thaws?
Ratings 0
Read later
Direct connection of heating cable without couplings
There is another way to connect to a 220V network - couplingless. The question is, why do we install the coupling?
Firstly, to ensure the tightness of the connection. And secondly, to save on the heating cable and not pull it into the next room to the nearest outlet or switchboard.
What if this “panelboard” is moved closer to the cable itself and placed directly on the pipe? We are talking about a regular sealed box with screw terminals inside.
In this case, the selfreg will have to be cut a little longer - by 15-20cm. And at the end, put the so-called end seal.
Similar kits are produced by Eltherm.
The procedure for preparing and cutting the cable is not much different from the previous method. We remove the external insulation.
We release the braid and twist it into a bundle.
We cut the middle layer and get to the matrix. Then we release the copper cores and remove the middle of the matrix.
We apply silicone sealant to the cutting area and pull the end “glove” over the conductors.
Instead of such special gloves, you can use thermal tubes. You put two narrow ones on each core, and then one wide one on top of them.
After heat shrinking, press the gap between the cores with thin-nose pliers so that the emerging glue reliably seals the joint.
A tube is also pulled over the grounding.
After this, all the veins and braid are pressed with sleeve tips.
The heating cable is inserted into the distribution box, and it itself is attached to the pipe through an L-shaped corner with clamps.
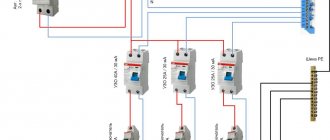
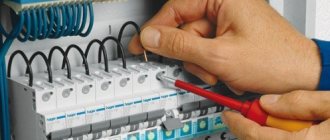
Power to the distribution box must be supplied through an RCD with a leakage current of 30 mA. The cable is protected from short circuits and overloads by a type “C” circuit breaker.
It’s even better to immediately install an automatic differential.
Select the rating based on the heating power. In addition to power, do not forget to choose the correct cross-section of the 220V power cable. The previously specified minimum size of 1.5mm2 may not be enough.
Mistake #10
Many people forget about the starting current.
Here is a measurement of the consumption of a small piece of heating cable during startup and after a couple of minutes.
Consumption of Samoreg at the very beginning briefly jumps three times. For example, a cable with a power of 40W/m and a length of 80 meters can show an initial load of 6kW!
Before direct connection, the insulation resistance must always be checked. At a test voltage of 2500V, the standardized resistance must be at least 10mOhm.
Insulation is checked between:
- braid and pipe
- braid and working cores
Self-regulating cable
A shielded or self-regulating cable for underfloor heating is a matrix, inside of which two conductors are placed, and between them there is a layer of polymer, which releases the necessary thermal energy. The special feature of this cable is that it regulates heating due to the resistance of the polymer. As the temperature increases, the resistance also increases, which leads to a decrease in current strength and, as a result, the amount of heat generated decreases.
Self-regulating heating cable braid
Thanks to this structure, the self-regulating cable is also quite economical, so over time it will justify the investment in its purchase.
Screened wire composition:
Shielded Heating Cable Design
- carbon conductor;
- polymer;
- insulation;
- reinforcing braid;
- external insulation made of PVC.
Despite the ability to control overheating, it is also not recommended to lay such a cable under furniture, since this will increase electricity consumption but will not provide the necessary effect - heating the cabinet is pointless.
Useful information on underfloor heating
- Heatherm - underfloor heating two-core cable and mat
- ThermoPEX for underfloor heating - the best option for the home
- Boss for heated floors. What are mats with bosses?
- Is a warm floor afraid of water? Can it give you an electric shock?
- Types of electric heated floors
- How much does underfloor heating cost per month?
- Water heated floor in a wooden house
- Water heated floor under laminate. Is it worth it?
- Water heated floor. Advantages and disadvantages.
- Installation time for heated floors. How long will it take?
- Choosing electric and water heated floors
- Where to install a comb or a heated floor collector?
- What type of underfloor heating is infrared film suitable for?
- Why is an oxygen barrier needed?
- Why do you need a pump in the manifold?
- Why do you need a damper tape in a heated floor?
- Why are flow meters needed in heated floors?
- Why are flow meters, mixing unit and Eurocone needed?
- How to choose the power of a heated floor
- How to choose a heated floor heating mat
- How to choose a pump for water heated floors?
- How to choose a heated floor pump. Pump base
- How to turn on the heated floor for the first time?
- How to make a heated floor cheaply and economically?
- How to replace a heated floor sensor if it is bricked up?
- How to buy a reliable heated floor?
- How reliable are thermostats? Regulator repair and replacement
- How to distinguish a rod heated floor from a fake?
- How to connect a heated floor sensor?
- How to check the work of installers on a heated floor?
- How does a water heated floor system work? Principle of operation
- How to calculate the number of comb contours?
- How to calculate the number of collector circuits?
- How to calculate the number of pipes per square meter?
- How to calculate materials for a water heated floor?
- How to make a heated floor if you can’t make a screed!?
- What kind of screed should there be for a heated floor?
- What types of underfloor heating are there?
- What should the concrete and underfloor heating screed look like?!
- What color should I choose for a heated floor pipe?
- What flooring can be used for heated floors?!
- What flooring can be used for heated floors?!
- What flooring can be used for heated floors?!
- What should the temperature of the heated floor be?
- Which cable fits under the tiles and which one goes into the screed?
- Which boiler is best to use for heated floors?
- What fasteners are used in water heated floors
- Which warm floor is better to choose for tiles?!
- Which heated floor is better? Which one to choose: water or electric?
- What laying step should be taken in a warm floor: 7, 10, 12, 15 or 20 cm?
- Which underfloor heating to choose?
- Heated floor calculator
- When is it advisable to install a water heated floor?
- What are the types of underfloor heating circuits?
- Where to put the rest of the heating cable. Is it possible to cut?
- Brass or stainless steel? Which comb is better?
- The best water heated floors and their rating
- The best electric heated floors and their rating!
- Mats with bosses for water heated floors. What is this?
- Pros and cons of water heated floors
- Is it possible... heated floor? Answers!
- Is it possible to connect a radiator to a collector?
- Is it possible to repair a heated floor, heating mat and cable?
- Installation
- Do-it-yourself installation of laminate flooring on a heated floor
- Installation of a rod heated floor?
- DIY installation of electric and water heated floors
- Review of the cost of heated floors per m2, installation cost
- Base for water heated floor. Types and methods of installation.
- The main components of a water heated floor.
- Design features of Ento boilers
- What is the difference between a two-core and a single-core heating cable?
- The difference between a mechanical thermostat and a programmable one
- What is the difference between continuous film and classic strip film?
- Heating the house with underfloor heating. Is it worth it?
- Underfloor heating
- Dispatch report
- Official website of underfloor heating
- Does a rod heated floor overheat?
- Tile adhesive for heated floors, which one to use?
- Pros and cons of electric and water heated floors
- Connecting electric and water heated floors
- Underlay for water heated floor. What is it for?
- Why a heated floor mat and not a cable?
- Why does an electric heated floor not heat?
- Proper water and electric heated floors
- The correct step for laying water and electric heated floors
- Advantages of water heated floors over radiator heating.
- The advantage of a rod heated floor
- Will a warm floor warm up 5-6 cm of screed?
- Design work
- Calculation of water and electric underfloor heating
- Repair of underfloor heating heating cable
- Repair of electric and water heated floors
- What does a water heated floor system consist of?
- Water and electric underfloor heating system
- Water heated floor control system. What is a servo drive?
- How much does a heating cable consume? Its power.
- How much does underfloor heating consume?
- How much energy does film heated flooring consume?
- Can a thermostat save electricity?
- Information
- Felix Excel standard film and its design
- Is it worth saving on a thermostat?
- Laying scheme for heated floors
- Cross-linked polyethylene for heated floors. Which pipes to choose?
- Cross-linked polyethylene or metal-plastic? Which pipe to choose?
- Infrared heat from Felix Excel infrared floor heating
- Thermal insulation under tiles for heated floors
- Warm floors in a hypermarket
- Warm floor 27 ua or 24 to 7, duration of operation?
- Warm floor without screed
- Warm floors in baths and saunas, how to implement them?
- Warm floors in the bathroom and toilet. How to implement?
- Warm floor in the bathroom, electric and water
- Warm floor screed water and electric
- Warm floor in a private house
- Warm floor and its temperature epicenter
- Warm floor made of metal-plastic pipes
- Warm floor on the balcony and loggia. How to implement it?
- Warm floor in the kitchen. Where can I post it?
- Warm floor from a stove or fireplace, how to make it?
- Warm floor from Rozetka
- Warm floor from central heating or boiler
- Warm floor under wooden floor
- Warm floor under carpet
- Warm floor under laminate
- Warm floor under linoleum
- Warm floor under linoleum on a wooden floor
- Warm floor under tiles
- Do-it-yourself warm floor
- Warm floor, price for 2021. Overview of prices of heated floors
- Thermostat for water heated floors. Which to choose?
- Types of underfloor heating insulation. Fluoroplastic, Teflon, elastomers
- Pipe for warm floor 16 diameter
- Underfloor heating pipe 14, 16, 17, 18, 20 diameters, which one to choose?
- How to install heated floors? How to do it right
- Heated floor control. What types of systems are there?!
- Installation of water and electric underfloor heating
- Insulation and underlays for heated floors
- How is a comb different from a collector?
- How to fix the heated floor pipe?
- How and how to secure the underfloor heating cable
- What is the difference between a heating mat and a cable?
- What is better: water heated floor or electric?
- What to choose for a heated floor without screed?
- Step of laying heated floors, electric and water?! Calculation
- Electric underfloor heating pros and cons
- Consultation
- Test article
- Shipping and payment
- Cooperation heated floor wholesale
- Documentation
- Water heated floor in a multi-storey building and in an apartment. Connection
- How to measure the area for underfloor heating yourself?
- Is it possible to shorten the heating cable or underfloor heating mat?
- Connect with us
Show more
The most common brands of heating cables and their characteristics
The Russian market includes both domestic and imported manufacturers of electrical cables for heated floors under screed.
| Brand | Section length, m | Power, W/m | Maximum operating temperature, оС | Service life, years |
| Single core cable | ||||
| National comfort, NK-250 | 17 | 15 | 90 | 15 |
| Teplolux | 10 | 14 | 90 | 25 |
| Neoclima | 5 | 15,2 | 100 | 35 |
| Twin cable | ||||
| Ceilhit | 8,1 | 18 | 100 | 25 |
| Teplolux Elite | 15 | 27 | 90 | 30 |
| Raychem T2 | 14 | 20 | 100 | 35 |
| Self-regulating cable | ||||
| Optiheat 15/30 | 15 | 30 | 100 | 40 |
| Devi-pipeguard 25 | 25 | 30 | 85 | 30 |
| Heating mat | ||||
| NeoClima | 0.65 m2 | 105 | 80 | 25 |
| Electrolux EEFM | 2 m2 | 150 | 80 | 35 |
| National comfort | 0.5 m2 | 130 | 90 | 25 |
Pros and cons of cable heating
Cable heating systems have become a real salvation for owners of private houses and cottages. If previously such a solution was available only for large industrial facilities, in recent years the market has been replenished with a variety of offers, and the range of manufacturers has expanded significantly.
Moreover, there are quite a lot of options for using heating systems. The most popular among them are water pipes, sewer pipes, drainage systems, roofs of houses, steps, small areas for various purposes, etc.
Image gallery
Photo from
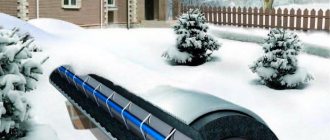
External heating of water pipe
Cable roof heating
Heating of the drainage system
Heating the garage area
This type of heating prevents the formation of ice, which can cause a breakdown of the water supply network and result in large expenses.
In addition, the heating cable also has the following advantages:
- affordable price;
- a wide range from various manufacturers, including kits for installation in hazardous areas;
- high efficiency of systems;
- low power consumption;
- ease of operation;
- availability of ready-made kits with instructions for independent connection;
- long service life.
As for the disadvantages, the biggest one of the heating cable is its volatility. After all, for the heating system to operate, it requires a constant power supply.
Users also note that without skills, self-installation can cause some difficulties. And the issue of cost is not entirely clear - products from famous manufacturers are not cheap at all.
True, experts advise not to skimp on high-quality cable, because it is installed for more than a dozen years. For example, the service life of Raychem cable systems is 50 years.
The photo shows a ready-made kit for installation inside the pipeline. All the disadvantages of such a cable, except for its volatility, are quite insignificant, especially in comparison with the benefits brought by the use of heating cable systems
Instructions for connecting heating
In fact, figuring out how to install a heating cable with your own hands is not difficult. This element can be installed on both plastic and cast iron water pipes. First, preparatory work is carried out. In addition, you need to purchase all the necessary tools and materials.
Instructions for installing a heating cable in full screen mode
First, the heating cable is installed; the connection diagram is often indicated by the manufacturer in the documentation included with the heating element. The next stage of installation of such a system is the installation of a casing for protection. The last step is to connect the cable to the network and check its operation. In addition, you can install the heating cable inside the pipe. This will increase its effectiveness.
You need to immediately purchase all the tools and materials necessary for installation, incl.
- connecting sleeves;
- pliers;
- roulette;
- crimper;
- construction hair dryer;
- mounting knife and tape;
- wire cutters;
- heat shrink tubes.
After this, the end seal should be carried out. The free end, which will not be connected to the network, must be freed from the protective insulation and cut off with a step. After this, it is necessary to insulate its heat-shrinkable tube. Some systems are already prepared for installation.
This option is more convenient, so it is recommended for people who want to install a heating cable correctly, but do not have experience in carrying out such work.
Fastening the cable system
The simplest arrangement option is rectilinear. In this case, the cable is fixed parallel to the pipe. This mounting option is suitable for heating pipes located indoors, which will additionally be covered with a layer of insulation. In this case, only a small part of the pipe is exposed to thermal effects, but this will be enough to prevent ice from forming inside it.
Using the table, you can quickly select the pitch length for laying the cable through the pipe.
In this case, several cables are located on the pipe at once. This option is recommended if the pipe, even with the additional installation of a heat-insulating layer, will be exposed to elevated temperatures in winter. Due to this arrangement of heating elements, more uniform heating is achieved.
For fixation, use metal tape. When installed in a straight line, it is fixed with tape along its entire length. When laying the heating element using the winding method, the pipe is wrapped around the pipe in increments of at least 30 cm for fixation.
Often a self-regulating heating cable is installed in a wound manner. In this case, the conductor is wrapped around the pipe at a pitch of 20-50 cm. This method provides good heating of the pipe, but leads to an increase in the consumption of the element.
Attaching the protective cover
After the self-regulating cable is installed, you can begin to form the insulating layer. It is necessary not only to prevent heat loss, but also to protect the heater from mechanical damage.
If the instructions supplied with the heating system indicate the need to install one or another insulation, you need to follow it.
If there are no manufacturer's recommendations, you can use rolled insulation rubber, mineral wool or foam rubber. The entire pipe is wrapped with the selected insulation. The material can be secured with tape or twine. Additionally, it is advisable to treat the insulation with mastic or other waterproofing compound.
Connection to the mains supply
Connecting the cable to the network is carried out with special elements that must be purchased in advance. Circuit with RCD Circuit with RCD 2
First, the free end of the heater must be freed from insulation. The insulating screen should be twisted into a bundle and the conductor cores should be stripped. The cores and power cable are connected. Heat shrink is fixed over the joint.
Testing and commissioning
The heater must have a separate line. After this, you need to turn on the system and wait until the element heats up. If no faults are found, then the installation was completed correctly.
Areas of use
Heating cables are used for various needs:
- in construction - for heating the concrete solution;
- in industry - for the purpose of heating tanks with diesel fuel and chemical liquids;
- in everyday life - to prevent icing of roofs, stairs, paths.
It is possible to install it inside greenhouses - this way you can maintain a constant positive soil temperature. Pipelines are also often wrapped with heating wires, especially those parts that run outdoors - a little heating reduces heat loss.
In addition to cables, it is recommended to use insulation using mineral wool and other materials. In this case, the heating efficiency will be much higher. And the cost of paying for electricity is lower.
How to shorten the cable?
The question of how to shorten a heating cable may arise when the wrong footage has been calculated and there is nowhere to put the excess (you must remember the minimum permissible distance between turns is 5 cm). The wire is sold in coils that have several sections. Couplings are installed at the ends of the cable in the section. A certain resistance is created within each section. If you cut the wire yourself, the balance will be upset: the resistance will decrease, the current will increase.
Heating cable information diagram
As a result of this, the cable will simply burn out, so you should use up the entire footage for coverage. But if such a need arises, then it is better to entrust the pruning to a professional. It will determine how much resistance is lost and install a current-limiting resistor to compensate. [ads-pc-2][ads-mob-2]
Results: how to choose the right one
To ensure efficient and economical heating of an object, you need to take into account its dimensions, the conditions under which the cable will operate, the power of the wire, and the operating temperature. The quality of the insulation should also be taken into account. For outdoor installation, be sure to use a cord with durable braiding. And in order to prevent interference with electrical appliances near residential premises, the cable must be equipped with a screen, which will also allow the system to be grounded.
All heating wires sold in the country must undergo mandatory certification.
Self-regulating pipe heating: installation methods
Heating of a pipeline from the outside with a cable is carried out as follows: the cable is fixed at the bottom of the pipe or wrapped around the pipe in a spiral manner. To secure the cable, use aluminum tape and wrap it around the entire heated section of the pipe.
To increase the efficiency of the heating cable, it should be used in combination with waterproof insulation (for example, polyethylene foam).
The second method - insulation from the inside - is suitable in cases where access to the water supply is difficult. Before inserting the heating element into the pipe, it is necessary to install a saddle. After installing it, screw in the pipe insert and insert the cable into the pipeline through it as required by the instructions.
An important limitation: insulation from the inside can only be used if the diameter of the pipes exceeds 20 mm. For thinner pipes, use external insulation method
Installation and maintenance tips
To ensure that the operation of the heating system does not cause trouble, it is advisable to perform all the steps recommended by the manufacturer during installation. It’s good not to forget about stickers - place/stick notices about heating on the heated area.
In the future, especially if repairs are necessary, such forethought will come in handy. It is also worth carrying out regular inspections of the pipeline, and if problems are found with the heating cable or it is damaged, repairs should be carried out correctly.
Why remove the damaged piece and instead attach a new, undamaged piece in this area. There is no point in repairing the damaged area - replacement is the right solution.
If you are not an electrician at all, then it is easier to buy a ready-made kit for internal/external heating. With such a system, all you have to do is read the instructions carefully and follow what is written exactly
Experienced installers advise using metal tape to remove rough areas of the pipe where the heating cable is to be installed.
Another useful tip concerns saving: you should not save by buying a cheap Chinese counterfeit cable - removing pipes from the ground and changing the heating system on frosty days will cost several times more than buying a high-quality system from a trusted manufacturer.
It is better to immediately buy a reliable cable and other components with a long-term warranty from a reputable manufacturer; in addition, it is advisable to consider one of the alternative options for heating pipes as a backup addition.
Installing the Thermostat
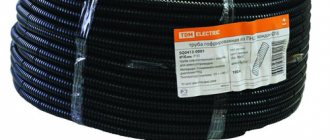
To save energy and more efficient operation of the heated floor, you should use a thermostat. It must be installed before laying the heating elements. It is mounted in a convenient place, at least 30 cm away from the floor. You need to make a niche in the wall to install the box and draw a groove to the base of the floor, in which the corrugation or pipe is placed. The corrugation should pass another 0.5–1 m along the base of the floor; connecting wires from the heating elements are placed in it.
A good place to mount the thermostat
The ends of the cable must be led to the thermostat in such a way that the couplings remain in the screed.
TOP 5 best manufacturers of warm cable
Leading manufacturers of heating cables are:
- The Swedish company Thermo Industri AB produces cables for heating domestic and main pipelines. Automatic equipment is used to manufacture systems, which improves product quality and reduces product costs. The manufacturer offers thermal regulators and additional devices that ensure reliable operation of pipe heaters.
- Eltrace products are produced by a company with French roots. The company specializes in the production of heating elements with automatic temperature control. The Tubes-heat product series is offered for domestic use. The Traceco range is suitable for installation on industrial pipelines. But the products can also be used in the private sector.
- Thermon products are manufactured by an American company. The equipment is characterized by ease of installation and reduced energy consumption. The company offers products with self-temperature regulation.
- The Danish company Devi offers resistance-type heaters, as well as self-regulating equipment. The company has been specializing in the production of heating elements for over 50 years. The products are of high quality and ease of installation.
- The Russian manufacturer Teplolux (SST) produces heating elements for pipes and floors. The products are distinguished by a reduced price and high quality manufacturing.
If non-standard pipe routing is used on the site. Then the owner will need to create a heating circuit himself or contact a company. When arranging an electric heating circuit, you should remember safety and provide for the installation of protective elements that eliminate the risk of electric shock.
Heating cable review and test, don't miss the video:
How to connect a heating cable to the network:
Helpful2Not Helpful
Is it possible to use a self-regulating cable for heated floors?
The main function of a self-regulating heating cable is to reduce the supply of electricity when the required heating degree is reached, without affecting the quality and uniformity of surface heating. This feature allows the model to be successfully used in the construction of heated floors in any room, from living rooms to bathrooms and toilets.
In addition, if you have heated floors with a self-regulating cable, you can rearrange the furniture in the apartment, since it has the ability to regulate the heating level, unlike resistive cables. That is, it is permissible to reduce heating under heavy furniture. It is impossible to change the heat supply of a resistive wire; overheating of the surface may occur, which will lead to failure of the system.
It is worth noting the simplicity of constructing a self-regulating floor, since this electrical cord can be cut anywhere and the end sealed with your own hands. At the same time, all connections, if installed correctly, can last for more than one year.
Naturally, like any self-regulating electric floor, it must be connected to power while observing all standard protection methods. That is, the system must have a circuit breaker and an RCD, the current leakage of which is no more than 30 mA. The Samreg cable must have a screen and a power of 30 - 40 W. At the same time, the laying step of the heating element is 15 - 20 cm.
Previously, the use of this function was not possible due to the small size of the film. Today, infrared film with 30% self-regulating ability is produced in Korea.